QW1 TechTools, QW1 Datasheet - Page 196
Specifications of QW1
Contents
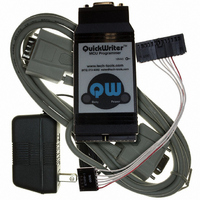
MCU Programmer with In-Circuit Serial Programming Cable and Optional GANG Adapters
For Use With/related Products
PIC Micro® MCU
For Use With
CBL-ICSP - CABLE PROG QUICKWRITER SERIALQW-4SSOP18 - ADAPTER QUICKWRITER 4GANG 18SSOPQW-4SSOP28 - ADAPTER QUICKWRITER 4GANG 28SSOPQW-4SO8/14W - ADAPT QUICKWRTR 4GANG 8/14SOIC WQW-4SO8/14N - ADAPT QUICKWRTR 4GANG 8/14SOIC NQW-4SOIC18 - ADAPTER QUICKWRITER 4GANG 18SOICQW-4ZIF18 - ADAPTER QUICKWRITER 4-GANG 18ZIFQW-4SOIC28 - ADAPTER QUICKWRITER 4GANG 28SOICQW-4PLCC44 - ADAPTER QUICKWRITER 4GANG 44PLCCQW-4ZIF40/28 - ADAPT QUICKWRITER 4GANG 40/28ZIFMP-ZIF14 - ADAPTER QUICKWRITER 14-PIN ZIFMP-SOIC8/14 - ADAPTER QUICKWRITER 8/14-SOICMP-SSOP18 - ADAPTER QUICKWRITER 18-SSOPMP-SSOP28 - ADAPTER QUICKWRITER 28-SSOPMP-14000 - ADAPTR QUICKWRTR PIC14000 28-PINMP-SOIC18 - ADAPTER QUICKWRITER 18-SOICMP-SOIC28 - ADAPTER QUICKWRITER 28-SOICMP-PLCC44 - ADAPTER QUICKWRITER 44-PIN PLCCMP-ZIF18/28 - ADAPTER QUICKWRITER 18/28PIN ZIFMP-ZIF40 - ADAPTER QUICKWRITER 40-PIN ZIF
Available stocks
Company
Part Number
Manufacturer
Quantity
Price
Company:

Part Number:
QW152
Manufacturer:
Laird Technologies IAS
Quantity:
135


4.3.2
190
:Loop djnz
Table.tpr
PIC Project #2: "Table.tpr"
PicTools Manual 3.0
The first step is to assemble the source code into hex code. To assemble the program,
click the Build button on the menu bar or select the build option from the Run menu.
If the assembler finds any errors, it will give the line number and description of each error.
Before continuing, you’ll need to correct any errors and reassemble the program (of
course, this should not occur, unless you typed the program yourself and perhaps made a
typo).
If the program assembles correctly, the assembler will produce a hex file, called
SIMPLE.OBJ, in the Apps sub-directory.
After running your program satisfactorily, you are ready to program your PIC with the HEX
file :
Once you have successfully programmed the PIC, you're ready to try it in your circuit.
Make sure the power to your circuit is off, and then plug in the PIC.
When you turn the power on, the LED should be flashing. If you push the button, the LED
should blink more quickly.
If your project appears "dead", double-check the circuit (power, RC oscillator,
connections, etc).
Like the first project, this project gives you a simple introduction to the PIC. But, it also
demonstrates the useful topics of how to debounce push button inputs and how to make
a lookup table.
The schematic below shows the circuit. Whenever the button is pressed, the value shown
on the 7-segment display increments.
SIMPLE.OBJ.
Count0,:Loop ;Decrement Count0 until it reaches zero
djnz
jmp
Count1,:Loop ;Decrement Count1.
Start:Loop
;(button is low when pressed)
;jump back to :Loop
;Jump back to first loop
If it’s not zero,
© 2007 TechTools
Related parts for QW1
Image
Part Number
Description
Manufacturer
Datasheet
Request
R

Part Number:
Description:
ADAPT QUICKWRTR 4GANG 8/14SOIC N
Manufacturer:
TechTools
Datasheet:

Part Number:
Description:
ADAPT QUICKWRTR 4GANG 8/14SOIC W
Manufacturer:
TechTools
Datasheet:


Part Number:
Description:
ADAPTER QUICKWRITER 4GANG 18SOIC
Manufacturer:
TechTools
Datasheet:

Part Number:
Description:
ADAPTER QUICKWRITER 4GANG 44PLCC
Manufacturer:
TechTools
Datasheet:

Part Number:
Description:
ADAPTER QUICKWRITER 4GANG 28SOIC
Manufacturer:
TechTools
Datasheet:


