ATMEGA256RZBV-8CU Atmel, ATMEGA256RZBV-8CU Datasheet - Page 7
ATMEGA256RZBV-8CU
Manufacturer Part Number
ATMEGA256RZBV-8CU
Description
BUNDLE ATMEGA2560V/AT86RF230-ZU
Manufacturer
Atmel
Series
ATMEGAr
Datasheet
1.ATMEGA64RZAPV-10MU.pdf
(21 pages)
Specifications of ATMEGA256RZBV-8CU
Frequency
2.4GHz
Modulation Or Protocol
802.15.4 Zigbee
Applications
ISM, ZigBee™
Power - Output
3dBm
Sensitivity
-101dBm
Voltage - Supply
1.8 V ~ 3.6 V
Current - Receiving
15.5mA
Current - Transmitting
16.5mA
Data Interface
PCB, Surface Mount
Memory Size
256kB Flash, 4kB EEPROM, 8kB RAM
Antenna Connector
PCB, Surface Mount
Package / Case
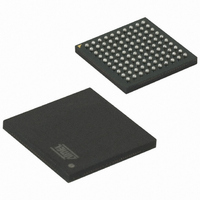
100-TFBGA
Wireless Frequency
2.4 GHz
Interface Type
SPI, USART
Output Power
3 dBm
For Use With
ATAVRISP2 - PROGRAMMER AVR IN SYSTEMATJTAGICE2 - AVR ON-CHIP D-BUG SYSTEM
Lead Free Status / RoHS Status
Lead free / RoHS Compliant
Operating Temperature
-
Data Rate - Maximum
-
Lead Free Status / Rohs Status
Lead free / RoHS Compliant
For Use With/related Products
ATmega256


4 Hardware Assembly
8051A-AVR-11/06
The following steps walk the reader through how to assemble and prepare the
STK500 board and the STK501 top module to be used with the RZ502. Then finally
how to mount the RZ502 board and configure it to run the evaluation application.
NOTE: The following steps must be completed successfully to ensure correct
operation of the hardware.
Step A. Assemble and configure the STK500 board
The jumpers and operating voltage of the STK500 board must be set up correct in
advance of mounting the STK501 and radio board.
1. Carefully remove any AVRs from the target sockets on the STK500.
2. Place jumpers on the following headers as shown in Figure 4-1:
3. Connect a serial cable to the connector marked RS232CTRL on the STK500 to a
4. Apply power to the STK500 by moving the power switch toward the edge of the
5. Start AVR Studio and press “Cancel” in the Welcome dialog window.
6. From the Tools menu, select “Program AVR” and “Connect…”.
7. Select “STK500 or AVRISP” as platform and then press “Connect…”. Verify that a
8. Open the Board tab. Adjust the VTarget voltage and ARef voltage to 3 Volts. Press
•
•
•
•
COM port on the PC.
board.
window named “STK500” appears.
the Write Voltages button. Close the STK500 window.
VTARGET
AREF
RESET
BSEL2
AVR414
7
Related parts for ATMEGA256RZBV-8CU
Image
Part Number
Description
Manufacturer
Datasheet
Request
R

Part Number:
Description:
DEV KIT FOR AVR/AVR32
Manufacturer:
Atmel
Datasheet:

Part Number:
Description:
INTERVAL AND WIPE/WASH WIPER CONTROL IC WITH DELAY
Manufacturer:
ATMEL Corporation
Datasheet:
Part Number:
Description:
Low-Voltage Voice-Switched IC for Hands-Free Operation
Manufacturer:
ATMEL Corporation
Datasheet:
Part Number:
Description:
MONOLITHIC INTEGRATED FEATUREPHONE CIRCUIT
Manufacturer:
ATMEL Corporation
Datasheet:
Part Number:
Description:
AM-FM Receiver IC U4255BM-M
Manufacturer:
ATMEL Corporation
Datasheet:
Part Number:
Description:
Monolithic Integrated Feature Phone Circuit
Manufacturer:
ATMEL Corporation
Datasheet:
Part Number:
Description:
Multistandard Video-IF and Quasi Parallel Sound Processing
Manufacturer:
ATMEL Corporation
Datasheet:
Part Number:
Description:
High-performance EE PLD
Manufacturer:
ATMEL Corporation
Datasheet:
Part Number:
Description:
8-bit Flash Microcontroller
Manufacturer:
ATMEL Corporation
Datasheet:
Part Number:
Description:
2-Wire Serial EEPROM
Manufacturer:
ATMEL Corporation
Datasheet: