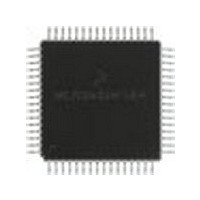
MC68HC711E9FU Freescale Semiconductor, MC68HC711E9FU Datasheet - Page 234

MC68HC711E9FU
Manufacturer Part Number
MC68HC711E9FU
Description
Manufacturer
Freescale Semiconductor
Datasheet
1.MC68HC711E9FU.pdf
(242 pages)
Specifications of MC68HC711E9FU
Cpu Family
HC11
Device Core Size
8b
Frequency (max)
4MHz
Interface Type
SCI/SPI
Program Memory Type
EPROM
Program Memory Size
12KB
Total Internal Ram Size
512Byte
# I/os (max)
38
Number Of Timers - General Purpose
8
Operating Supply Voltage (typ)
3.3/5V
Operating Supply Voltage (max)
5.5V
Operating Supply Voltage (min)
3V
On-chip Adc
8-chx8-bit
Instruction Set Architecture
CISC
Operating Temp Range
0C to 70C
Operating Temperature Classification
Commercial
Mounting
Surface Mount
Pin Count
64
Package Type
PQFP
Lead Free Status / Rohs Status
Not Compliant
Available stocks
Company
Part Number
Manufacturer
Quantity
Price
- Current page: 234 of 242
- Download datasheet (2Mb)
To Execute the Program
To Execute the Program
Once you have obtained PCbug11, use this step-by-step procedure.
Step 1
Step 2
Apply power to the programmer board by moving the +5-volt switch to the ON position.
From a DOS command line prompt, start PCbug11 this way:
PCbug11only supports COM ports 1 and 2.
Step 3
PCbug11 defaults to base ten for its input parameters.
Change this to hexadecimal by typing: CONTROL BASE HEX
Step 4
Clear the block protect register (BPROT) to allow programming of the MC68HC811E2 EEPROM.
At the PCbug11 command prompt, type: MS 1035 00
Step 5
PCbug11 defaults to a 512-byte EEPROM array located at $B600. This must be changed since the
EEPROM is, by default, located at $F800 on the MC68HC811E2.
At the PCbug11 command prompt, type: EEPROM 0
Then type: EEPROM F800 FFFF
Then type:
This assumes you have not relocated the EEPROM by previously reprogramming the upper 4 bits of the
CONFIG register. But if you have done this and your S records reside in an address range other than
$F800 to $FFFF, you will need to first relocate the EEPROM.
234
•
•
•
•
•
•
•
Enabling the Security Feature on M68HC811E2 Devices with PCbug11 on the M68HC711E9PGMR, Rev. 0.1
Before applying power to the programming board, connect the M68HC711E9PGMR serial port P2
to one of your PC COM ports with a standard 25 pin RS-232 cable. Do not use a null modem cable
or adapter which swaps the transmit and receive signals between the connectors at each end of
the cable.
Place your MC68HC811E2 part in the PLCC socket on your board.
Insert the part upside down with the notched corner pointing toward the red power LED.
Make sure both S1 and S2 switches are turned off.
Apply +5 volts to +5 volts and ground to GND on the programmer board’s power connector, P1.
Applying voltage to the V
C:\PCBUG11\> PCBUG11 –A PORT = 1 when the E9PGMR connected to COM1 or
C:\PCBUG11\> PCBUG11 –A PORT = 2 when the E9PGMR connected to COM2
EEPROM 103F 103F
PP
pin is not necessary.
Freescale Semiconductor
Related parts for MC68HC711E9FU
Image
Part Number
Description
Manufacturer
Datasheet
Request
R

Part Number:
Description:
APPENDIX A ELECTRICAL CHARACTERISTICS
Manufacturer:
FREESCALE [Freescale Semiconductor, Inc]
Datasheet:
Part Number:
Description:
Manufacturer:
Freescale Semiconductor, Inc
Datasheet:
Part Number:
Description:
Manufacturer:
Freescale Semiconductor, Inc
Datasheet:
Part Number:
Description:
Manufacturer:
Freescale Semiconductor, Inc
Datasheet:
Part Number:
Description:
Manufacturer:
Freescale Semiconductor, Inc
Datasheet:
Part Number:
Description:
Manufacturer:
Freescale Semiconductor, Inc
Datasheet:
Part Number:
Description:
Manufacturer:
Freescale Semiconductor, Inc
Datasheet:
Part Number:
Description:
Manufacturer:
Freescale Semiconductor, Inc
Datasheet:
Part Number:
Description:
Manufacturer:
Freescale Semiconductor, Inc
Datasheet:
Part Number:
Description:
Manufacturer:
Freescale Semiconductor, Inc
Datasheet:
Part Number:
Description:
Manufacturer:
Freescale Semiconductor, Inc
Datasheet:
Part Number:
Description:
Manufacturer:
Freescale Semiconductor, Inc
Datasheet:
Part Number:
Description:
Manufacturer:
Freescale Semiconductor, Inc
Datasheet:
Part Number:
Description:
Manufacturer:
Freescale Semiconductor, Inc
Datasheet:
Part Number:
Description:
Manufacturer:
Freescale Semiconductor, Inc
Datasheet:


