XLT06SOT Microchip Technology, XLT06SOT Datasheet - Page 21
XLT06SOT
Manufacturer Part Number
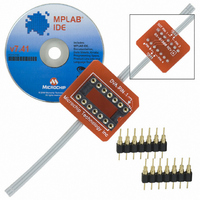
XLT06SOT
Description
SOCKET TRAN ICE 6SOT W/CABLE
Manufacturer
Microchip Technology
Datasheet
1.XLT06SOT.pdf
(42 pages)
Specifications of XLT06SOT
Module/board Type
*
Product
Microcontroller Accessories
Lead Free Status / RoHS Status
Lead free / RoHS Compliant
For Use With/related Products
MPLAB™ICE
For Use With
AC162070 - HEADER INTRFC MPLAB ICD2 8/14PAC162059 - HEADER INTRFC MPLAB ICD2 8/14PIN
Lead Free Status / RoHS Status
Lead free / RoHS Compliant, Lead free / RoHS Compliant


RECOMMENDED INSTALLATION OF
TRANSITION SOCKETS WITH
CABLES
For transition sockets that use a cable, follow these
instructions for installing your transition socket on the
target board.
PCB Layout Considerations:
Make sure you leave enough room on the PCB to
accommodate the cable, i.e., space your target pads
for each device far enough apart so that the cable from
one pad group will not interfere with another pad group.
6-Pin SOT Solder Instructions:
1.
2.
3.
4.
8-Pin DFN Solder Instructions:
1.
2.
3.
4.
8-Pin DFN Assembly Instructions:
1.
2.
3.
4.
16-Pin QFN Solder Instructions:
1.
2.
2010 Microchip Technology Inc.
Remove protective cable covering from end of
cable.
Position cables on target board (see below).
Tape down to prevent movement.
Solder each lead to target pad.
Remove tape and clean.
Prepare leads by trimming narrowest portion to
0.10-inch maximum in length (see below).
Position cables on target board (see below).
Tape down to prevent movement.
Solder each lead to target pad.
Remove tape and clean.
Start with cable associated with pin 1.
Fold cable up and over, forming a radius.
Mate with the header on the side of the transition
socket assembly, making sure pin 1 mates with
the pin labeled “DFN Pin 1”.
Fold over and mate the other cable.
Remove protective cable jacket from stripped
end of cable.
Lay out the four cables in a “+” pattern (see
below).
trim leads
pin 1
pin 1
Transition Socket Specification
3.
4.
5.
16-Pin QFN Assembly Instructions:
1.
2.
3.
4.
28/44-Pin QFN Solder Instructions:
1.
2.
3.
4.
5.
28/44-Pin QFN Assembly Instructions:
1.
2.
3.
4.
Center each cable on the footprint (see below).
Tape down each cable to prevent movement.
Solder each lead to target pad.
Remove tape and clean
Start with cable associated with pin 1.
Fold cable up and over, forming a radius.
Header pins will now be facing upwards.
Mate with the socket on the underside of the
transition socket assembly, making sure pin 1
mates with the pin labeled “QFN Pin 1”.
Fold over and mate the other cables.
Remove protective cable jacket from stripped
end of cable.
Lay out with long cables opposing each other
and short cables opposing each other (see
below).
Place center lead (6th lead for 44-pin, 4th lead
for 28-pin) on center target pad to center each
cable on the footprint (see below). Tape down
each cable to prevent movement.
Solder each lead to target pad.
Remove tape and clean
Start with cable associated with pin 1.
Fold cable up and over, forming a radius.
Header pins will now be facing upwards.
Mate with the socket on the underside of the
transition socket assembly, making sure pin 1
mates with the pin labeled “QFN Pin 1”.
Fold over and mate the other cables.
pin 1
pin 1
short
short
use center lead
to center cable
on target footprint
center cable
on target footprint
header pins
facing down
header pins
facing down
DS51194S-page 21
Related parts for XLT06SOT
Image
Part Number
Description
Manufacturer
Datasheet
Request
R

Part Number:
Description:
Manufacturer:
Microchip Technology Inc.
Datasheet:
Part Number:
Description:
Manufacturer:
Microchip Technology Inc.
Datasheet:
Part Number:
Description:
Manufacturer:
Microchip Technology Inc.
Datasheet:
Part Number:
Description:
Manufacturer:
Microchip Technology Inc.
Datasheet:
Part Number:
Description:
Manufacturer:
Microchip Technology Inc.
Datasheet:
Part Number:
Description:
Manufacturer:
Microchip Technology Inc.
Datasheet:
Part Number:
Description:
Manufacturer:
Microchip Technology Inc.
Datasheet:
Part Number:
Description:
Manufacturer:
Microchip Technology Inc.
Datasheet: