DM320001 Microchip Technology, DM320001 Datasheet - Page 35
DM320001
Manufacturer Part Number
DM320001
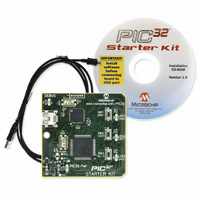
Description
KIT EVAL PIC32 STARTER
Manufacturer
Microchip Technology
Series
PIC®r
Type
MCUr
Specifications of DM320001
Contents
Board, USB mini-b cable and software
Processor To Be Evaluated
PIC 32
Data Bus Width
32 bit
Interface Type
USB
Silicon Manufacturer
Microchip
Core Architecture
PIC
Core Sub-architecture
PIC32
Silicon Core Number
PIC32MX
Kit Contents
Demo Board, USB Cable, And PIC32 Starter Kit Installation CD-ROM
Rohs Compliant
Yes
Lead Free Status / RoHS Status
Lead free / RoHS Compliant
For Use With/related Products
PIC32
For Use With
876-1000 - PIC32 BREAKOUT BOARDAC164127-5 - BOARD GRAPH LCD CNTLR PICTAILAC164127-3 - BOARD DAUGHTER GRAPHIC PICTAIL
Lead Free Status / Rohs Status
Lead free / RoHS Compliant


5.10
© 2008 Microchip Technology Inc.
Step-by-Step Procedures to Setup, Build, and Run a Demo Project
ATTACHING THE DEBUGGER
In order to test the code using the PIC32 Starter Kit, please refer to the PIC32MX
Starter Kit User’s Guide (DS61144 ) for a sample project and a step-by-step getting
started info.
For the purpose of testing our code in this document we will use an Explorer 16
Development board (DM240001), a MPLAB REAL ICE In-Circuit Debugger
(DV244005) and a PIC32MX360F512L PIM (MA320001) together with a 9V universal
power supply, a serial cable and a USB cable for connecting the REAL ICE to the
development board.
FIGURE 5-11:
Take the following steps to ensure proper connection of the REAL ICE to the Explorer
16 development board:
1. Connect the MPLAB REAL ICE module to the PC with the USB cable.
2. Connect the MPLAB REAL ICE to the Explorer 16 Development Board with the
3. Apply power to the Explorer 16 board.
4. From the Debugger menu, click Select Tool > MPLAB REAL ICE to set the
5. From the Debugger menu, select Connect to connect the debugger to the device.
Once you have performed these steps, go to the MPLAB IDE window and from the
Debugger->Select Tool menu select the debugging tool you’re using to connect to the
board (i.e., MPLAB REAL ICE should be within the available choices).
Once you have selected the tool, the “Debug Toolbar” should be present just below the
main menu bar, together with other toolbars that may be selected.
Note:
Note:
short RJ-11 cable.
MPLAB REAL ICE as the debug tool in MPLAB IDE.
MPLAB IDE should report in the Output window that it found the
PIC32MX360F512L device.
MPLAB IDE may need to download new firmware if this is the first time the
MPLAB REAL ICE is being used with a PIC32 device. Allow it to do so.
Be sure to select Debug from the MPLAB IDE Build Configuration drop
down list.
EXPLORER 16, MPLAB
PIC32MX360F512L PIM
®
REAL ICE™ AND
DS61146B-page 31
Related parts for DM320001
Image
Part Number
Description
Manufacturer
Datasheet
Request
R

Part Number:
Description:
Manufacturer:
Microchip Technology Inc.
Datasheet:
Part Number:
Description:
Manufacturer:
Microchip Technology Inc.
Datasheet:
Part Number:
Description:
Manufacturer:
Microchip Technology Inc.
Datasheet:
Part Number:
Description:
Manufacturer:
Microchip Technology Inc.
Datasheet:
Part Number:
Description:
Manufacturer:
Microchip Technology Inc.
Datasheet:
Part Number:
Description:
Manufacturer:
Microchip Technology Inc.
Datasheet:
Part Number:
Description:
Manufacturer:
Microchip Technology Inc.
Datasheet:
Part Number:
Description:
Manufacturer:
Microchip Technology Inc.
Datasheet: