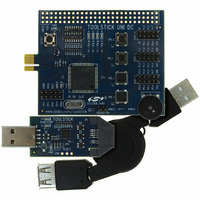
TOOLSTICKUNISK Silicon Laboratories Inc, TOOLSTICKUNISK Datasheet - Page 13

TOOLSTICKUNISK
Manufacturer Part Number
TOOLSTICKUNISK
Description
KIT UNIVERSITY TOOLSTICK STARTER
Manufacturer
Silicon Laboratories Inc
Series
ToolStickr
Type
MCUr
Datasheet
1.TOOLSTICKUNIDC.pdf
(16 pages)
Specifications of TOOLSTICKUNISK
Contents
ToolStick base adapter, daughter card and 3' USB cable
Interface Type
USB
Operating Supply Voltage
2.7 V to 3.6 V
Lead Free Status / RoHS Status
Contains lead / RoHS non-compliant
For Use With/related Products
-
Lead Free Status / Rohs Status
Lead free / RoHS Compliant
Other names
336-1433
Available stocks
Company
Part Number
Manufacturer
Quantity
Price
Company:
Part Number:
TOOLSTICKUNISK
Manufacturer:
Silicon Labs
Quantity:
135
6.7. Single-Stepping Through Firmware
The IDE supports the ability to single-step through firmware one assembly instruction at a time. The IDE reads the
Flash from the device, converts the instructions to assembly and displays them in a disassembly window. The
following steps show how to open the disassembly window and single step through firmware.
1. If there is not a breakpoint already set on the line of code that increments the Button_Press_Count variable,
2. Start the processor using the Go button, and press the button labeled P5.0 on the daughter card to stop
3. Select View → Debug Windows → Disassembly, or click the Disassembly Window button on the toolbar.
4. To execute one assembly instruction at a time, click the Step button on the toolbar or select the Debug → Step
The disassembly window has three columns. The left column is the address of the instruction in Flash. The middle
column is the instruction in hex. The right column is the disassembled instruction. The disassembly debug window
and the capability to single-step through firmware allow a developer to see exactly what instructions are executed
and their output.
set the breakpoint using the steps described in Section 6.6.
execution on the breakpoint.
The disassembly window shown in Figure 16 will appear on the right-hand side of the IDE (if it is not already
open).
menu option. The highlighted line in the disassembly window indicates the next instruction to be executed. The
blue line marker in the editor window will stay on the same C source line until all of the assembly instructions
are completed.
Figure 16. Disassembly Window
Rev. 0.1
ToolStickUniDC
13


