EN3C3MX Switchcraft Inc., EN3C3MX Datasheet - Page 4
EN3C3MX
Manufacturer Part Number
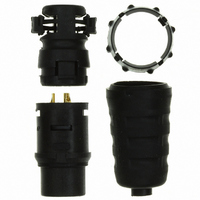
EN3C3MX
Description
CONN PLUG 3POS MALE CORD #20
Manufacturer
Switchcraft Inc.
Series
EN3™r
Type
Cable Plugr
Specifications of EN3C3MX
Rohs Information
Switchcraft RoHS Info.
Connector Type
Plug, Male Pins
Number Of Positions
3
Mounting Type
Free Hanging (In-Line)
Termination
Solder Cup
Fastening Type
Threaded
Orientation
Keyed
Ingress Protection
IP67/68 - Dust Tight, Waterproof
Shell Material, Finish
Thermoplastic Polymer, Glass Fiber
Features
Cable Clamp
Product Type
Connectors
Contact Style
Pin (Male)
Shell Style
Plug
Number Of Positions / Contacts
3
Mounting Style
Free Hanging
Termination Style
Solder Cup
Contact Plating
Gold
Current Rating
3 A
Voltage Rating
600 V
Angle
Straight
Application
Commercial
Brand/series
EN3 Series
Current, Rating
7.5 A
Flammability Rating
UL94-V0
Housing Type
Plastic
Ip Rating
IP 66/68
Material, Housing
Thermoplastic Rubber
Number Of Contacts
3
Primary Type
Sealed
Voltage, Rating
600 V
Wire, Awg
20
Connector Body Material
Thermoplastic
Gender
Plug
Contact Gender
Pin
Connector Mounting
Cable
No. Of Contacts
3
Contact Termination
Solder
Lead Free Status / RoHS Status
Lead free / RoHS Compliant
Shell Size - Insert
-
Shell Size, Military
-
Lead Free Status / Rohs Status
Lead free / RoHS Compliant
Other names
SC252


STEP 1:
PRESS THE TWO WINGS OF CABLE CLAMP INWARD, THEN THREAD NUT CLOCKWISE ONTO CABLE CLAMP
TO THE POSITION SHOWN.
EN3™ SERIES FIELD ASSEMBLY INSTRUCTIONS FOR CRIMP CONTACTS:
CORD CONNECTOR
STEP 2:
FEED THE FREE END OF CABLE THROUGH BOOT, CABLE CLAMP,
AND COUPLING RING IN THE ORDER SHOWN.
NOTE: CUT-OFF END OF BOOT FOR LARGER THAN 0.280"
STRIP CABLE END AND CONDUCTORS AS SHOWN.
CRIMP CONDUCTORS TO CONTACTS.
USE CRIMP HAND TOOL EN3CR OR PNEUMATIC CRIMP TOOL
EN3CRAUTO WITH #26 POSITIONER EN3POS26.
INSERT CONTACTS TO CONNECTOR HOUSING PER CONTACT
ARRANGEMENTS AND INSERTION INSTRUCTIONS.
STEP 3:
ALIGN TABS OF COUPLING RING WITH NOTCHES OF
CORD HOUSING AND PUSH COUPLING RING ONTO
CORD HOUSING.
STEP 4:
ALIGN CABLE CLAMP AND PUSH FORWARD UNTIL IT
SNAP-LOCKS ONTO THE REAR OF CONNECTOR HOUSING.
TURN NUT OF CABLE CLAMP COUNTERCLOCKWISE
UNTIL CABLE CLAMP TIGHTENS AGAINST CABLE.
STEP 5:
PUSH BOOT ALL THE WAY FORWARD, OVER
CABLE CLAMP, UNTIL FRONT END OF BOOT
SEALS TIGHTLY ONTO CONNECTOR HOUSING.
CABLE CLAMP
TYPICAL CONTACT INSERTION INSTRUCTIONS:
PLACE CONTACT IN GROOVE OF INSERTION HAND TOOL
EN3INS26. NOTE: TIP OF TOOL SHOULD BE UP AGAINST
THE SHOULDER OF CONTACT.
INSERT CONTACT INTO CORRECT CAVITY OF CONNECTOR
BODY BY APPLYING CONSTANT PRESSURE UNTIL
CONTACT BOTTOMS UP AGAINST LOCKING DISC.
NOTE: DO NOT TILT TOOL DURING THE INSERTION.
REPEAT ABOVE PROCEDURE TO INSERT ALL CONTACTS
PER CONTACT ARRANGEMENTS.
DIAMETER CABLES.
CONTACTS
CRIMP
NUT
COUPLING RING
CABLE CLAMP
CORD WIRING SIDE VIEW
CORD HOUSING
CONTACT
LOCKING DISC
BOOT
CABLE CLAMP WITH NUT
IN POSITION
NOTCH,
PIN #1 INDICATOR
CUT-OFF END OF BOOT HERE FOR
LARGER THAN 0.280" DIA. CABLES
CABLE
.75 19.1
.156 4.0
CONDUCTOR
INSERTION
HAND TOOL
CABLE
Related parts for EN3C3MX
Image
Part Number
Description
Manufacturer
Datasheet
Request
R

Part Number:
Description:
CONN PLUG PHONE 1/4" 2POS RED
Manufacturer:
Switchcraft Inc.
Datasheet:

Part Number:
Description:
CONN PLUG 2-COND 1/4" PHONE SLD
Manufacturer:
Switchcraft Inc.
Datasheet:

Part Number:
Description:
CONN PLUG PHONE SILENT 2-COND
Manufacturer:
Switchcraft Inc.
Datasheet:

Part Number:
Description:
THICK PANEL/GOLD PLA
Manufacturer:
Switchcraft Inc.
Datasheet:

Part Number:
Description:
CONN JACK PHONE 1/4" 2POS CLOSED
Manufacturer:
Switchcraft Inc.
Datasheet:

Part Number:
Description:
CONN PHONE JACK 2COND 1/4" OPEN
Manufacturer:
Switchcraft Inc.
Datasheet:
Part Number:
Description:
CONN JACK PHONE 1/4" 2POS W/HDWR
Manufacturer:
Switchcraft Inc.
Datasheet:

Part Number:
Description:
CONN PLUG PHONE .206" 2POS BLACK
Manufacturer:
Switchcraft Inc.
Datasheet:
Part Number:
Description:
CONN PLUG PHONE 1/4" FLAT 2POS
Manufacturer:
Switchcraft Inc.
Datasheet:

Part Number:
Description:
CONN PLUG FLAT PHONE 1/4" 3-COND
Manufacturer:
Switchcraft Inc.
Datasheet:

Part Number:
Description:
PHONE T-JACK PANEL .25" STD SGL
Manufacturer:
Switchcraft Inc.
Datasheet:

Part Number:
Description:
CONN JACK PANEL 96POS W/O JACK
Manufacturer:
Switchcraft Inc.
Datasheet:
Part Number:
Description:
CONN PLUG PHONE .206" 3POS BLACK
Manufacturer:
Switchcraft Inc.
Datasheet:

Part Number:
Description:
CONN JACK 1/4" 3-COND IN-LINE
Manufacturer:
Switchcraft Inc.
Datasheet:

Part Number:
Description:
CONN PLUG AUDIO PHONE 3COND BLK
Manufacturer:
Switchcraft Inc.
Datasheet: