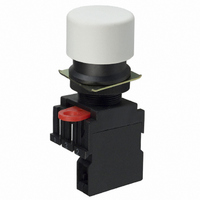
A22-SW-10M Omron, A22-SW-10M Datasheet - Page 28

A22-SW-10M
Manufacturer Part Number
A22-SW-10M
Description
SWITCH PB MUSH MOM SPST-NO WHITE
Manufacturer
Omron
Series
A22r
Type
Standardr
Specifications of A22-SW-10M
Circuit
SPST-NO
Switch Function
Off-Mom
Contact Rating @ Voltage
10A @ 110VAC
Actuator Type
Mushroom Button
Mounting Type
Panel Mount
Termination Style
Screw Terminal
Contact Form
SPST - NO
Contact Rating
10 mAmps
Actuator
Round, Mushroom
Mounting Style
Panel
Illumination
Illuminated
Illumination Color
White
Body Shape
Square
Dielectric Strength
2500 Volts
Insulation Resistance
100 MOhms
Mounting Angle
Straight
Operating Force
29.4 N
Water / Moisture Rating
IP65
Lead Free Status / RoHS Status
Lead free / RoHS Compliant
Illumination Type, Color
-
Illumination Voltage (nominal)
-
Lead Free Status / Rohs Status
Lead free / RoHS Compliant
Other names
A22SW10M
Z1470
Z1470
Half-guard Indicators
Put the tips of the Cap Tightening Tool (A22Z-3908) into the Color
Cap slot and turn the Tool.
■ Assembling the Cap
Lighted Pushbutton Switch
Mount the Color Cap so that the protrusions inside the cap fit into the
grooves in the Pushbutton Unit.
Indicator
Mount the Color Cap so that the protrusions inside the Pushbutton
Unit fit into the grooves in the cap.
Square Pushbutton/Indicator
Removing the Color Cap:
Insert the protruding tip of the Cap Puller (A3PJ-5080) into the Cap
slot, hold the plate spring, and pull them to remove the Color Cap.
G-102
Pushbutton Switch
Plate spring
Grooves in the cap
Color Cap
Grooves
Color Cap
A22
Protrusion inside cap
Protrusion
Cap
Cap
Mounting the Color Cap:
Mount the Color Cap on the flange and firmly push the Color Cap.
When the Color Cap is inserted, check whether it operates properly.
When replacing the Lamp, remove the Color Cap and diffusion plate
with fingers or Cap Puller.
Attach the Character Film properly so that it fits inside the protruding
part of the diffusion plate. Then, match the diffusion plate to the
square flange and insert the Cap.
Emergency Stop Switch
Insert the protrusion of the Tightening Wrench (A22Z-3905) into the
Cap slot and then turn to remove the Cap.
■ Installing/Replacing the Lamp
Installing/Replacing from the Panel
Surface
Insert the Lamp Extractor (A22Z-3901) into the lamp, then rotate the
Extractor while pressing it.
Installing/Replacing on the Switch
Grip the indicator with your fingers, then rotate the indicator while
pressing it against the Switch.
Diffusion plate
Character Film
Flange
Color Cap


