EE-SPY415 Omron, EE-SPY415 Datasheet - Page 18
EE-SPY415
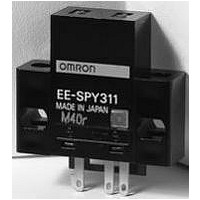
Manufacturer Part Number
EE-SPY415
Description
Photomicrosensors REFL PHOTO IC
Manufacturer
Omron
Type
Reflectiver
Series
-r
Specifications of EE-SPY415
Aperture Orientation
Horizontal
Output Configuration
Photo IC
Sensing Distance
3 mm to 19 mm
Sensing Method
Reflective
Termination Style
Connector
No. Of Pins
3
Opto Case Style
Module
No. Of Channels
1
Operating Temperature Range
-10°C To +60°C
Operating Voltage Max
24VDC
Operating Voltage Min
5VDC
Output Current Max
80mA
Function
Proximity
Primary Type
Photoelectric
Sensing Mode
Retro-Reflective
Technology
Photoelectric
Sensing Object
Black Paper, OHP Paper
Sensing Light
-
Mounting Type
Chassis Mount
Current - Supply
25mA
Voltage - Supply
10.8 V ~ 13.2 V
Package / Case
Module, Connector
Features
Improved Response Time
Input Current
25mA
Input Current Max
25mA
Rohs Compliant
Yes
Lead Free Status / RoHS Status
Lead free / RoHS Compliant
Lead Free Status / RoHS Status
Lead free / RoHS Compliant, Lead free / RoHS Compliant
Available stocks
Company
Part Number
Manufacturer
Quantity
Price
Company:

Part Number:
EE-SPY415
Manufacturer:
OMRON
Quantity:
1 000
Company:
Part Number:
EE-SPY415
Manufacturer:
VISHAY
Quantity:
260
Part Number:
EE-SPY415
Manufacturer:
OMRON/欧姆龙
Quantity:
20 000


■ Precautions
Precautions for Connection
• Do not move the screwdriver up, down, or from side to side while it
• Do not insert the screwdriver at an angle. Doing so may break the
• Do not insert two or more wires in the hole. Wires may come in con-
• Insert the screwdriver along the hole wall as shown below.
• If lubricating liquid, such as oil, is present on the tip of screwdriver,
• Insert the screwdriver into the bottom of the hole. It may not be pos-
276
is inserted in the hole. Doing so may cause damage to internal
components (e.g., deformation of the coil spring or cracks in the
housing) or cause deterioration of insulation.
side of socket and result in a short-circuit.
tact with the spring causing a temperature rise or be subject to
sparks. (There are two wiring holes for each terminal.)
the screwdriver may fall out resulting in injury to the operator.
sible to connect cables properly if the screwdriver is inserted incor-
rectly.
General-purpose Relay
Screwdriver
MY
General Precautions
• Use the clip to prevent relays floating or falling out of the socket.
• Do not use the product if it has been dropped on the ground. Drop-
• Confirm that the socket is securely attached to the mounting track
• Ensure that the socket is not charged during wiring and mainte-
• Do not pour water or cleansing agents on the product. Doing so
• Do not use the socket in locations subject to solvents or alkaline
• Do not use the socket in locations subject to ultraviolet light (e.g.,
• Do not dispose of the product in fire.
Removing from Mounting Rail
To remove the socket from the mounting rail, insert the tip of screw-
driver in the fixture rail, and move it in the direction shown below.
ping the product may adversely affect performance.
before wiring. If the socket is mounted insecurely it may fall and
injure the operator.
nance. Not doing so may result in electric shock.
may result in electric shock.
chemicals.
direct sunlight). Doing so may result in markings fading, rust, corro-
sion, or resin deterioration.
Screwdriver
Fixture rail
Related parts for EE-SPY415
Image
Part Number
Description
Manufacturer
Datasheet
Request
R

Part Number:
Description:
Photomicrosensors 13mm P Modulated SLOT PMS L-On
Manufacturer:
Omron
Datasheet:

Part Number:
Description:
Photomicrosensors PMOD 5mmSD D-ON SS
Manufacturer:
Omron
Datasheet:
Part Number:
Description:
Photomicrosensors DIFFUSE PMS PMOD 5mm
Manufacturer:
Omron
Datasheet:

Part Number:
Description:
Photomicrosensors CONV REFL DARK-ON
Manufacturer:
Omron
Datasheet:
Part Number:
Description:
Photomicrosensors 5MM LIGHT-ON REFLECT
Manufacturer:
Omron
Datasheet:
Part Number:
Description:
Photomicrosensors CONV REFL LIGHT-ON
Manufacturer:
Omron
Datasheet:

Part Number:
Description:
Photomicrosensors REFL LIGHT-ON/DRK-ON
Manufacturer:
Omron
Datasheet:
Part Number:
Description:
Photomicrosensors CONV REFL LIGHT-ON
Manufacturer:
Omron
Datasheet:
Part Number:
Description:
Photomicrosensors REFL LIGHT-ON/DRK-ON
Manufacturer:
Omron
Datasheet:

Part Number:
Description:
Photomicrosensors REFL LIGHT-ON
Manufacturer:
Omron
Datasheet:


Part Number:
Description:
PHOTO MICROSENSOR
Manufacturer:
Omron
Datasheet:

Part Number:
Description:
PHOTO MICROSENSOR :
Manufacturer:
Omron
Datasheet:

Part Number:
Description:
PHOTO MICROSENSOR
Manufacturer:
Omron
Datasheet:

Part Number:
Description:
PHOTO MICROSENSOR
Manufacturer:
Omron
Datasheet: