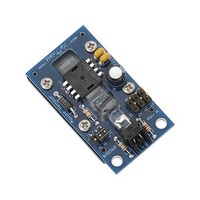
28560 Parallax Inc, 28560 Datasheet - Page 7

28560
Manufacturer Part Number
28560
Description
Interface Modules & Development Tools Mouse Sensor Kit
Manufacturer
Parallax Inc
Datasheet
1.28560.pdf
(18 pages)
Specifications of 28560
Interface Type
Serial
Operating Supply Voltage
5 V
Product
Interface Modules
Lead Free Status / RoHS Status
Lead free / RoHS Compliant
Quick Start Circuit (Propeller)
Do not omit the 2.2K resistor
NOTE:
. It is required in order to limit the input voltage to the Propeller.
Connecting and Testing
Once the Mouse Sensor powers up, the red LED should come on. For a further indication that it’s
working, place the Mouse Sensor on a flat surface and keep it still for a second or two. While keeping an
eye on the LED, move it slightly. The LED should brighten just a little while the Mouse Sensor is moving,
then dim a little when it stops. This indicates that the Mouse Sensor is detecting motion.
BASIC Stamp 2 Series
To test the Mouse Sensor further with a BASIC Stamp, wire it as shown above. Then upload the program
mouse_monitor.bs2, shown at the end of this document and downloadable from the Mouse Sensor
product page (search "28560" at www.parallax.com). When run, a debug window will pop up, and you
should see a display that looks something like this:
The program accumulates the sensor’s X and Y displacement data to show the current position. It also
displays a “quality” figure, which indicates how textured the surface is that the sensor is looking at. The
higher the number, the better.
You can also monitor the mouse position graphically, using the program mouse_monitor.exe,
downloadable from the Mouse sensor product page. You will have to make a small change to
mouse_monitor.bs2 to do so. Just comment out the line that reads #DEFINE USE_DEBUG:
'#DEFINE USE_DEBUG
'Comment this out to use 38400 baud, instead of DEBUG.
Copyright © Parallax Inc.
Mouse Sensor Kit (#28560)
v1.0 6/1/2010 Page 7 of 18


