SUPERPRO-5004GP Xeltek, SUPERPRO-5004GP Datasheet
SUPERPRO-5004GP
Specifications of SUPERPRO-5004GP


Related parts for SUPERPRO-5004GP


SUPERPRO-5004GP Summary of contents
Page 1
... XELTEK Bldg 6‐31 Meizhiguo Garden, #2 Jiangjun Ave., Jiangning, Nanjing, China Tel: (086) +25‐52765233 Fax: (086) +25‐52765203 www.xeltek.com.cn Superpro ® 5004GP User’s Guide 5004GP ® 1 ...
Page 2
... The information in this document is subject to change without notice. Software Copyright 2008‐2011 XELTEK Userʹs Guide Copyright 2008‐2011 XELTEK Superpro ® 5004GP User’s Guide ...
Page 3
... Table of Contents Welcome ...............................................................................................................................7 Feature Highlights ..........................................................................................................7 Manual Organization......................................................................................................8 Chapter 1 General Description..........................................................................................9 Introduction to SUPERPRO 5004GP ............................................................................9 Package Contents ............................................................................................................9 Programming Hardware................................................................................................9 Software Features ..........................................................................................................10 System Requirements ...................................................................................................10 Chapter 2 System Installation..........................................................................................11 Software Setup...............................................................................................................11 CD‐ROM .....................................................................................................................11 Xeltek Website............................................................................................................12 Setup Process .................................................................................................................12 Hardware and Driver Installation ..............................................................................18 Chapter ...
Page 4
... Output Window ............................................................................................................53 Statistical Window ........................................................................................................54 Chapter 4 Procedures .......................................................................................................56 Programming Procedure..............................................................................................56 Prepare the Hardware ..............................................................................................56 Prepare the Settings ..................................................................................................56 Start Producer Mode.................................................................................................58 Program the Chips ....................................................................................................58 Security and Password Input.......................................................................................59 Making a Chip Blank ....................................................................................................60 Identifying the Sector....................................................................................................60 Superpro ® 5004GP User’s Guide 4 ...
Page 5
... Reading A Master Chip ................................................................................................61 Superpro ® 5004GP User’s Guide 5 ...
Page 6
... Program Two or More Files to One Chip...............................................................64 POF Format Files .......................................................................................................65 Adapter Selection ..........................................................................................................65 Selecting the Correct Adapter..................................................................................66 Other Messages..............................................................................................................67 Insertion Test Errors..........................................................................................68 Device ID Check Error......................................................................................69 Appendix............................................................................................................................70 Troubleshooting.........................................................................................................70 Contact Information..................................................................................................70 License Agreement............................................................................................................70 Warranty .............................................................................................................................73 Superpro ® 5004GP User’s Guide 6 ...
Page 7
... The SUPERPRO operates with a PC for engineering purpose or in stand‐alone mode, without a PC, for repeat production mode programming. This provides ...
Page 8
... For authorized users, the SUPERPRO can provide for automatic generation of electronic serial numbers. IMPORTANT! Make sure to complete the software installation before connecting the programmer USB cable. Manual Organization This manual includes the following: ...
Page 9
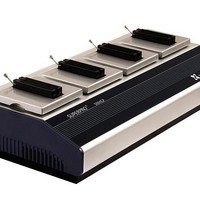
... SP5004GP is a mass‐product programmer that can burn into four chips at the same time. It contains four burning modules, as illustrated below. The module marked “1” is the main module. Superpro ® 5004GP User’s Guide ...
Page 10
... Windows XP or Windows Vista operating system • A hard disk with at least 1 GB free space • At least one standard USB port (USB 2.0) • One CD‐ROM drive Superpro ® 5004GP User’s Guide ...
Page 11
... If the setup program does not start automatically, run SETUP. EXE located in the root directory. The system displays a dialog box to select the programmer model, illustrated below. Superpro ® 5004GP User’s Guide ...
Page 12
... Setup Process The following procedure explains the setup process. 1. The system displays the Select Language dialog box, illustrated below. Superpro ® 5004GP User’s Guide 12 ...
Page 13
... Select your preferred language for the setup process from the drop down list. 2. Select OK. The system displays the Install Wizard dialog box, illustrated below. Superpro ® 5004GP User’s Guide 13 ...
Page 14
... The system displays the License Agreement, illustrated below. 4. Please read the license agreement carefully. Select I Agree to continue the installation. To cancel the installation and exit the installation process, select Cancel. Superpro ® 5004GP User’s Guide ...
Page 15
... Check the Create a start menu icon box to add an icon on the Start menu during the installation. Check the Create a desktop icon box to add an icon to the desktop during the installation. Select Next. Superpro ® 5004GP User’s Guide ...
Page 16
... Select Back to return to a previous step to change your selections. The system displays the following dialog box. The system copies the files, installs the drivers and registers the software. Superpro ® 5004GP User’s Guide ...
Page 17
... If you are using Windows Vista, the system displays following dialog box. 8. Select Install this driver software anyway. The system displays the following dialog box. 9. Select Finish to complete the setup process. Superpro ® 5004GP User’s Guide ...
Page 18
... Make sure all other programs are closed during the installation process. 2. Connect the programmer module to the computer through the USB port. 3. Turn on the power switch of the programmer module. Superpro ® 5004GP User’s Guide ...
Page 19
... Waiting window, illustrated below. Stop any operations while this message displays and the system is communicating with the programmer. Superpro ® 5004GP User’s Guide ...
Page 20
... Note: The four modules are independent of each other. Under urgent circumstances, if two or more modules are working, you can still use SP5004GP. Superpro ® 5004GP User’s Guide ...
Page 21
... The main Superpro 5004GP screen is illustrated below. Each part of the user interface is labeled with a number and described below. 1. The Toolbar includes icons to access common functions. Refer to the Toolbar section on page 22 for more information. Superpro ® 5004GP User’s Guide ...
Page 22
... The Superpro 5004GP has an Administrator mode and Producer mode to separate management from production. Select the Setting tool to choose whether to enter Administrator mode or Producer mode. The system displays the Setting Mode screen, illustrated below. Superpro ® 5004GP User’s Guide ...
Page 23
... When you select Administrator on the Setting Mode screen, the system displays the Setting screen illustrated below. Each part of the screen is described below. 1. The system displays the name of the selected Device. Choose Select to open the Superpro ® 5004GP User’s Guide ...
Page 24
... Select Administrator’s Password to set a password to prevent others from changing the program settings, including quitting or entering the program. 14. Select Programmer’s ID to display the ID of the four modules. These IDs are Superpro ® 5004GP User’s Guide ...
Page 25
... Select ALL if you are not sure what type to choose. 2. In the Manufacturer box, highlight the desired manufacturer. The lower right corner displays the manufacturer logo to help ensure you select the correct manufacturer. Superpro ® 5004GP User’s Guide ...
Page 26
... Select Dev.Info to open the Device Information screen. Refer to the next section for more information. 5. Select OK or Cancel. Superpro ® 5004GP User’s Guide ...
Page 27
... To ensure correct programming, arrange the data and prepare the corresponding settings according to the requirements. You can also find this information in the data manual of the device. Superpro ® 5004GP User’s Guide ...
Page 28
... Load File Screen There may be one or more data buffers in the device. If several data buffers are displayed after you have selected the device, refer to the name and the data Superpro ® 5004GP User’s Guide ...
Page 29
... When you select Load File into Buffer from the Setting screen, the system displays the Load File screen, illustrated below. The red labels refer to the numbered explanations below. 1. Select the data Buffer name from the drop down list, as illustrated below. Superpro ® 5004GP User’s Guide ...
Page 30
... Select the File Type from the drop down list. 4. Select one of the following File Modes from the drop down list: • Normal to load the whole file Superpro ® 5004GP User’s Guide ...
Page 31
... Check the Show Offset Address (Minimize) After Loading to show the minimized file offset address or initial address on the screen. 10. Select OK to load the file. Otherwise, select Cancel. Superpro ® 5004GP User’s Guide ...
Page 32
... Press the Page Down key to Page down in the data window. • Press the Home key to move the cursor to the beginning of the line. • Press the End key to move cursor to the end of the line. Superpro ® 5004GP User’s Guide ...
Page 33
... HEX/ASCII data buffer: 00000000 00- MZ.._..._....... 00000010 00- ........@....... 00000020 00- ................ 00000030 00- ................ • Fuse data buffer: 00000768 10011010101010101010101010101010 00000800 01101010101010101010101010101010 00000832 10100110101010101010101010101010 00000864 10101010011010101010101010101010 00000896 10101010101001101010101010101010 00000928 10101010101010100110101010101010 00000960 10101010101010101010011010101010 00000992 10101010101010101010101001101010 Superpro ® 5004GP User’s Guide 33 ...
Page 34
... Enter the end address in the End Address field. • Select OK to copy the data between the start address and the end address, beginning with a new address. Otherwise, select Cancel. Superpro ® 5004GP User’s Guide ...
Page 35
... Then after swapping the data, it would look like this according to the selected word width: • 16 Bits (2 bytes) ‐ • 32 Bits (4 bytes) ‐ • 64 Bits (8 bytes) ‐ Superpro ® 5004GP User’s Guide 35 ...
Page 36
... Refer to the HEX/ASCII Data Buffer section on page 34 for more information about the options on this screen. Superpro ® 5004GP User’s Guide ...
Page 37
... Superpro ® 5004GP User’s Guide ...
Page 38
... Note: Using the Operation Option to change the settings may produce minor changes from the following descriptions. The Operation Option screen includes four views: • General • Buffer Superpro ® 5004GP User’s Guide ...
Page 39
... Note: Not all programmers include a beeper. 4. Indicate the mode for verifying the data by selecting one of the Verify Mode Superpro ® 5004GP User’s Guide ...
Page 40
... Note: Most single‐chip microcomputers do not allow a change to the start address of the device. 1. For each file, enter the Start Address. 2. For each file, enter the End Address. Superpro ® 5004GP User’s Guide ...
Page 41
... Note: The serial number is the content required by some applications that must be written in a certain area for every chip. This information includes the product sequence number and the MAC address. Superpro ® 5004GP User’s Guide ...
Page 42
... Select ASCII Hex to set the start value as 30 (hexadecimal representation of 0) and the overflow value as 46+1 (the hexadecimal representation of a number greater than F, where 9+1=A). Superpro ® 5004GP User’s Guide ...
Page 43
... To define the increase of the serial number, select User’s Definition. You must be authorized to use this function. If so, you can change the data as desired in the 4K byte range. Superpro ® 5004GP User’s Guide ...
Page 44
... Select Delete to delete the highlighted function in the Auto column. You can also double‐click the highlighted function in the Auto column to delete it. 3. Select Delete All to remove all the functions from the Auto column. Superpro ® 5004GP User’s Guide ...
Page 45
... If a chip includes ConfigWord, the system reads the ConfigWord data and saves it to the ConfigWord buffer. • Verify compares the content of the buffer with that of the chip. Superpro ® 5004GP User’s Guide ...
Page 46
... ConfigWord. Select None to have the system perform no protect function. Note: If the chips made by some manufacturers are fully protected, the data cannot be erased even with the ultraviolet ray eraser. These Superpro ® 5004GP User’s Guide ...
Page 47
... The user files contain the configuration words of some devices. When you load these files, the system automatically loads the configuration words into the configuration word buffer. However, you must select the configuration words for some devices manually. Superpro ® 5004GP User’s Guide ...
Page 48
... The 16‐bit (word) edit box input • The single choice input (select and deselect, choose one out of two) • The multiple choice input (choose one out of many) Superpro ® 5004GP User’s Guide ...
Page 49
... This screen allows you to view and edit the user’s electronic signature in both HEX and ASCII formats. When reading devices or loading files, the content may be changed. Superpro ® 5004GP User’s Guide ...
Page 50
... Select Log File to open the Log File screen. Refer to the Log File Screen section on page 51 for more information. 4. Select Administrator’s Password to set a password to prevent others from changing the program settings, including quitting or entering the program. Superpro ® 5004GP User’s Guide ...
Page 51
... Status window, illustrated below. Each part of the user interface is labeled with a number and described below. Superpro ® 5004GP User’s Guide ...
Page 52
... Important: Make sure to check the operation result in the following instances: 1. In non‐production mode, the Stop icon on the Toolbar is gray, as illustrated below. Superpro ® 5004GP User’s Guide ...
Page 53
... The other four tabs correlate to the modules. Each windows displays specific information about the related module, including device selection, chip burning, and reasons for failure. Superpro ® 5004GP User’s Guide ...
Page 54
... Select Reset to set the successful times and the failed times back to 0. Select Reset Count Down to open the Count Down dialog box, illustrated below. The red labels refer to the explanations that follow. Superpro ® 5004GP User’s Guide ...
Page 55
... Check the Count Down: enabled box to enable the count down function. 3. Check the Stop when reading the total box to ensure that no more programs are written until you reset the option. Superpro ® 5004GP User’s Guide ...
Page 56
... Select the device. Refer to the Select section on page 25 for more information. 4. Load the data into the buffer. Refer to the Load File Screen section on page 28 for more information. Superpro ® 5004GP User’s Guide ...
Page 57
... Check the Production Mode box on the Setting screen. In order to program chips in batches, the programmer conducts the insertion test. Once you have Superpro ® 5004GP User’s Guide ...
Page 58
... Note: You may need to set the configuration word before performing encryption. Refer to Device Configuration Word on page 47 for more information. 1. To write the data in the memory buffer into the chips, select Auto from the Superpro ® 5004GP User’s Guide ...
Page 59
... The Set Password screen is illustrated below. 1. Enter the new password in the Enter the password field. Leave the field blank to indicate no password is required. Superpro ® 5004GP User’s Guide ...
Page 60
... There are two ways to select the Sector: 1. Enter the address of several sectors (maximum of 8)to decide the sectors to protect. After the Protect operation is performed, the identified sectors are protected. Superpro ® 5004GP User’s Guide ...
Page 61
... Reading A Master Chip The system can read a master chip to the buffer, which allows you to copy a master chip to the chips in the other modules, Superpro ® 5004GP User’s Guide ...
Page 62
... Save the project. 8. With a new chip, execute the programming process with the saved project. If the new chip works in the target board like the master chip, the copy succeeded. Superpro ® 5004GP User’s Guide ...
Page 63
... There are three methods for separating the file data. 1. Based on byte (8bit), divide the file into two parts by the odd and even address. Superpro ® 5004GP User’s Guide ...
Page 64
... Select Load from the File menu to load the Sample1 file. • In the Buffer Address field, enter 0. • In the File Address field, enter 200. Superpro ® 5004GP User’s Guide st ...
Page 65
... There are two types of adapters: universal and specific. • Universal adapters are applicable for all devices of the same encapsulation and Superpro ® 5004GP User’s Guide ...
Page 66
... Selecting the Correct Adapter The Device Information screen displays adapter information. The following illustration shows PLCC44 as an example. In this example, the adapter order number is CX2044 or CX2144. Superpro ® 5004GP User’s Guide ...
Page 67
... Pin check error. Ignore: The system indicates an error during the pin check. Ignore it and continue. • Pin check error: An error occurred during the pin check, and the operation Superpro ® 5004GP User’s Guide ...
Page 68
... The pin number refers to DIP chip’s pin number or the adapter’s pin number. • Device inserted backwards or damaged.: Take the chip out, reverse it, and insert it again properly. If the problem still exists, the chip may have been damaged. Superpro ® 5004GP User’s Guide ...
Page 69
... Select Yes to ignore the error and continue programming. • Select No to abort the programming. When the ID is unmatched, the system searches for matched devices and display them in the Operation Information window. Superpro ® 5004GP User’s Guide ...
Page 70
... Email: sales02@xeltek.com.cn Superpro ® 5004GP User’s Guide ...
Page 71
... Email: Service@xeltek.com.cn Fax +86‐25‐52765233 Website: http://www.xeltek.com.cn Superpro ® 5004GP User’s Guide 71 ...
Page 72
... Modify, copy, or transfer the User’s Guide or other documentation or any copy. 5. Decompile or disassemble any program modules or encrypted devices. Superpro ® 5004GP User’s Guide ...
Page 73
... The product has been damaged because of misuse or careless use. • The product serial number has been changed by the user or some other person. • The program errors caused by the physical damage of the disk. Superpro ® 5004GP User’s Guide ...