4295 Conxall/Switchcraft, 4295 Datasheet - Page 35
4295
Manufacturer Part Number
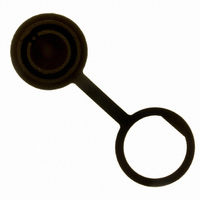
4295
Description
CONN DUST CAP MULTI-CON-X
Manufacturer
Conxall/Switchcraft
Series
Multi-Con-X®r
Datasheet
1.4295.pdf
(36 pages)
Specifications of 4295
Accessory Type
Cap (Cover), Dust
Features
Contains Strap
Color
Black
For Use With/related Products
Multi-Con-X® Series
For Use With
4380-4SG-300 - CONN PIN PANEL MNT MULTI 4 PINSC1245 - CONN SOCKET PANEL MNT MULTI 9PINSC1244 - CONN PIN PANEL MNT MULTI 9PINSC1243 - CONN SOCKET PANEL MNT MULTI 8PINSC1242 - CONN PIN PANEL MNT MULTI 8PINSC1241 - CONN SOCKET PANEL MNT MULTI 7PINSC1240 - CONN PIN PANEL MNT MULTI 7PINSC1239 - CONN SOCKET PANEL MNT MULTI 6PINSC1238 - CONN PIN PANEL MNT MULTI 6PINSC1237 - CONN SOCKET PANEL MNT MULTI 5PINSC1236 - CONN PIN PANEL MNT MULTI 5PINSC1235 - CONN SOCKET PANEL MNT MULTI 4PINSC1234 - CONN PIN PANEL MNT MULTI 4PINSC1233 - CONN SOCKET PANEL MNT MULTI 3PINSC1232 - CONN PIN PANEL MNT MULTI 3PINSC1231 - CONN SOCKET PANEL MNT MULTI 2PINSC1230 - CONN PIN PANEL MNT MULTI 2PIN
Lead Free Status / RoHS Status
Lead free by exemption / RoHS Compliant
Shell Size - Insert
-
Other names
SC1332
Available stocks
Company
Part Number
Manufacturer
Quantity
Price

Part Number:
4295
Manufacturer:
NA
Quantity:
20 000


Contact Insertion/Removal Tools
Pneumatic Crimping Tools - Consult Factory
Manual Contact Crimping Tools
Contact Crimping and Assembly Procedures:
A. Push cable through connector components, i.e. backshell, grommet, sleeve, and coupling ring.
B. Wire preparation: Strip cable to dimensions shown. Make all cuts square and sharp being careful not to nick wires
C. Contact crimping tools, use as follows:
D. Contact insertion tools. Place wired contact into proper connectors cavity. Guide tip of the insertion tool so that it starts
when cutting. To prevent stranded wires from fraying it is recommended that ends be tightly twisted and not solder
dipped.
at the contact and slides down against the stop. Apply a steady force perpendicular to the contact until it snaps into
position.
Assemble contact locator to tool.
Check tool setting for wire gage to be crimped.
Drop contacts, mating end first into locator so that it rests fully on bottom. Insert stripped lead into contact barrel
until it stops.
Close tool handles completely in one stroke. (The ratchet will not release jaws until tool has completed cycle.)
Inspect crimp to be sure there are no loose strands outside the contact which may short out to an adjacent contact.
®
®
Conductor Strip Lengths
601 East Wildwood, Villa Park, Illinois 60181 • Telephone (630) 834-7504 • Fax (630) 834-8540 • www.conxall.com
#20 -3/16
#16 -7/32
#12 -7/32
CON-X
#16 -9/32
#12 -7/32
MIL-E-QUAL
T
OOLING
35
Cable Stripping
Product not designed to
remove contacts after
insertion. Consult factory
for removal tools.
Related parts for 4295
Image
Part Number
Description
Manufacturer
Datasheet
Request
R

Part Number:
Description:
CABLE ASSY SGL-END MALE 3POS 2M
Manufacturer:
Conxall/Switchcraft
Datasheet:

Part Number:
Description:
CABLE ASSY PNL-MNT MALE 3POS .3M
Manufacturer:
Conxall/Switchcraft
Datasheet:

Part Number:
Description:
CABLE ASSY PNL-MNT RECPT 2POS 1'
Manufacturer:
Conxall/Switchcraft
Datasheet:

Part Number:
Description:
CABLE ASSY SGL-END MALE 4POS 2M
Manufacturer:
Conxall/Switchcraft
Datasheet:

Part Number:
Description:
CABLE ASSY SGL-END FEM 3POS 2M
Manufacturer:
Conxall/Switchcraft
Datasheet: