HS1E-140KR IDEC, HS1E-140KR Datasheet - Page 10
HS1E-140KR
Manufacturer Part Number
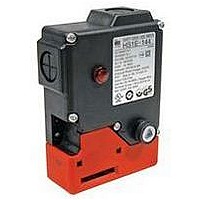
HS1E-140KR
Description
SWITCH, SAFETY INTERLOCK, 2NC, 10A
Manufacturer
IDEC
Datasheet
1.HS1E-140KR.pdf
(11 pages)
Specifications of HS1E-140KR
Contact Configuration
SPST-NC / SPST-NO
Contact Voltage Ac Max
250V
Contact Voltage Dc Max
250V
Contact Current Ac Max
10A
Contact Current Dc Max
6A
Switch Terminals
Screw
Circuitry
2NC/1NO
Lead Free Status / RoHS Status
Lead free / RoHS Compliant


B1
Precautions
Wire Connection
• Make an opening for wire connection by breaking one of the con-
• Before breaking the knockout, temporarily remove the connector-fix-
• When breaking the knockout, take care not to damage the contact
• Cracks or burrs on the conduit entry may deteriorate the housing
• When changing to the other conduit port, close the unused opening
Manual Unlocking
• Remove the screw located on the unlocking entry at the side of the
• Insert a small screwdriver into the elliptical hole on the back of the
• Regardless of door type, do not use the safety switch as a locking
• The safety switch cover can be only removed with the special key
• Remove the screw located on the unlocking entry at the side of the
B1-44
duit-port knockouts on the switch housing using a screwdriver.
ing lock nut from the switch.
block or other parts inside the switch.
protection.
with an optional plug (accessory).
switch using the key wrench included with the switch. Then insert a
small screwdriver into the switch to push the lever inside of the
switch toward the indicator until the actuator is unlocked (refer to
the diagram on the right).
switch, then push the lever inside of the switch toward the indicator
until the key is unlocked (refer to the diagram on the right).
device. Install a locking device independently, for example, using a
metal latch (also applicable to Type HS1E).
wrench supplied with the switch or with the optional screwdriver
(applicable to HS1B and HS1E).
switch using the key wrench included with the switch. Then insert a
small screwdriver into the switch to push the lever inside of the
switch toward the indicator until the actuator is unlocked (refer to
the diagram on the right).
Caution: After the unlocking operation, put the screw back
into the unlocking entry for safety.
www.idec.com
Plug (For G1/2)
Type No. HS9Z-P1
Type No.: HS9Z-P1
Plug (For G1/2)
HS1C Precautions
HS1E Precautions
USA: (800) 262-IDEC or (408) 747-0550, Canada: (888) 317-IDEC
Safety Products
Screwdriver
1. This unlocking method is intended for an escape from a
machine when a person is locked in. For access to the
unlocking entry, an access hole should be opened on the
mounting panel. When opening the hole, apply proper pro-
tection against water or other foreign objects.
2. Caution: After the unlocking operation, put the screw
back into the unlocking entry for safety.
Screwdriver
UNLOCK
Lid
Normal
Position
UNLOCK
Manual
Unlocking
Position
Related parts for HS1E-140KR
Image
Part Number
Description
Manufacturer
Datasheet
Request
R

Part Number:
Description:
Switch, SAFETY, WITHOUT INDICATOR, WITHOUT KEY, 2NC/1NO
Manufacturer:
IDEC Corporation
Datasheet:
Part Number:
Description:
Switch, SAFETY, WITH INDICATOR, WITH KEY, 2NC/1NO
Manufacturer:
IDEC Corporation
Datasheet:
Part Number:
Description:
HS1E-140KRP Solenoid Sfty Swtch 2NC/1NO W/unlock PG13.5
Manufacturer:
IDEC
Part Number:
Description:
HS1E-144KR-R Solenoid Sfty Swtch 2NC/1NO W/man&ind G1-2
Manufacturer:
IDEC
Part Number:
Description:
HS1E-244R-G Solenoid Sfty Swtch 2NC/2NC W/ind G1/2
Manufacturer:
IDEC
Part Number:
Description:
HS1E-340KRP Solenoid Sfty Swtch 2NC/1NC W/unlock PG13.5
Manufacturer:
IDEC
Part Number:
Description:
HS1E-44KR-R Solenoid Sfty Swtch 2NC/2NO W/man&ind G1/2
Manufacturer:
IDEC
Part Number:
Description:
Hs1e Series Full Size Interlock Switch With Locking Solenoid
Manufacturer:
IDEC Corporation
Datasheet:
Part Number:
Description:
Hs1e Series Full Size Solenoid Locking Switches
Manufacturer:
IDEC Corporation
Datasheet:

Part Number:
Description:
SWITCH, SAFETY INTERLOCK, 2NC, 10A
Manufacturer:
IDEC
Datasheet:

Part Number:
Description:
IC LN-DRVR ARINC 429 16-SBDIP
Manufacturer:
Intersil
Datasheet:
Part Number:
Description:
IC,LINE TRANSCEIVER,CMOS,1 DRIVER,2 RCVR,DIP,40PIN,CERAMIC
Manufacturer:
Intersil
Datasheet:
Part Number:
Description:
Manufacturer:
Intersil
Datasheet:
Part Number:
Description:
Manufacturer:
Intersil
Datasheet:

Part Number:
Description:
ARINC 429 Bus Interface Line Driver Circuit
Manufacturer:
Intersil Corporation