DPM8120A-2 ANDERS ELECTRONICS, DPM8120A-2 Datasheet
DPM8120A-2
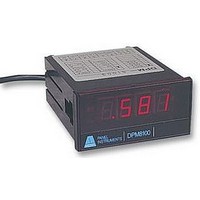
Manufacturer Part Number
DPM8120A-2
Description
DPM, LED, DIN, AC VOLTMETER
Manufacturer
ANDERS ELECTRONICS
Datasheet
1.DPM8100A-2.pdf
(2 pages)
Specifications of DPM8120A-2
Supply Voltage Range
184VAC To 253VAC
No. Of Digits / Alpha
3.1/2
Panel Cutout Height
45mm
Panel Cutout Width
92mm
Operating Temperature Range
0°C To +50°C
Display Technology
LED
External
RoHS Compliant


DPM 8000 Series-2 Voltmeters and Ammeters
Models covered by this instruction sheet
The DPM8100-2 and DPM8400-2 series can be ranged as voltmeters or
ammeters by fitting multiplier or shunt resistors (not include into the
labelled positions on the main printed circuit board as shown on the
diagram overleaf. Wire links"JP1" may need to be removed for some
voltmeter ranges.
Using close tolerance resistors, the minimum of recalibration is required.
For accurate setting a calibrated supply should be used. The resistors
fitted should be adequately rated for the current or voltage range.
For non standard ranging and calibration, application sheet No. AES040
is available on request.
Over range is indicated by -1 on the display for 3.5 digit meters and by
flashing zero's on the 4.5 digit meters.
digital panel modules
1
2
3
4
5
6
7
8
DPM8100-2
DPM8100A-2
DPM8120-2
DPM8120A-2
DPM8140-2
DPM8400-2
DPM8400A-2
DPM8420-2
DPM8420A-2
STEP BY STEP INSTRUCTIONS
Remove instrument from its protective plastic bag and clip off
front cover.
Pull off the three green safety terminals from the rear of the
meter. The complete panel meter assembly can now be
removed from its case by carefully levering the base of the
LED display board over the plastic retaining lug while pushing
gently on the terminal pins at the rear.
With reference to the Range Specification table and notes
overleaf, determine the resistance values to be fitted for the
required voltage or current range. Further note whether link
"JP1" should be removed.
Carefully de-solder and remove link JP1 if necessary and
solder the required resistors in place as shown on the main
circuit board diagram.
The decimal point should be set as required by either
repositioning the PCB jumper link JP2 on the 3.5 digit models
or setting a dip switch on the front of the 4.5 digit model, in
one of these locations:-
DP1 gives 1.999
DP2 gives 19.99
DP3 gives 199.9
DP4 gives 1999.9 i.e XXX. X on 4.5 digit version only.
Slide panel meter back into its case along the guide rails
taking care to ease bottom of LED display board over
protruding lug. Then push the green safety terminals securely
back into place on the rear of the meter.
Make electrical connection to the meter with reference to the
Terminal Definition table. Note Mains Earth must NOT be
connected to pin 4. There is no earth connection required
with this meter. Note also that Pin 3 is unused.
The instrument may now be tested.
For improved accuracy it can be adjusted by turning the
"span adj" potentiometer whilst applying full scale signal from
a calibrated source until exactly full scale is shown on the
display. On the DPM8140 and DPM8400 only, first set the
display to read zero for 0V input using the "offset"
potentiometer on the front left hand side of the board.
Finally, clip the cover back on and insert the meter into the
panel cut-out. "Snap" the mounting clips into the side of the
case (refer to installation diagram) and tighten the fixing
screws until secure in the panel - do not over tighten!
3.5 DIGIT 200mV DC
3.5 DIGIT 2V DC
3.5 DIGIT 200mV AC
3.5 DIGIT 2V AC
3.5 DIGIT 200mV True RMS AC
4.5 DIGIT 200mV DC
4.5 DIGIT 2V DC
4.5 DIGIT 200mV AC
4.5 DIGIT 2V AC
i.e.
i.e.
i.e
. XXX
X. XX
XX. X
user guide
Accuracy:
Line voltage:
Temperature:
Humidity:
Power:
Sampling rate:
DIMENSIONS
TERMINAL DEFINITIONS
INSTALLATION DIAGRAM
OPERATING SPECIFICATION
1
2
3
4
5
6
7
8
9
SYMBOL
Gnd (sig)
+5V (o/p)
(display)
HOLD
0V (N)
IN LO
230V
115V
IN HI
n/c
81xx: +/- 0.1% of rdg +/-1 digit (AC models +/- 0.2%)
84xx: +/- 0.01% of rdg +/-2 digits DC models
84xx: +/- 0.1% of rdg +/-3 digits AC models
115/ 230 volts +10, -20%,
0 - 50 degrees C
below 85% RH
4VA
2.5 / second
Apply input to pins 1 and 2. If INLO signal is
greater than INHI the display will read -ive.
Not connected (unused)
digital 0 Volts (NOT MAINS EARTH)
connect to terminal 6 (+5V) 8100 series
connect to terminal 4 (0V) 8400 series
internal +5V output (maximum 50mA)
AC mains supply
DESCRIPTION
50 - 60 Hz
DPM8000-2 Rev 3 10/03
Related parts for DPM8120A-2
Image
Part Number
Description
Manufacturer
Datasheet
Request
R

Part Number:
Description:
DPM, LED, DIN, AC VOLTMETER
Manufacturer:
ANDERS ELECTRONICS
Datasheet:

Part Number:
Description:
SCALE, 78X60, PM, 0-100
Manufacturer:
ANDERS ELECTRONICS
Datasheet:
Part Number:
Description:
SCALE, 96X75, PM, 0-100
Manufacturer:
ANDERS ELECTRONICS
Datasheet:

Part Number:
Description:
BEZEL, OEM22/24L
Manufacturer:
ANDERS ELECTRONICS
Datasheet:
Part Number:
Description:
DPM, LED, DIN, DC VOLTMETER
Manufacturer:
ANDERS ELECTRONICS
Datasheet:

Part Number:
Description:
DPM, LCD, 4-20MA, PROCESS
Manufacturer:
ANDERS ELECTRONICS
Datasheet:

Part Number:
Description:
DPM, LCD, THERMOMETER
Manufacturer:
ANDERS ELECTRONICS
Datasheet:
Part Number:
Description:
DPM, LCD
Manufacturer:
ANDERS ELECTRONICS
Datasheet:

Part Number:
Description:
DPM, LCD, 3.5DIGIT, MINI
Manufacturer:
ANDERS ELECTRONICS
Datasheet:

Part Number:
Description:
METER, 78X60, 0-1MA
Manufacturer:
ANDERS ELECTRONICS
Datasheet:
Part Number:
Description:
METER, 78X60, 0-100UA
Manufacturer:
ANDERS ELECTRONICS
Datasheet:
Part Number:
Description:
METER, 96X75, 0-1MA
Manufacturer:
ANDERS ELECTRONICS
Datasheet:

Part Number:
Description:
AMP METER
Manufacturer:
ANDERS ELECTRONICS
Datasheet:

Part Number:
Description:
METER, CIRCULAR, 0-200UA
Manufacturer:
ANDERS ELECTRONICS
Datasheet:

Part Number:
Description:
METER, CIRCULAR, 0-200UA
Manufacturer:
ANDERS ELECTRONICS
Datasheet:
DPM8120A-2 Summary of contents
Page 1
... DPM 8000 Series-2 Voltmeters and Ammeters Models covered by this instruction sheet DPM8100-2 3.5 DIGIT 200mV DC DPM8100A-2 3.5 DIGIT 2V DC DPM8120-2 3.5 DIGIT 200mV AC DPM8120A-2 3.5 DIGIT 2V AC DPM8140-2 3.5 DIGIT 200mV True RMS AC DPM8400-2 4.5 DIGIT 200mV DC DPM8400A-2 4.5 DIGIT 2V DC DPM8420-2 4 ...
Page 2
PCB LAYOUT SPAN OFFSET addition. ADJUST VR1 Converter Chip LINK JP1 R17 R18 R30 N/c 0v Hold +5V 230 Hi Lo Vac dc i/p dc Important Observe the ...