SNAP-ODC5-I OPTO 22, SNAP-ODC5-I Datasheet - Page 2
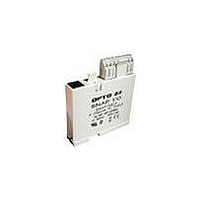
SNAP-ODC5-I
Manufacturer Part Number
SNAP-ODC5-I
Description
I/O Module
Manufacturer
OPTO 22
Type
Outputr
Specifications of SNAP-ODC5-I
Leaded Process Compatible
No
Peak Reflow Compatible (260 C)
No
No. Of Analog Outputs
4
Supply Voltage Min
5VDC
Signal Input Type
5VDC
Supply Voltage Max
60VDC
No. Of Outputs
4
Brand/series
SNAP Series
Connection To Host
Backplane
Current, Input
50 mA
Dimensions
82.55mmL×18.29mmW×90.17mmH
Mounting Type
DIN Rail
Number Of Channels
4
Output
5 to 60 VDC
Output Type
Digital
Output, Range
5 to 60 VDC
Primary Type
Control
Special Features
Optical Isolation
Voltage, Isolation
4000 V
Voltage, Supply
5 VDC
Operating Temperature
0 to +70°C
Lead Free Status / RoHS Status
Contains lead / RoHS non-compliant


PAGE
2
For Ethernet-based applications requiring higher density of
digital I/O points, see Opto 22 form #1556, the SNAP High-
Density Digital Module Data Sheet.
I/O Processor Compatibility
SNAP digital output modules are compatible with all SNAP
PAC brains and rack-mounted controllers, including both
standard wired models and Wired+Wireless
Notes for legacy hardware: SNAP digital output modules
are also compatible with SNAP Ultimate, SNAP Ethernet, and
SNAP Simple brains, as well as other SNAP brains such as the
serial B3000 and the B3000HA. These modules can also be
used on B-series and
M-series mounting racks.
Installation
The following diagram shows part of a SNAP mounting rack.
The rack is shown without screw connectors.
Modules snap securely into place in the row of connectors on
the rack. Each module connector has a number. Digital output
modules and other types of SNAP I/O modules are mounted
on the module connectors starting at module position zero.
NOTE: Check the data sheet or user’s guide for the brain or on-
the-rack controller you are using to determine module
features available and any restrictions on module placement.
Opto 22 • 43044 Business Park Drive • Temecula, CA 92590-3614 • www.opto22.com
SALES 800-321-6786 • 951-695-3000 • FAX 951-695-3095 • sales@opto22.com • SUPPORT 800-835-6786 • 951-695-3080 • FAX 951-695-3017 • support@opto22.com
© 2011 Opto 22. All rights reserved. Dimensions and specifications are subject to change. Brand or product names used herein are trademarks or registered trademarks of their respective companies or organizations.
™
models.
SNAP Digital Output Modules
1.
2.
3.
4.
5.
Modules require a special tool (provided) for removal.
Processor
Place the rack so that the module connector numbers
are right-side up, with zero on the left, as shown in the
diagram above. (If your rack has screw connectors, the
screw connectors will be at the bottom.)
Position the module over the module connector,
aligning the small slot at the base of the module with
the retention bar on the rack. When positioning modules
next to each other, be sure to align the male and female
module keys at the tops of the modules before snapping
a module into position.
With the module correctly aligned, push on the module
to snap it into place.
(Optional) Use standard 4-40 x 1/2 truss-head Phillips
hold-down screws to secure both sides of each module.
CAUTION: Do not over-tighten screws.
Follow the wiring diagrams beginning on
attach modules to the devices they monitor.
Module
position zero
Module connectors
page 5
Retention bar
to
Related parts for SNAP-ODC5-I
Image
Part Number
Description
Manufacturer
Datasheet
Request
R

Part Number:
Description:
Digital I/O Module
Manufacturer:
OPTO 22
Datasheet:
Part Number:
Description:
Digital I/O Module
Manufacturer:
OPTO 22
Datasheet:

Part Number:
Description:
I/O Module
Manufacturer:
OPTO 22
Datasheet:
Part Number:
Description:
I/O Module
Manufacturer:
OPTO 22
Datasheet:

Part Number:
Description:
SNAP I/O MODULE REMOVAL TOOL
Manufacturer:
OPTO 22
Datasheet:

Part Number:
Description:
I/O Module, Snap Analog, Single Channel, 0 Volt DC To 10 Volt DC Output
Manufacturer:
OPTO 22
Datasheet:

Part Number:
Description:
I/O Module
Manufacturer:
OPTO 22
Datasheet:

Part Number:
Description:
I/O Module Rack
Manufacturer:
OPTO 22
Datasheet:

Part Number:
Description:
Analog I/O Module
Manufacturer:
OPTO 22
Datasheet:
Part Number:
Description:
Digital I/O Module
Manufacturer:
OPTO 22
Datasheet:

Part Number:
Description:
Solid State Relays, Accessories
Manufacturer:
OPTO 22
Datasheet:
