WACE PIR DANLERS, WACE PIR Datasheet
WACE PIR
Manufacturer Part Number
WACE PIR
Description
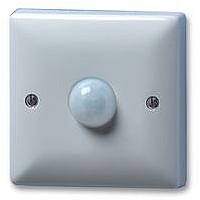
PIR SWITCH, WALL MOUNTED
Manufacturer
DANLERS
Type
PIR Switchr
Datasheet
1.WACE_PIR.pdf
(1 pages)
Specifications of WACE PIR
Beam Angle
120°
Range Max
10m
WACE PIR
The WACE PIR will switch on any type of connected load, including electronic control gear. Several WACE PIR
can be wired in parallel to control the same load. Neutral is needed on these models. Model WACE PIR is suitable
for wall or ceiling mounting.
Detection
diagram:
(wall mounted
illustrated)
1.
2.
3.
4.
5.
6.
7.
8.
9.
10.
In case of doubt, consult a qualified electrical contractor.
with this product.
The maximum load is 6 amps (1500W) with a 230-240VAC supply. There is no minimum load requirement
Read these notes before commencing work.
IMPORTANT - SITING. The switch should be placed in the area where activity is expected. If the photocell
override facility is required, the switch must be sited in a position where the daylight gives greater
illumination than the artificial light.
When mounted on the wall, at an ideal mounting height between 1 and 1.8m, the detection diagram is as
above. When mounted on the ceiling the detection range is in an elliptical cone.
Make sure power is switched off from the circuits you are working on by removing appropriate fuses, or
switching off appropriate isolating switches.
The wiring diagram is as opposite:
Connect the switch according to the wiring
diagram above. When the mains supply is initially
connected to the PIR switch it goes through its
Walk Test. This means it switches on for about 1
minute, then switches off and enters its automatic
mode. Stand away from the switch for a couple
of minutes until the switch turns off. Movement
near the switch should then cause it to switch
on (subject to the room brightness and photocell
setting), and then, if there is no more movement,
it will go off after the set time lag. If a manual
wall switch is feeding the PIR switch (see wiring
diagram) then it will go through the Walk Test each time the wall switch is switched on. By wiring the manual
wall switch in the alternative position, the supply to the PIR occupancy switch is uninterrupted and it remains
in automatic mode. It does not go through its Walk Test each time the wall switch is switched on.
Several WACE PIR can be wired in parallel to control the same load.
There are three adjustments on the underside edge of the switch as shown in the diagram.
TIME Setting the “TIME” adjustment determines how
LUX
SENS Turn fully clockwise for maximum range and sensitivity of the person detector. Turn anti-clockwise
long the lights remain on after the switch has last
detected movement. This ranges from 10 seconds to
40 minutes in nine discrete steps as follows:- 10, 20,
40 seconds, 1.25, 2.5, 5, 10, 20, 40 minutes. (These
times are approximate to +/- 20%.)
Incorporated into the switch is a photocell override
function which stops the lights coming on whenever
there is sufficient daylight. If the “LUX” knob is set
fully anti-clockwise the lights will come on no matter
how bright it is in the room. With the knob turned clockwise it has to get darker in the room before
the occupancy switch will be able to turn the lights on.
for reduced range and sensitivity.
Plan view
WACE PIR
(Spindles
facing
down)
60°
120°
Strong
Detection
Zone
i.e. person
moving arm
wall or ceiling mounted PIR occupancy switch
Secondary
Detection
Zone
i.e. person
walking
L
N
230/115VAC
installation notes
Side elevation
WACE PIR
(Spindles
facing
down)
sec
20
sec
40
sec
10
min
1.25
mins
TIME
45°
mins
WACE PIR
2.5
90°
max
mins
5
mins
APPROXIMATE SETTINGS
mins
40
mins
10
20
Strong
Detection
Zone
i.e. person
moving arm
1000 lux
∞
max
5m
LUX
min
100 lux
Secondary
Detection
Zone
i.e. person
walking
67%
min
SENS
max
10m
100%
load
Related parts for WACE PIR
Image
Part Number
Description
Manufacturer
Datasheet
Request
R

Part Number:
Description:
SWITCH, PHOTOCELL, DUSK TO DAWN
Manufacturer:
DANLERS
Datasheet:

Part Number:
Description:
SWITCH, PHOTOCELL, DUSK TO DAWN, ADJ
Manufacturer:
DANLERS
Datasheet:

Part Number:
Description:
PIR SWITCH, CEILING, FLUSH MOUNTED
Manufacturer:
DANLERS
Datasheet:

Part Number:
Description:
PIR SWITCH, SURFACE MOUNTED
Manufacturer:
DANLERS
Datasheet:

Part Number:
Description:
PIR SWITCH, FLUSH MOUNT, W/SEAL
Manufacturer:
DANLERS
Datasheet:
