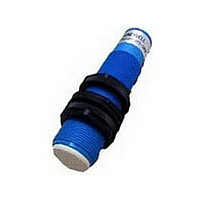
944-T4V-2D-1D1-130E Honeywell, 944-T4V-2D-1D1-130E Datasheet - Page 3

944-T4V-2D-1D1-130E
Manufacturer Part Number
944-T4V-2D-1D1-130E
Description
Proximity Sensors FIBER OPTIC PRODUCTS
Manufacturer
Honeywell
Type
Ultrasonic Sensorr
Datasheet
1.944-T4V-2D-1D1-130E.pdf
(6 pages)
Specifications of 944-T4V-2D-1D1-130E
Proximity Sensor Type
Ultrasonic
Proximity Sensor Sensing Distance Range
>=1200mm
Proximity Sensor Switching Mode
NO/NC
Mounting
Panel
Operating Temperature Classification
Commercial
Operating Supply Voltage (typ)
24V
Operating Supply Voltage (max)
30V
Output Type
PNP
Maximum Operating Temperature
+ 70 C
Supply Voltage
19 V to 30 V
Mounting Style
Panel
Sensing Distance
3500 mm
Minimum Operating Temperature
- 15 C
Features
NO / NC
Lead Free Status / RoHS Status
Compliant
944 Series
Programmation, in THREE steps of the position SP1, corresponding to a value of 0 volt/4 mA on the analog output and to the
Set Point 1 (Switching output 1). Please wire the sensor to 24 Vdc power supply.
Action
1
the LED P1 and ECHO blink, then release. P1 blinks.
2
ECHO is ON when the target is detected. *
3
- ON to set up the output 1 to Normally Open
- OFF to set up the output 1 to Normally Close
Programmation, in THREE steps of the position SP2, corresponding to a value of 10 volts/20 mA on the analog output and to the
Set Point 2 (Switching output 2). Please wire the sensor to 24 Vdc power supply.
Action
1
the LED P2 and ECHO blink, then release. P2 blinks
2
ECHO is ON when the target is detected. *
3
- ON to set up the output 2 to Normally Open
- OFF to set up the output 2 to Normally Close
* if the switch is not pressed for one minute, the sensor exits the programming mode and goes back to the previous value
3 Schritte zum Programmieren von P1 (Position 0 V/4 mA und SP1)
Aktion
1
ECHO LED und
P1 LED blinken mit ~ 2 Hz
2
bringen. ECHO an, wenn Objekt detektiert
(Ausrichthilfe);
P1 LED blinkt mit ~ 1 Hz (*)
3
Achtung : Wird Taster gedrückt während P1 an ist: SP1 hat NO-Charakteristik (Normally Open)
3 Schritte zum Programmieren von P2 (Position 10 V/20 mA und SP2)
Aktion
1
ECHO LED und
P2 LED blinken mit ~ 2 Hz
2
bringen. ECHO an, wenn Objekt detektiert
(Ausrichthilfe);
P2 LED blinkt mit ~ 1 Hz (*)
3
*Achtung :
Press the switch continuously for 8 seconds, until
Press the switch once while the LED P1 is
Press the switch continuously for 13 seconds, until
Press the switch once while the LED P2 is
Taster ca. 8 Sekunden drücken
Taster loslassen, Objekt an neue Position P1
Taster kurz drücken und loslassen
Taster ca. 13 Sekunden drücken
Taster loslassen, Objekt an neue Position P1
Taster kurz drücken und loslassen
Put the target in place at the distance P1, the LED
Put the target in place at the distance P2, the LED
Wird Taster gedrückt während P1 aus ist: SP1 hat NC-Charakteristik (Normally Close)
Wird Taster gedrückt während P2 an ist: SP2 hat NO-Charakteristik (Normally Open)
Wird Taster gedrückt während P2 aus ist: SP2 hat NC-Charakteristik (Normally Close)
Wird der Taster innerhalb einer Minute nicht betätigt, geht der Sensor zurück zur vorherigen Einstellung.
Result
Go into auto-tuning mode for set point SP1
NOTE : Be careful that the switching output SP1 toggles at
about 1 hertz during the programmation
This position of the target corresponds to :
- The switching point for the switching output 1
- The level 0 volt/4 mA for the analog output
The position SP1 is programmed in permanent memory. This
memory is unaffected by power supply cuts.
Result
Go into auto-tuning mode for set point SP2
(After 8 seconds the LED P1 blinks and then stops)
NOTE : Be careful that the switching outputs SP1 and SP2
toggle during the programmation
This position of the target corresponds to :
- The switching point for the switching output 2
- The level 10 volts/20 mA for the analog output
The position SP2 is programmed in permanent memory. This
memory is unaffected by power supply cuts.
Sensor geht in den Teach-In Mode für P1
Achtung : Der Schaltausgang SP1 schaltet mit dem Blinken
der P1 –LED
Diese Position des Objekts bestimmt
- den Schaltpunkt des Schaltausgangs SP1
- die 0 Volt/4 mA Position des analogen Ausgangs
Schalter SP1 ist auf die Stellung Permantspeicher eingestellt.
Der Speicherinhalt geht bei Einbrüchen der
Spannungsversorgung nicht verloren.
Sensor geht in den Teach-In Mode für P2
Achtung : Die Schaltausgänge SP1 / SP2 schalten mit dem
Blinken der P1/ P2 –LEDs
Diese Position des Objekts bestimmt
- den Schaltpunkt des Schaltausgangs SP2
- die 10 Volt/20 mA Position des analogen Ausgangs
Schalter SP2 ist auf die Stellung Permantspeicher eingestellt.
Der Speicherinhalt geht bei Einbrüchen der
Spannungsversorgung nicht verloren.
Ergebnis
Ergebnis
Honeywell • Control Products 3
PK 104099-10


