YB215CWSKW01-N-EB NKK Switches, YB215CWSKW01-N-EB Datasheet - Page 7
YB215CWSKW01-N-EB
Manufacturer Part Number
YB215CWSKW01-N-EB
Description
SW PB SPDT NO LAMP SEAL SQ YEL
Manufacturer
NKK Switches
Series
YB2r
Type
Standardr
Datasheet
1.YB215CWSKW01-N-CB.pdf
(7 pages)
Specifications of YB215CWSKW01-N-EB
Circuit
SPDT
Switch Function
On-Mom
Contact Rating @ Voltage
3A @ 125VAC
Actuator Type
Flush Square Button
Illumination Type, Color
-
Illumination Voltage (nominal)
-
Mounting Type
Panel Mount
Termination Style
Solder, Quick Connect - .110" (2.8mm)
Contact Form
SPDT
Mounting Style
Quick Connect
Illumination
Not Illuminated
Current Rating (max)
3 Amps
Voltage Rating Ac
125 Volts
Contact Plating
Gold
Contact Material
Silver
Actuator
Square
Contact Rating
3 A at 125 VAC
Lead Free Status / Rohs Status
Lead free / RoHS Compliant
Other names
360-2662


www.nkkswitches.com
1. Remove knurled nut.
2. Remove bezel and
3. Install LED.
4. Align tabs (B) on both
Availability
LEDs
AT634 & AT636
LED AT628
LEDs AT625G,
AT631B,
AT632F
o-ring from housing.
sides of actuator with
the projections (A) inside
of the housing and push
actuator firmly down to
snap in.
(+)
(+)
(+)
(–)
(–)
(–)
D-Flat
D-Flat
March 16, 2011
Align D-flat on LED with Part Number
on switch for appropriate polarity and
insert LED into base.
Align D-flat on LED with Part Number
on switch for appropriate polarity and
insert LED into base.
The larger metal part within the LED
represents the cathode (–). Align LED
for appropriate polarity and insert LED
into base.
Spacer
Cathode (–)
B
Part Number
This Side
SENSITIVE DEVICES
SENSITIVE DEVICES
ELECTROSTATIC
ELECTROSTATIC
Bezel
ATTENTION
ATTENTION
Actuator
Cathode
Socket (–)
Anode
Socket (+)
A
ASSEMBLY INSTRUCTIONS
Anode (+)
Housing
7850 East Gelding Drive • Scottsdale, Arizona 85260
Phone 480.991.0942 • Toll Free 877.228.9655
Blue
O-ring
5. Install the blue o-ring which
6. Align tab inside of the bezel with keyway on housing and
7. Before installing into panel,
8. Attach knurled nut behind panel and tighten. Make sure that
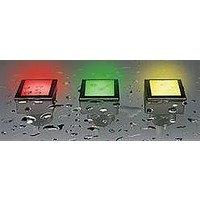
24mm Square Panel Seal Pushbuttons
was removed in step 2 at
the inside bottom of the
bezel.
bring bezel back into its original position.
make sure that the square
gasket is present at the
back of the bezel. Align
keyway on bezel with tab
in panel and push switch
all the way into the panel.
bezel and actuator fit properly and that there is no space
between bezel and panel. Do not overtighten.
Shaded Area is Printable Area for Film Inserts
Screen Print; Epoxy based ink is recommended
Bezel
Housing
(15.88) Sq
(17.4) Sq
.685
.625
Recommended Print Method:
Knurled Nut
Spacer
(0.76) Typ
.030
LEGENDS
Film Material and Thickness:
Clear Polyester, 4 mil max.
Back of
Bezel
Actuator
Keyway
Tab
Bezel
Bezel
Panel
Blue
O-ring
Panel
Bezel
0211
Related parts for YB215CWSKW01-N-EB
Image
Part Number
Description
Manufacturer
Datasheet
Request
R

Part Number:
Description:
Rocker Switches & Paddle Switches High In-rush Rated Rocker Switch
Manufacturer:
NKK Switches
Datasheet:
Part Number:
Description:
Rocker Switches & Paddle Switches High In-rush Rated Rocker Switch
Manufacturer:
NKK Switches
Datasheet:
Part Number:
Description:
Rocker Switches & Paddle Switches High In-rush Rated Rocker Switch
Manufacturer:
NKK Switches
Datasheet:
Part Number:
Description:
Rocker Switches & Paddle Switches High In-rush Rated Rocker Switch
Manufacturer:
NKK Switches
Datasheet:

Part Number:
Description:
Pushbutton Switches SPST ON(OFF) 15/32'
Manufacturer:
NKK Switches
Datasheet:

Part Number:
Description:
Pushbutton Switches SPST OFF(ON) 15/32'
Manufacturer:
NKK Switches
Datasheet:

Part Number:
Description:
Pushbutton Switches ON(OFF) NORM CLSD 3A RED PLNGR LUG 15/32
Manufacturer:
NKK Switches
Datasheet:

Part Number:
Description:
Pushbutton Switches SPDT ON-(ON)
Manufacturer:
NKK Switches
Datasheet:

Part Number:
Description:
Pushbutton Switches ON-(ON) RND BUSH MNT RED LED RED/RED CAP
Manufacturer:
NKK Switches
Datasheet:
Part Number:
Description:
Pushbutton Switches SPST ON-(OFF) STRT
Manufacturer:
NKK Switches
Datasheet:
Part Number:
Description:
Pushbutton Switches OFF(ON) NORM OPEN 3A RED CAP LUG 15/32
Manufacturer:
NKK Switches
Datasheet:
Part Number:
Description:
Pushbutton Switches ILLUM PUSHBUTTON SPDT
Manufacturer:
NKK Switches
Datasheet:
Part Number:
Description:
Pushbutton Switches OFF(ON) NORM OPEN 3A BLK CAP LUG 15/32
Manufacturer:
NKK Switches
Datasheet:
Part Number:
Description:
Pushbutton Switches SPST NO Metric Thrd Blk Plunge w/Blu Cap
Manufacturer:
NKK Switches
Datasheet:
Part Number:
Description:
Pushbutton Switches SPST OFF-(ON) NO 3A
Manufacturer:
NKK Switches
Datasheet: