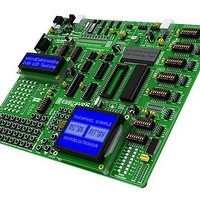
MIKROE-415 mikroElektronika, MIKROE-415 Datasheet - Page 17

MIKROE-415
Manufacturer Part Number
MIKROE-415
Description
Development Boards & Kits - AVR EASYAVR6 DEVELOPMENT SYSTEM
Manufacturer
mikroElektronika
Datasheet
1.MIKROE-415.pdf
(28 pages)
Specifications of MIKROE-415
Tool Type
AVR Development Board
Interface Type
RS-232, USB, JTAG UART
Dimensions
265 mm x 220 mm
Operating Supply Voltage
9 V to 32 V
Lead Free Status / Rohs Status
Details
EasyAVR6 Development System
EasyAVR6 Development System
13.0. Push Buttons
13.0. Push Buttons
The logic state of all microcontroller digital inputs may be changed using push buttons. Jumper J13 is used to determine the logic
state to be applied to the desired microcontroller pin by pressing the appropriate push button. The purpose of the protective resistor
is to limit the maximum current thus preventing a short circuit from occurring. If needed, advanced users may short such resistor us-
ing jumper J18. Just next to the push buttons, there is a RESET button which is not connected to the MCLR pin. The reset signal is
generated by the programmer.
By pressing any push button (PA0-PA7) when jumper J13 is in the VCC position, a logic one (5V) will be applied to the appropriate
microcontroller pin as shown in Figure 13-2.
Figure 13-2: PORTA push buttons connection schematic
Jumper J13 in the VCC position
RSTbut
Bot om view
Top view
t
C
100nF
32
VCC
R20
10K
Inside view
Side view
RESET
VCC
DIP40
PB0
PB1
PB2
PB3
PB4
PB5
PB6
PB7
RESET
VCC
GND
XTAL2
XTAL1
PD0
PD1
PD2
PD3
PD4
PD5
PD6
AREF
AVCC
GND
Jumper J18 used for shorting
protective resistor
Jumper J13 used for
selecting logic state to
be applied to the pin by
pressing button
Push buttons used for
simulating digital inputs
PC7
PC6
PC5
PC4
PC3
PC2
PC0
PD7
PA0
PA2
PA3
PA4
PA5
PA6
PA7
PC1
PA1
RESET button
VCC
PA7
PA6
PA5
Figure 13-1: Push buttons used for simulating digital inputs
PA4
PA3
PA2
PA1
PA0
0V
0V
5V
5V
J18
R58
220R
VCC
VCC
MikroElektronika
J13
J13
17


