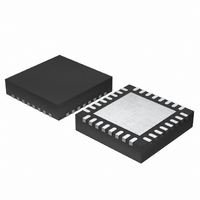
MB39A132QN-G-ERE1 Fujitsu Semiconductor America Inc, MB39A132QN-G-ERE1 Datasheet - Page 46

MB39A132QN-G-ERE1
Manufacturer Part Number
MB39A132QN-G-ERE1
Description
IC CONV DC-DC LI-ION 32QFN
Manufacturer
Fujitsu Semiconductor America Inc
Specifications of MB39A132QN-G-ERE1
Function
Charge Management
Battery Type
Lithium-Ion (Li-Ion)
Operating Temperature
25°C ~ 85°C
Mounting Type
Surface Mount
Package / Case
32-QFN
Lead Free Status / RoHS Status
Lead free / RoHS Compliant
Other names
865-1020
Available stocks
Company
Part Number
Manufacturer
Quantity
Price
Company:
Part Number:
MB39A132QN-G-ERE1
Manufacturer:
Fujitsu Semiconductor America
Quantity:
1 932
Part Number:
MB39A132QN-G-ERE1
Manufacturer:
FUJITSU/富士通
Quantity:
20 000
MB39A132
46
GND routing example
• Board layout
When designing the layout, consider the points listed below. Take account of the following points when
designing the board layout.
- Place a GND plane on the IC mounting surface whenever possible. Connect bypass capacitors connected
- Connect to the input capacitor (C
- For a loop composed of input capacitors (CIN), switching FET and SBD, minimize its current loop. When
- Create through-holes directly next to the GND pins of the input capacitor (CIN), SBD, output capacitor
- Place the boot strap capacitor (CBOOT) as close to the CB, LX pins as possible.
- Place the input capacitor (C
- Large currents momentarily flow through the nets of the OUT1, OUT2 pins, which are connected to the
- Place the bypass capacitor connected to VCC, VIN, VREF, and VB pins, and the resistance connected
- -INCx,+INCx, BATT,COMPx,RT pins is sensitive to noise. Therefore, minimize the routing of these pins
- The remote sensing (Kelvin connection) of the routing of the -INC2 and +INC2 pins are very sensitive to
PGND
to switching components to the switching GND (PGND pin), and controller components to GND (GND
pin). Separate different GND so that no large current path passes through the controller GND (GND pins).
When designing the connection of the controller GND and the switching GND, make their connection
underneath the IC. Connect PGND to the controller GND at only one point to prevent large current from
flowing to the controller GND. Connect the controller GND to PGND only at one point of PGND in order
to prevent a large current path from passing the controller GND.
on the surface layer. Do not connect to them via any through-hole.
minimizing routing and loops, give priority to this loop over others.
(Co), and connect these pins to the GND of the inner layer.
LX pin from a point close to the source pin of the high-side FET. Large currents momentarily flow through
the net of the LX pin. Use a wiring width of about 0.8 mm, and minimize the length of routing.
switching FET gate. Use a wiring width of about 0.8 mm and minimize the length of routing.
to the RT pin as close to the respective pins as possible. Moreover, connect the bypass capacitor and
the GND pin of the f
(Strengthen the connection to the internal layer GND by making through-holes in close proximity to each
of the GND pin of the IC, terminals of bypass capacitors, terminals of the fosc setting resistors.)
and keep them as far away from switching components as possible.
noise. Therefore, make their routing close to each other and keep the routing as far away from switching
components as possible.
GND
Connect the PGND to the GND at a single point
directly under the IC.
Surface layer
Inner layer
VCC
OSC
:setting resistance in close proximity to the GND pin of the IC.
IN
) and high-side FET as close together as possible. Bring out the net of the
IN
), SWFET, SBD, inductor (L), sense resistor (Rs), output capacitor (Co)
VIN
VREF
RT
Low-side FET
To LX pin
To -INC2 pin
To +INC2 pin
SBD
Example of switching components
High-side FET
L
To feedback line
Cin
R
S
To BATT pin
DS04–27265–3E
Co
PGND
VIN
V
O


