CBC-EVAL-08 Cymbet Corporation, CBC-EVAL-08 Datasheet
CBC-EVAL-08
Specifications of CBC-EVAL-08
Available stocks


Related parts for CBC-EVAL-08


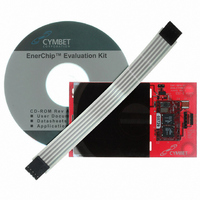
CBC-EVAL-08 Summary of contents
Page 1
... The power management block is used to protect ©2009 Cymbet Corporation • Tel: +1-763-633-1780 • www.cymbet.com DS-72-08 Rev18 Figure 2: CBC-EVAL-08 Demo Kit - 3. (inches) V OUT the EnerChips from discharging too deeply in low ambient light conditions or abnormally high current load conditions ...
Page 2
... This trace cut if an alternate solar panel connected to J8. J8 Jumper and Shunt - This connector ships with the shunt installed to protect the EH module. The shunt is removed before CBC-EVAL-08 is charged for the first time. This connector can also be used to connect an alternate solar panel to CBC-EVAL-08. PT1 Connector - An alternate piezoelectric (or other AC) energy harvesting transducer can be connected ...
Page 3
... BATOFF is low the EnerChips will always be charging when sufficient input power is available. • CHARGE is an output signal from the CBC-EVAL-08 that will be forced low under one of two conditions: » When transducer output power is very low, a low level on CHARGE indicates that the EnerChips have been charged. » ...
Page 4
... Recharge Time (to 80% of rated capacity) From 50% state-of-charge Capacity (1) Fluorescent (FL) Light Conditions Specifications subject to change without notice EVAL-08 Circuit Schematic Figure 4: EnerChip EVAL-08 Circuit Schematics ©2009 Cymbet Corporation • Tel: +1-763-633-1780 • www.cymbet.com DS-72-08 Rev18 EnerChip Solar Energy Harvesting Demo Kit Condition Min Minimum operating Lux ...
Page 5
... Vmax = final voltage to which the capacitor must be charged prior to delivering the next current pulse Vmin = initial voltage on the capacitor when charging begins Vchg = applied charging voltage on the capacitor ©2009 Cymbet Corporation • Tel: +1-763-633-1780 • www.cymbet.com DS-72-08 Rev18 EnerChip Solar Energy Harvesting Demo Kit ...
Page 6
... That amount of charge is transferred from the EnerChips into the output capacitor, which then delivers the charge to the load at the rate demanded by the radio. On the CBC-EVAL-08, there is a series diode between the output capacitor and the output pin (V In that scenario, 50% of the 100µ ...
Page 7
... If more than three pulses are in the waveform then the value of C1 should be reduced to obtain the nominal waveform. When using a power transducer other than the solar cell supplied with the CBC-EVAL-08 recommended that the solar cell be isolated from the input stage prior to connecting the other transducer. This is easily done by cutting trace connector J7 ...
Page 8
... The same algorithm used for internal pull-up/down resistors can then be used to save power. The CHARGE line on the CBC5300 has a 10MΩ pull-up resistor with a very slow rise time. Use an internal microcontroller pull-down resistor to force the CHARGE line low all of the time and then disable the pull-down resistor to check the state of the line ...
Page 9
... EnerChip device state-of-charge. This test verifies operation of the boost converter. 3) Probe the positive (bottom side) terminal of capacitor C2 on the CBC-EVAL-08. Voltage should be 4.06V, or steadily increasing if there is no output voltage. When the capacitor voltage reaches 3.8V, the output will turn on from zero volts to the voltage across capacitor C2 ...
Page 10
... This depends on many factors, including power consumption, EnerChip state-of-charge, operating temperature, etc. The on-board EnerChips provide 100µAh of discharge capacity when fully charged. Q: How long will the CBC5300 module last if I use it every day and the light most of the time? A: The CBC5300 module should last at least 10 years. ...
Page 11
... Q: What happens if the CBC-EVAL-08 is exposed to light indefinitely? A: This is not harmful to it. Q: Can I use the CBC-EVAL-08 or CBC5300 module as a permanent, stand-alone power supply? A: Yes; take the output from VBAT or VOUT2 and ground see no voltage on VBAT or VOUT2. A: Make sure the jumper is not across J7, as this shorts out the solar panel. Place the unit in a well lit area, wait for about 30 minutes, and try again ...