AT88SC-DK1 Atmel, AT88SC-DK1 Datasheet
AT88SC-DK1
Specifications of AT88SC-DK1
Available stocks


Related parts for AT88SC-DK1


AT88SC-DK1 Summary of contents
Page 1
... AT88SC-DK1 WELCOME AND QUICK START GUIDE Dear Valued Customer, Thank you for choosing CryptoMemory already know, CryptoMemory provides low-cost powerful security for your product authentication and secure data storage needs. current information, we ask that you check the CryptoMemory product website at www.atmel.com/products/SecureMem for any recent updates. ...
Page 2
... GPIO header pin for TWI data, SDA header pin for power, VCC header pin for ground, GND. n ÏÏÏÏ Software Setup 1. Install contents of AT88SC-DK1 CD into your PC 2. Check the README file for information on CryptoMemory Library Integration and Reference. Everywhere You Are ® ...
Page 3
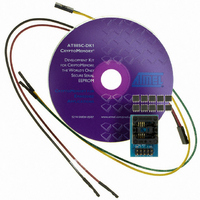
... Hardware Setup STEP 1: Insert a CryptoMemory device into the SOIC socket Align PIN 0 of the SOIC package towards the header-pins side of the adaptor board. STEP 2: Connect Power and Ground wires Use Black-Red patch cord 1. Connect the double-header end of the Green-Yellow patch cord to the SCL-SDA header pins of the adaptor board ...
Page 4
Troubleshooting 1. Make sure CryptoMemory is properly inserted and aligned in the SOIC socket. The correct orientation places PIN 0 of the SOIC package towards the adaptor board header pins. When correctly oriented, holding the adaptor board with header ...