28136 Parallax Inc, 28136 Datasheet
28136
Specifications of 28136


Related parts for 28136


28136 Summary of contents
Page 1
Propeller-powered and fully programmable! Open-source and user-hackable! ...
Page 2
... S2 Robot (part # 28136) - Please read and retain this instruction booklet. The S2 robot is not a toy. This product has moving parts and accessible electronic components when the cover is removed. Only enthusiastic or skilled experimenters should partake in S2 customization or hacking activities. BATTeRY SAFeTY: • Only adults should install and replace batteries. ...
Page 3
Package contents additional Items needed White poster board Serial Cable (#800-00003) for programming. If your computer lacks a serial port you would instead need a Parallax USB-to- Serial Adapter and cable (#28031). S2 Manual S2™ Robot Markers - up to ...
Page 4
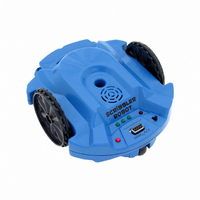
VIew infrared emitters infrared detector light sensors pen port speaker bi-color indicator LED lights programming port (for serial cable) 4 power switch power light reset button ...
Page 5
Bottom VIew wheel tire 5 line sensors pen port battery cover tail wheel ...
Page 6
Battery InstallatIon Step 1 You need 6 (six) “AA” batteries. You may use 1.5V alkaline, 1.5V standard (carbon-zinc) or 1.2V rechargeable NiMH (nickel-metal-hydride) type batteries. ! cautIon: Step 2 Step 3 •Do not mix different types of batteries. •Do not mix old batteries with new batteries. •Do not store the S2 with batteries installed. Put the power switch in the ...
Page 7
Step 4 Step 5 or DeMO PROGRAMS: There are 8 Demo play modes. The Demo play modes can be configured two ways, by pressing the reset button or by using the light sensors. If you are using the light sensors ...
Page 8
Demo 1: Light SenSorS 1 button press Step 1 Step 2 light sensors The S2 has 3 light sensors. If you place your finger on a light sensor, the S2 can “see” it because you have blocked out the light shining ...
Page 9
Step 3 In this demo mode, the left light sensor controls the left LED, the center light sensor controls the center LED, and the right light sensor controls the right LED. Other Demos will use the indicator LEDs in a ...
Page 10
Demo 2: Light Seeking Behavior 2 button presses Step 1 While you cover the right light sensor, press and release the reset button. Step 2 Listen for the beep, then uncover the light sensor. The three light sensors can detect ...
Page 11
The S2 plays a short song, then drives around the room seeking the brightest light within its view. extra * Try this dark room, hold a flashlight at floor level facing the S2. As you move the flashlight ...
Page 12
Demo 3: oBject Detection 3 button presses infrared emitters infrared detector Infrared light shines from the emitters, even though your eyes cannot see it. The S2 can detect the light after it reflects off an obstacle and bounces back to its infrared ...
Page 13
Step 3 Place an object on the floor in front of the S2. If the S2 sees the object on its right, the right green LED turns on, and the speaker plays a tone object is detected on ...
Page 14
Demo 4: avoiDing oBjectS Behavior 4 button presses Step 1 While holding your fingers on the center and right light sensors, press and release the reset button. Step 2 When you hear the beep, uncover the light sensors. The S2 ...
Page 15
The S2 has a stall sensor inside gets stalled on an object it cannot see... ...it will back up, turn, and try driving forward again. 15 ...
Page 16
Demo 5: Line SenSor 5 button presses Step 1 The S2 has two pairs of infrared emitters and detectors on its underside. With them, it can see a black line on white paper. Print out a set of black lines ...
Page 17
Step 2 While holding your finger on the left light sensor, press and release the reset button. Step 3 When you hear the beep, uncover the light sensor. Step 4 + Place the S2 on the paper, and move it ...
Page 18
Demo 6: Line FoLLowing Behavior 6 button presses Make black lines on white paper as a track for the S2 to follow. Step 1 Always protect surfaces with paper or poster board when using a marker or any other writing ...
Page 19
Step 3 While holding your fingers on the left and right light sensors, press and release the reset button. Step 4 Listen for the beep, then uncover the light sensor. The S2 does best following black lines about ¾ inch ...
Page 20
Demo 7: ScriBBLe Behavior 7 button presses Step 1 Step 2 Step 3 Always protect surfaces with paper or poster board when using a marker or any other writing instrument in your S2. Be aware that some markers can bleed ...
Page 21
Step 4 While covering the left and center light sensors, press and release the reset button. Step 5 Listen for the beep, then uncover the light sensors. Pick up the S2 and put it down on another Step part of ...
Page 22
Demo 8: amBuLance Behavior 8 button presses Step 1 While you cover all 3 light sensors, press and release the reset button. Step 2 Listen for the beep, then uncover the light sensors. The S2 drives around blaring its siren ...
Page 23
23 ...
Page 24
ProgrammIng your s2 roBot Your S2 robot contains a reprogrammable “brain,” the Parallax Propeller P8X32A-Q44 multi- core microcontroller. This Propeller P8X32A-Q44 chip comes pre-programmed with the 8 Demo modes shown in this guide. You can also write your own custom ...
Page 25
For BeginnerS The S2 GUI software lets you build your own programs with picture-coded action “blocks” that turn wheels, blink lights, play sounds, and more. Arrange them in the sequence you want, download the program, and your ...
Page 26
ProPeller tool coDe eDItor The S2’s Propeller chip may be programmed in directly in the Propeller Tool Code Editor. With the Propeller’s multi-processing capability you will have more direct control over the mo- tors, sensors, speaker and lights. Parallax tools ...
Page 27
ProPeller ProgrammIng The S2 Robot Start-up Guide will get your S2 rolling, but there’s a tremendous amount of customizing that can be accomplished using the many available Propeller programming tools. You can program the PC, ...
Page 28
Need TechNical SupporT? Please contact Parallax directly for help! Toll free Tech Support in USA or Canada (888) 99-STAMP Toll free Sales & Information in USA or Canada (888) 512-1024 Thank you for purchasing the S2 Robot! We want you to have the best possible robotics experience. learn about the whole family of Parallax ...