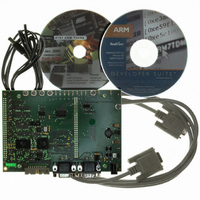
AT91EB40A Atmel, AT91EB40A Datasheet - Page 10

AT91EB40A
Manufacturer Part Number
AT91EB40A
Description
KIT EVAL FOR ARM AT91R40008
Manufacturer
Atmel
Series
AT91SAM Smart ARMr
Type
MCUr
Datasheet
1.AT91EB40A.pdf
(40 pages)
Specifications of AT91EB40A
Contents
Evaluation Board, Cable, Power Jack, CD-ROM
For Use With/related Products
AT91R40008
Lead Free Status / RoHS Status
Contains lead / RoHS non-compliant
2635C–ATARM–13-May-05
2.4
2.5
2.6
2-2
Jumper Settings
Powering Up the
Board
Measuring
Current
Consumption
on the
AT91R40008
JP1 is used to boot standard or user programs. For standard operations, set it in the
STD position; for user programs, set it to the USER position.
CB2 is used to select the core power supply between 1.8V and 3.3V.
For more information on the CB2 setting, see “Configuration Straps” on page 5-1 in Sec-
tion 5.
DC power is supplied to the board via the 2.1 mm socket (J1) shown in Figure 2-2. The
polarity of the power supply is not critical. The minimum voltage required is 7V.
Figure 2-2. 2.1 mm Socket
The board has a voltage regulator providing +3.3V and 1.8V. The regulator allows the
input voltage to range from 7V to 9V. When you switch the power on, the red LED D11
marked PWR lights up. If it does not, switch off and check the power supply
connections.
The board is designed to generate the power for the AT91 product, and only the AT91
product, through the jumpers JP5A/JP5B (V
ture enables the current consumption of the AT91 product to be measured.
See “Power Consumption Measurement Straps (JP5A/B, JP7A/B)” on page 5-3 in Sec-
tion 5 for further details.
positive (+)
or
negative (-)
2.1 mm Connector
DDIO
AT91EB40A Evaluation Board User Guide
) and JP7A/JP7B (V
DDCORE
). This fea-


