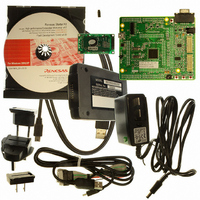
R0K42215RS001BE Renesas Electronics America, R0K42215RS001BE Datasheet

R0K42215RS001BE
Manufacturer Part Number
R0K42215RS001BE
Description
KIT STARTER FOR H8S/2215R
Manufacturer
Renesas Electronics America
Series
H8®r
Type
MCUr
Datasheets
1.R0K42215RS001BE.pdf
(33 pages)
2.R0K436079S000BE.pdf
(50 pages)
3.R0K42215RS001BE.pdf
(3 pages)
Specifications of R0K42215RS001BE
Contents
Evaluation Board
For Use With/related Products
H8S/2215
Lead Free Status / RoHS Status
Lead free / RoHS Compliant
Quick Start
1. Installation
Do not connect the E10A module until the software support has been installed.
1.
2.
3.
4.
5.
6.
7.
8.
9.
10. The Auto-update dialog box will be launched. Configure the Auto-update settings dialog to allow your installation to be checked for updates.
USB connector
J13 – E10A enable
Insert the CD into your computer’s CD-ROM drive. The CD should automatically run the installation program. If the installer does not start, browse to the CD root
folder and double click on ‘setup.exe’.
The installer will ask you which language is to be used, please choose the appropriate one and click <OK>.
On the first screen of the installer proper, click <Next>.
The License Agreement will be shown, read and click <Yes>.
The next screen asks you to pick the world region – please select and click <Next>.
Select the RSK you wish to install and click <Next> to continue.
The destination folders are specified on the next screens. It is recommended to accept the default settings. Click <Next> to continue.
Click <Next> on all screens until the Installation process commences.
After the installation the machine’s site code will be shown, this is not important at this stage, click <Next> then <Finish>.
LCD connector and module
Application headers
Analog adjust
Reset switch
User switches
User LEDs
Renesas Starter Kit for H8S/2215R
Power jack
E10A connector
E10A for Starter Kits Debug Module
D006144_11
_S01_V02
Related parts for R0K42215RS001BE
R0K42215RS001BE Summary of contents
Page 1
Quick Start USB connector LCD connector and module Application headers J13 – E10A enable Analog adjust 1. Installation Do not connect the E10A module until the software support has been installed. 1. Insert the CD into your computer’s CD-ROM drive. ...
Page 2
Connection 11. Ensure that “E10A enable” jumper (J13) is fitted. 12. Connect the E10A module to the ‘E10A’ connector on the RSK using the ribbon cable. 13. Plug in the LCD module to ‘LCD’ connector on the RSK ensuring ...
Page 3
The ‘System Clock’ dialog will appear, enter “24” into the MHz box and click <OK>. 37. The ‘ID code’ dialog will appear, enter “0000E10A” for the ID code and check the “New ID code” tick-box and click <OK>. 38. ...


