G2RV-SL500 DC24 (DC21) Omron, G2RV-SL500 DC24 (DC21) Datasheet - Page 10
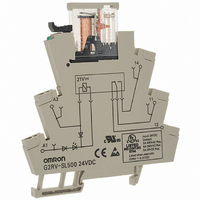
G2RV-SL500 DC24 (DC21)
Manufacturer Part Number
G2RV-SL500 DC24 (DC21)
Description
RELAY PWR SPDT 6A 24VDC DIN SKT
Manufacturer
Omron
Series
G2RVr
Specifications of G2RV-SL500 DC24 (DC21)
Relay Type
General Purpose
Contact Form
SPDT (1 Form C)
Contact Rating (current)
6A
Switching Voltage
440VAC, 125VDC - Max
Coil Type
Standard
Coil Current
13.3mA
Coil Voltage
24VDC
Turn On Voltage (max)
19.2 VDC
Turn Off Voltage (min)
2.4 VDC
Mounting Type
DIN Rail
Termination Style
Screwless Clamp
Circuit
SPDT (1 Form C)
Contact Rating @ Voltage
6A @ 30VDC
Control On Voltage (max)
19.2 VDC
Control Off Voltage (min)
2.4 VDC
Mounting Style
Socket
Power Consumption
0.3 W
Lead Free Status / RoHS Status
Lead free / RoHS Compliant
Lead Free Status / RoHS Status
Lead free / RoHS Compliant, Lead free / RoHS Compliant
Other names
G2RV-SL500-DC24DC21
G2RV-SL500DC24(DC21)
G2RVSL500DC24DC21
Z2559
G2RV-SL500DC24(DC21)
G2RVSL500DC24DC21
Z2559


Precautions
■ Precautions for Connection
• Do not move the screwdriver up, down, or from side to side while it is inserted in the hole. Doing so may cause damage to internal components
• Do not insert the screwdriver at an angle. Doing so may break the side of socket and result in a short-circuit.
• Do not insert two or more wires in the hole. Wires may come in contact with the spring causing a temperature rise or be subject to sparks.
• Insert the screwdriver along the hole wall as shown below.
• If lubricating liquid, such as oil, is present on the tip of screwdriver, the screwdriver may fall out resulting in injury to the operator.
• Insert the screwdriver into the bottom of the hole. It may not be possible to connect cables properly if the screwdriver is inserted incorrectly.
■ General Precautions
• Do not use the product if it has been dropped on the ground. Dropping the product may adversely affect performance.
• Confirm that the socket is securely attached to the mounting track before wiring. If the socket is mounted insecurely it may fall and injure
• Insure that the socket is not charged during wiring and maintenance. Not doing so may result in electric shock.
• Do not pour water or cleansing agents on the product. Doing so may result in electric shock.
• Do not use the socket in locations subject to solvents or alkaline chemicals.
• Do not use the socket in locations subject to ultraviolet light (e.g., direct sunlight). Doing so may result in markings fading, rust, corrosion, or
• Do not dispose of the product in fire.
■ Removing from Mounting Rail
To remove the socket from the mounting rail, insert the tip of screwdriver in the fixture rail, and move it in the direction shown below.
■ Wiring Procedure for G2RV-SL500 series
Wire insertion
Insert the exposed conductor into the connection hole.
No other tools are required.
Note: In case of wiring stranded wires without ferrules screwdriver
10
(e.g., deformation of the clamp spring or cracks in the housing) or cause deterioration of insulation.
(There are two wiring holes for each terminal.)
the operator.
resin deterioration.
should be inserted before inserting the wire. Screwdriver
should be removed after fully insertion of the wire.
Slim Relay
G2RV
Screwdriver hole
Wire connection hole
Wire
Wire removal
Insert the specified screwdriver into the release hole.
Removing wire.
Removing screwdriver.
Related parts for G2RV-SL500 DC24 (DC21)
Image
Part Number
Description
Manufacturer
Datasheet
Request
R

Part Number:
Description:
RELAY PWR SPDT 6A 48VAC/VDC
Manufacturer:
Omron
Datasheet:

Part Number:
Description:
RELAY PWR SPDT 6A 24VDC DIN SKT
Manufacturer:
Omron
Datasheet:

Part Number:
Description:
RELAY; E-MECH; GEN PURP; SPDT; CUR-RTG 6A; CTRL-V 24AC/DC; VOL-RTG 250/30AC/DC
Manufacturer:
Omron Automation
Datasheet:
Part Number:
Description:
RELAY; E-MECH; GEN PURP; SPDT; CUR-RTG 6A; CTRL-V 48AC/DC; VOL-RTG 250/30AC/DC
Manufacturer:
Omron Automation
Datasheet:

Part Number:
Description:
POWER RELAY, SPDT, 12VDC, 6A, PLUG IN
Manufacturer:
Omron
Datasheet:
Part Number:
Description:
POWER RELAY, SPDT, 24VDC, 6A, PLUG IN
Manufacturer:
Omron
Datasheet:

Part Number:
Description:
RELAY MODULE, SPDT, 24VDC
Manufacturer:
Omron
Datasheet:
Part Number:
Description:
RELAY; E-MECH; GEN PURP; SPDT; CUR-RTG 6A; CTRL-V 24DC; VOL-RTG 250/30AC/DC; SOCKET MNT
Manufacturer:
Omron Automation
Datasheet:
Part Number:
Description:
RELAY; E-MECH; GEN PURP; SPDT; CUR-RTG 6A; CTRL-V 12DC; VOL-RTG 250/30AC/DC; SOCKET MNT
Manufacturer:
Omron Automation
Datasheet:
Part Number:
Description:
RELAY; E-MECH; GEN PURP; SPDT; CUR-RTG 6A; CTRL-V 110AC; VOL-RTG 250/30AC/DC; PUSH-IN
Manufacturer:
Omron Automation
Datasheet:

Part Number:
Description:
RELAY PWR SPDT 6A 12VDC DIN SKT
Manufacturer:
Omron
Datasheet:

Part Number:
Description:
RELAY PWR SPDT 6A 110VAC DIN SKT
Manufacturer:
Omron
Datasheet:

Part Number:
Description:
RELAY PWR SPDT 6A 230VAC DIN SKT
Manufacturer:
Omron
Datasheet:
Part Number:
Description:
GP Power Relay & Socket
Manufacturer:
Omron
Datasheet:
