1643914-1 Tyco Electronics, 1643914-1 Datasheet
1643914-1
Manufacturer Part Number
1643914-1
Description
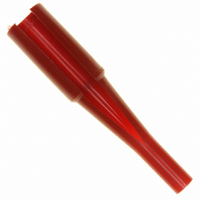
TOOL INSERTION/REMOVAL SIZE #8
Manufacturer
Tyco Electronics
Series
ELCONr
Type
Extraction Toolr
Specifications of 1643914-1
Tool Type
Insertion/Extraction Tool
Description/function
Red tool
Wire Gauge Range
8
Product
Insertion / Extraction Tool
For Use With/related Products
Circular Connector Contacts
For Use With
A36295 - CONN SOCKET #8 PCBA36294 - CONN SOCKET #8 CRIMP REMOVABLEA36280 - CONN PIN #8 PCB SILVERA36279 - CONN PIN #8 CRIMP SILVER
Lead Free Status / RoHS Status
Not applicable / Not applicable
Other names
A36311


1. INTRODUCTION
Insertion/Extraction Tools are designed to remove
Drawer and Domino Series crimp type and threaded
contacts from connectors. Each tool is color coded for
the purpose of the tool and the size of the contact.
See Figure 1. Read these instructions carefully before
inserted or removing any contacts.
2. DESCRIPTION
The tool consists of a plastic handle, and two plastic
insertion tips each with a slot. When properly inserted
into the connector contact cavity, the tool tip fits
between the contact wire barrel and the connector
retention clips, and supports the wire to allow the
contact to be inserted into or removed from the
connector.
3. USING THE TOOL
3.1. Insertion
E
DANGER
NUMBER
1. Slide the contact wire barrel into the end of the
tool tip until the tip butts against the shoulder of the
contact.
PART
To prevent possibility of injury, always hold the
tool handle when inserting or removing contacts.
Do NOT hold tool with unused tip against the
palm of your hand.
INSERTION
TIP COLOR
TOOL
Figure 1
EXTRACTION
TIP COLOR
Insertion/Extraction Tools
for ELCON Circular Contacts
CONTACT
CONTACT
SIZE
3.2. Extraction
CAUTION
Hold Wire
Against
Serrations
2. Place the wire over the slot in the tool tip. Apply
light pressure on the wire until the tip spreads and
allows the wire to enter the tip.
3. Align the contact and tool tip with the desired
connector contact cavity.
4. Hold the wire against the serrations in the tool
handle, and push the tool straight into the contact
cavity until the contact bottoms.
5. Remove the tool from the contact. Pull back
lightly on the wire to make sure that the contact is
secure in the cavity.
1. Align the tool tip with the desired connector
contact cavity.
2. Gently push the tool tip straight into the contact
cavity and over the contact wire barrel until it butts
against the shoulder of the contact.
3. Place the wire over the slot in the tool tip. Apply
light pressure on the wire until the tool tip spreads
and allows the wire to enter the tip.
4. Hold the wire against the serrations in the tool
handle, and gently pull back. Tool 1643914–1,
1643921–1, and 1643922–1 do not have
serrations.
!
Hold Tool Handle
Do NOT use excessive force when removing
contacts. If you experience difficulty in removing
the contact, re-insert the tool tip, making sure
that the tip is properly positioned in the cavity,
and try again.
Figure 2
www.tycoelectronics.com
408-10159
1
1643914-1 Summary of contents
Page 1
... Hold the wire against the serrations in the tool handle, and gently pull back. Tool 1643914–1, 1643921–1, and 1643922–1 do not have serrations. CAUTION Do NOT use excessive force when removing contacts ...
Page 2
... Store the tool in a clean, dry place and clean the tool with a soft, lint–free cloth. Additional tools can be purchased from CUSTOMER SERVICE (38–35) TYCO ELECTRONICS CORPORATION PO BOX 3608 HARRISBURG PA 17105–3608 5. REVISION SUMMARY S Initial release of instruction sheet Tyco Electronics Corporation 408-10159 Rev A ...