3320 3M, 3320 Datasheet - Page 3
3320
Manufacturer Part Number
3320
Description
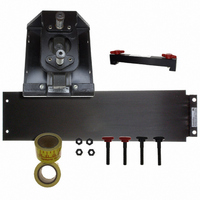
CABLE SHEAR FOR 3640
Manufacturer
3M
Datasheet
1.3457-2.pdf
(4 pages)
Specifications of 3320
Lead Free Status / RoHS Status
Not applicable / Not applicable
Other names
05400732614
3320
3M9427
5400732614
80-6100-9555-8
80610095558
3320
3M9427
5400732614
80-6100-9555-8
80610095558
Available stocks
Company
Part Number
Manufacturer
Quantity
Price


Fig. 3
4.
5.
Operation:
Use:
1.
2.
3.
4.
5.
Press the tape down onto the table, the length as
required by the number of table assemblies installed.
Cut the tape along the edge of the table where the
cutting board meets the table and remove the tape from
the cutting board.
Note: The tape is made with a surface suitable for ink
Move the cable stop along the table until the left side is
set for the proper cable length; tighten the two set
screws.
Insert cable from either side or the front of the shear.
Guide cable along either the front or rear edge of the
shear to obtain proper alignment, assuring a right angle
cut.
Depress the assembly press handle until the arms stop
against the casting. If the cable is not fully sheared or
excessive pressure is required, fine-tune the shut
height setting to correct.
through the shear to the desired length.
Note: When shearing very thick cable, it is necessary
Subsequent cuts can be made by feeding the cable
marking so additional numbers can be added as
desired.
to use the incoming cable to push the cut cable
out so the plastic guard does not drop. If a
problem is encountered in inserting cable from
side, insert from the front.
Fig. 4
Maintenance:
Cutting Board (Replacement Board 3457-1 A)
1. When a clean cut is no longer obtainable, loosen the
2. Replacement boards are available and can be installed
Cutting Blade (Replacement Blade 3449-1A)
1. Depress the assembly press handle until the arms stop
2. With a 3/32” allen wrench, loosen the two set screws
3. Release the assembly press handle and remove the old
4. With the press handle most of the way down, slide a
5. When blade is properly located, depress the press
6. Tighten the two blade holding set screws.
cutting board hold down screw, move the board 1/16”
to the left and tighten the screw. The board can also be
turned 180° for more use of one side, then turned over
and the procedure repeated.
as in #1 above.
against the casting. The two set-screws are now visible
through the plastic guard on the right side of the blade
holder.
(figure 4).
blade.
new blade into the slot from the front. (Use the old
blade to push the new one into place, centering the
blade over the cutting board.)
handle until the arms stop against the casting.
3449-6
3457-2