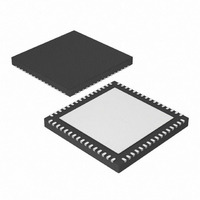
PIC32MX320F128H-80I/MR Microchip Technology, PIC32MX320F128H-80I/MR Datasheet - Page 17

PIC32MX320F128H-80I/MR
Manufacturer Part Number
PIC32MX320F128H-80I/MR
Description
IC PIC MCU FLASH 128KX32 64-QFN
Manufacturer
Microchip Technology
Series
PIC® 32MXr
Datasheets
1.MA320002.pdf
(208 pages)
2.DM320001.pdf
(44 pages)
3.PIC32MX320F032H-40IPT.pdf
(48 pages)
4.PIC32MX320F032H-40IPT.pdf
(66 pages)
5.PIC32MX320F032H-40IPT.pdf
(22 pages)
6.PIC32MX320F064H-40IMR.pdf
(172 pages)
Specifications of PIC32MX320F128H-80I/MR
Core Size
32-Bit
Program Memory Size
128KB (128K x 8)
Core Processor
MIPS32® M4K™
Speed
80MHz
Connectivity
I²C, IrDA, LIN, PMP, SPI, UART/USART
Peripherals
Brown-out Detect/Reset, POR, PWM, WDT
Number Of I /o
53
Program Memory Type
FLASH
Ram Size
16K x 8
Voltage - Supply (vcc/vdd)
2.3 V ~ 3.6 V
Data Converters
A/D 16x10b
Oscillator Type
Internal
Operating Temperature
-40°C ~ 85°C
Package / Case
64-VFQFN, Exposed Pad
Controller Family/series
PIC32
No. Of I/o's
53
Ram Memory Size
16KB
Cpu Speed
80MHz
No. Of Timers
6
No. Of Pwm Channels
5
Embedded Interface Type
EUART, I2C, PSP, SPI
Processor Series
PIC32MX3xx
Core
MIPS
Data Bus Width
32 bit
Data Ram Size
16 KB
Interface Type
I2C, JTAG, SPI, TWI, UART
Maximum Clock Frequency
80 MHz
Number Of Programmable I/os
53
Number Of Timers
5
Operating Supply Voltage
2.3 V to 3.6 V
Maximum Operating Temperature
+ 125 C
Mounting Style
SMD/SMT
3rd Party Development Tools
52713-733, 52714-737
Development Tools By Supplier
PG164130, DV164035, DV244005, DV164005, DM320001, DM320002, MA320001
Minimum Operating Temperature
- 40 C
On-chip Adc
10 bit
Lead Free Status / RoHS Status
Lead free / RoHS Compliant
For Use With
876-1000 - PIC32 BREAKOUT BOARDAC164327 - MODULE SKT FOR 64TQFP
Eeprom Size
-
Lead Free Status / Rohs Status
Details
© 2009 Microchip Technology Inc.
2.4.2
Perform the following steps to view the tutorial:
1. After your computer has rebooted, the Getting Started Tutorial menu opens.
2. View the tutorial instructions for connecting to the starter kit board and running
If you performed the installation steps as you followed along in the Getting Started
tutorial, skip to Section 2.5 “Starting the Tutorial Project” on page 16.
If you did not, continue to the next page for instructions about how to connect the board
and install the device driver.
2.4.3
Using the supplied USB cable, connect the board to an open USB port on your com-
puter. (A USB hub that is not bus-powered can also be used.) Connect the other end
of the cable into the USB connector on the starter kit board.
Check the board: the green power LED D3 should be lit. If it is not, check the
connections at the port, hub, and board.
2.4.4
Perform the following steps to install the USB device driver:
1. When the USB cable is connected, the “Found New Hardware Wizard” dialog
FIGURE 2-2:
Note:
the tutorial project.
box opens, as shown in Figure 2-2. When asked whether to install the software
automatically or install from a list or specific location, select “Install software
automatically” and click Next.
View the Getting Started Tutorial
Connect the Starter Kit Board
Install the USB Device Driver
The USB driver installation steps described here refer specifically to
installing the driver on a Microsoft Windows XP operating system.
FOUND NEW HARDWARE WIZARD
DS61144D-page 13


