E3X-NA11 Omron, E3X-NA11 Datasheet - Page 13
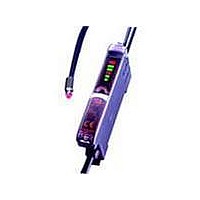
E3X-NA11
Manufacturer Part Number
E3X-NA11
Description
NPN GEN PURPOSE FO AMP
Manufacturer
Omron
Series
E3X-NAr
Type
Standard Fiber Optic Sensorr
Specifications of E3X-NA11
Output Type
NPN
Amplifier Type
Standard
Voltage - Supply
12 V ~ 24 V
Current - Supply
35mA
Mounting Type
DIN Rail
Sensor Output
NPN
Length/height, External
31.5mm
Sensor Housing
Rectangular
Sensor Input
Fiber Optic
External Width
10mm
Supply Voltage Max
24V
Switch Terminals
Wire Leaded
Supply Voltage Min
12V
Rohs Compliant
Yes
External Depth
64.3mm
Fiber Optic Sensor Type
Standard Fiber Optic Sensor
Lead Free Status / RoHS Status
Lead free / RoHS Compliant
Lead Free Status / RoHS Status
Lead free / RoHS Compliant, Lead free / RoHS Compliant
Other names
E3XNA11


Do not use the product in atmospheres or environments that
exceed product ratings.
Amplifier Units
● Designing
Communications Hole
The hole on the side of the Amplifier Unit is a communications
hole for preventing mutual interference when Amplifier Units
are mounted side-by-side. The E3X-MC11 Mobile Console
(order separately) cannot be used.
If an excessive amount of light is received via the Sensor, the
mutual interference prevention function may not work. In this
case, make the appropriate adjustments using the sensitivity
adjuster.
The mutual interference prevention function will not operate
when the E3X-SD/NA is used side-by-side with E3X-DA-N
models.
● Mounting
DIN Track Mounting/Removal
Mounting Amplifier Units
1. Mount the Amplifier Units one at a time onto the DIN track.
2. Slide the Amplifier Units together, line up the clips, and
Removing Amplifier Units
Slide Amplifier Units away from each other, and remove from
the DIN track one at a time. (Do not attempt to remove
Amplifier Units from the DIN track without separating them
first.)
Note 1. The specifications for ambient temperature will vary according to the
press the Amplifier Units together until they click into place.
2. Always turn OFF the power supply before mounting or removing
number of Amplifier Units used together. For details, refer to Ratings
and Specifications.
Amplifier Units.
Clip
Precautions for Correct Use
Click into
place
Fiber Connection and Disconnection
The E3X Amplifier Unit has a lock lever. Connect or
disconnect the fibers to or from the E3X Amplifier Unit using
the following procedures:
1. Connection
Open the Protective Cover, insert the fibers according to the
fiber insertion marks on the side of the Amplifier Unit, and
lower the lock lever.
2. Disconnection
Remove the Protective Cover and raise the lock lever to pull
out the fiber.
Note:To maintain the fiber properties, confirm that the lock is
3. Precautions for Fiber Connection/Disconnection
Be sure to lock or unlock the lock lever within an ambient
temperature range between −10°C and 40°C.
● Operating Environment
Ambient Conditions
If dust or dirt adhere to the hole for optical communications, it
may prevent normal communications. Be sure to remove any
dust or dirt before using the Units.
● Other
Protective Cover
Be sure to mount the Protective Cover before use.
Lock lever
Fiber
released before removing the fiber.
Fiber insertion mark
Locked
Unlocked
10.7 mm
Protective Cover
Insertion position
E3X-SD/-NA
13
Related parts for E3X-NA11
Image
Part Number
Description
Manufacturer
Datasheet
Request
R

Part Number:
Description:
SENSOR PHOTOAMP FIBER 2M CBL
Manufacturer:
Omron
Datasheet:

Part Number:
Description:
CONN READY NPN GEN PURPOSE FO
Manufacturer:
Omron
Datasheet:
Part Number:
Description:
CONN READY PNP GEN PURPOSE FO
Manufacturer:
Omron
Datasheet:
Part Number:
Description:
PNP GREEN LED GEN PURPOSE FOA
Manufacturer:
Omron
Datasheet:
Part Number:
Description:
AMANUAL FA NPN RED M8 CONN
Manufacturer:
Omron
Datasheet:

Part Number:
Description:
PNP GEN PURPOSE FO AMP
Manufacturer:
Omron
Datasheet:

Part Number:
Description:
AUTOTUNE NPN
Manufacturer:
Omron
Datasheet:
Part Number:
Description:
AUTOTUNE NPN TMR REMOTE TCH
Manufacturer:
Omron
Datasheet:
Part Number:
Description:
AUTOTUNE PNP TMR REMOTE TCH
Manufacturer:
Omron
Datasheet:

Part Number:
Description:
PREWIRED DIGITAL NPN FO AMP
Manufacturer:
Omron
Datasheet:

Part Number:
Description:
G6S-2GLow Signal Relay
Manufacturer:
Omron Corporation
Datasheet:
Part Number:
Description:
Compact, Low-cost, SSR Switching 5 to 20 A
Manufacturer:
Omron Corporation
Datasheet:
Part Number:
Description:
Manufacturer:
Omron Corporation
Datasheet: