D38999/26WG11PN-LC ITT Cannon, D38999/26WG11PN-LC Datasheet - Page 29
D38999/26WG11PN-LC
Manufacturer Part Number
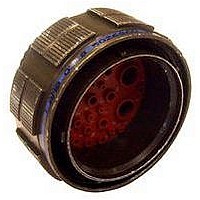
D38999/26WG11PN-LC
Description
CIRCULAR CONN PLUG SIZE 21, 11POS, CABLE
Manufacturer
ITT Cannon
Datasheet
1.MS27656E11F35P.pdf
(32 pages)
Specifications of D38999/26WG11PN-LC
Connector Body Material
Aluminum Alloy
Gender
Plug
Contact Gender
Pin
Connector Mounting
Cable
Connector Shell Size
21
Insert Arrangement
21-11
Connector Type
Circular Military
Lead Free Status / RoHS Status
Contains lead / RoHS non-compliant


www.ittcannon.com
Dimensions shown in mm
Specifications and dimensions subject to change
A A s s s s e e m m b b l l y y I I n n s s t t r r u u c c t t i i o o n n s s
Wire Stripping
Strip insulation from end of wire to be crimped.
(See table for proper stripping dimensions.) Do not
cut or damage wire strands.
Contact Crimping
Contact Insertion
Contact Extraction
MIL-DTL-38999 Series I, II, III Connectors
1. Insert stripped wire into contact crimp pot.
Wire must be visible thru inspection hole.
1. Remove hardware from plug or receptacle and
slip over wire bundle in proper order for
reassembly.
4. Hold wire firmly in tool and extract wired
contact and tool. Repeat operation for all
contacts to be extracted.
1. Remove hardware from plug or receptacle
and slide hardware back along wire bundle.
VISUAL INSPECTION HOLE
2. Using correct crimp tool and locator, cycle the tool once to be sure the indentors are open. Insert
contact and wire into locator. Squeeze tool handles firmly and completely to insure a proper crimp. The
tool will not release unless the crimp indentors in the tool head have been fully actuated.
2. Using proper plastic or metal insertion tool for
corresponding contact, position wire in tip of the tool
so that the tool tip butts up against the contact
shoulder.
5. Fill any empty wire cavities with wire sealing plugs, and
4. Remove tool and pull back lightly on wire to make
sure contact is properly seated. Repeat operation with
remainder of contacts to be inserted, beginning with
the center cavity and working outward in alternating
rows.
2. Using plastic or metal extraction tool with proper
color code corresponding to contact size, place wire in
tool.
29
A
3. Release crimped contact and wire from tool. Be
certain the wire is visible thru inspection hole in
contact.
* For reference only
Cannon KJL/KJ/KJA
Wire Size
22D or 22M*
5. After all contacts are inserted, fill any empty
cavities with wire sealing plugs, Ressemble plug
or receptacle hardware.
3. Insert tool into contact cavity until tool tip
bottoms against the contact shoulder, expanding
clip retaining tines.
3. Press tool against contact shoulder and, with
firm and even pressure, insert wired contact and
tool tip into center contact cavity. A slight click may
be heard as metal retaining tines snap into place
behind contact shoulder.
6. Reassemble plug or receptacle.
20
16
12
.125 (3.18)
.188 (4.77)
.188 (4.77)
.188 (4.77)
A
Related parts for D38999/26WG11PN-LC
Image
Part Number
Description
Manufacturer
Datasheet
Request
R

Part Number:
Description:
D38999 Series 3
Manufacturer:
Souriau Connection Technology
Datasheet:
Part Number:
Description:
D38999 Series 3
Manufacturer:
Souriau Connection Technology
Datasheet:
Part Number:
Description:
D38999 Series 3
Manufacturer:
Souriau Connection Technology
Datasheet:
Part Number:
Description:
D38999 Series 3
Manufacturer:
Souriau Connection Technology
Datasheet:
Part Number:
Description:
D38999 Series 3
Manufacturer:
Souriau Connection Technology
Datasheet:

Part Number:
Description:
EMI SHIELDED ENDBELL WITH 4-40 EXTENDED JACKSCREW
Manufacturer:
ITT Cannon
Datasheet:
Part Number:
Description:
UNIVERSAL CONTACT 1.8MM SMD
Manufacturer:
ITT Cannon
Datasheet:
Part Number:
Description:
UNIVERSAL CONTACT 2.5MM SMD
Manufacturer:
ITT Cannon
Datasheet:
Part Number:
Description:
UNIVERSAL CONTACT 3.5MM SMD
Manufacturer:
ITT Cannon
Datasheet:
Part Number:
Description:
PLUG STR CRIMP SMB RG174/U 316/U
Manufacturer:
ITT Cannon
Datasheet:
Part Number:
Description:
TRI TNM RECP M FLG SEAL 0-12
Manufacturer:
ITT Cannon
Datasheet:
Part Number:
Description:
CONN RCPT 6POS JAM NUT W/SCKT
Manufacturer:
ITT Cannon
Datasheet:

Part Number:
Description:
TRI R E/B STR C/C SEAL SZ 18
Manufacturer:
ITT Cannon
Datasheet:
Part Number:
Description:
CAB CON 16S PIN 18/16 F80 SILVER
Manufacturer:
ITT Cannon
Datasheet:

Part Number:
Description:
TRI CON SKT 16-18 TIN ST/LO
Manufacturer:
ITT Cannon
Datasheet: