PIT43TMB5 BANNER ENGINEERING, PIT43TMB5 Datasheet - Page 2
PIT43TMB5
Manufacturer Part Number
PIT43TMB5
Description
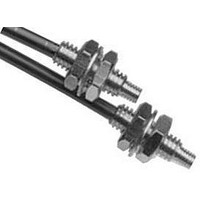
Plastic Fiber Optic Assembly
Manufacturer
BANNER ENGINEERING
Datasheet
1.PIT43TMB5.pdf
(2 pages)
Specifications of PIT43TMB5
Fiber Diameter
1mm
Cable Assembly Type
Individual Fiber
No. Of Fibers
1
Ferrule Material
Acrylic
Cable Length
1m
Fiber Type
Plastic


D12 Series
D12 Series sensors for
use with plastic fiber optic
assemblies include sensors
with the letters FP in their
model number suffix.
Q19 Series
Q19 Series sensors for
use with plastic fiber optic
assemblies include sensors
with the letters FP in their
model number suffix.
PC44 Series
PC44 Series sensors for
use with plastic fiber optic
assemblies include sensors
with the letters FP in their
model number suffix.
OMNI-BEAM, MAXI-BEAM, VALU-BEAM,
Q45 Series
OMNI-BEAM, MAXI-
BEAM, VALU-BEAM,
and Q45 Series sensors for
use with plastic fiber optic
assemblies include sensors
with the letters FP in their
model number suffix.
MINI-BEAM and ECONO-
BEAM sensors for use with
plastic fiber optic assem-
blies include sensors with
the letters FP in their model
number suffix.
MINI-BEAM, ECONO-BEAM
Banner Engineering Corp. 9714 Tenth Ave. No., Minneapolis, MN 55441
Fiber Installation Instructions
Install the plastic fiber optic
assembly(s) as follows:
Install the plastic fiber optic assembly(s)
as follows:
1) Prepare the sensor ends of the fibers
2) Slide the fiber gripper up (open).
3) Gently insert the prepared plastic fiber
Install the plastic fiber optic assembly(s)
as follows:
1) Prepare the sensor ends of the fibers
2) Unlock (slide up) the fiber gripper.
3) Gently insert the prepared plastic fiber
Install the plastic fiber optic assembly(s)
as follows:
1) Prepare the sensor ends of the fibers
2) Raise (liftup) the fiber gripper door.
3) Gently insert the prepared plastic fiber
Install the plastic fiber optic assembly(s)
as follows:
Prepare the sensor ends of the
fibers (see page 1, bottom).
Loosen the clamp screw on the
sensor face.
Follow steps 1-3 in the
drawing, right.
(see page 1, bottom).
sensor ends into the ports as far as they
will go. Slide the fiber gripper down to
lock.
(see page 1, bottom).
sensor ends into the ports as far as they
will go. Slide the fiber gripper down to
lock.
(see page 1, bottom).
sensor ends into the ports as far as they
will go. Lower the fiber gripper to
lock.
Prepare the sensor ends of the fibers
(see page 1, bottom).
Loosen the clamp screw on the sensor
face.
Follow steps 1-3 in the drawing, right.
Telephone: (763) 544-3164
FAX: (763) 544-3213
Related parts for PIT43TMB5
Image
Part Number
Description
Manufacturer
Datasheet
Request
R

Part Number:
Description:
Photoelectric Sensor
Manufacturer:
BANNER ENGINEERING
Datasheet:

Part Number:
Description:
Photoelectric Sensor
Manufacturer:
BANNER ENGINEERING
Datasheet:

Part Number:
Description:
LEDIR70XD4-XM-81039 MAX INTENS STROBE ONLY NO BANNER MARKS
Manufacturer:
BANNER ENGINEERING
Part Number:
Description:
M18SP6DL-72225 LABELED MOELLER NO BANNER MARKINGS BULK PACK
Manufacturer:
BANNER ENGINEERING
Part Number:
Description:
M18SP6DLQ-72226 LABLED MOELLER NO BANNER MARKINGS BULK PACK
Manufacturer:
BANNER ENGINEERING
Part Number:
Description:
M18SP6L-72223 LABELED MOELLER NO BANNER MARKINGS BULK PACK
Manufacturer:
BANNER ENGINEERING
Part Number:
Description:
M18SP6LQ-72224 LABELED MOELLER NO BANNER MARKINGS BULK PACK
Manufacturer:
BANNER ENGINEERING
Part Number:
Description:
P4D1-77908 P4 DRIVER GENERIC NO BANNER MARKINGS RESALE TO CUSTOMER
Manufacturer:
BANNER ENGINEERING
Part Number:
Description:
Photoelectric Sensor
Manufacturer:
BANNER ENGINEERING
Datasheet:

Part Number:
Description:
Programmable Indicator Light
Manufacturer:
BANNER ENGINEERING
Datasheet:
Part Number:
Description:
INDICATOR LED PANEL 50MM GRN/RED/YEL 30V
Manufacturer:
BANNER ENGINEERING
Datasheet:
Part Number:
Description:
Programmable Indicator Light
Manufacturer:
BANNER ENGINEERING
Datasheet: