XLNPC B&K Precision, XLNPC Datasheet
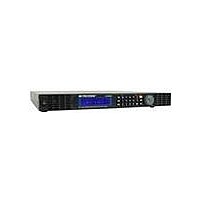
XLNPC
Specifications of XLNPC


Related parts for XLNPC


XLNPC Summary of contents
Page 1
Model: XLN3640, XLN6024, XLN8018, XLN10014 High Power Programmable DC Power Supply USER MANUAL ...
Page 2
Safety Summary The following safety precautions apply to both operating and maintenance personnel and must be observed during all phases of operation, service, and repair of this instrument. Before applying power, follow the installation instructions and become familiar with the ...
Page 3
DO NOT SUBSTITUTE PARTS OR MODIFY THE INSTRUMENT Do not install substitute parts or perform any unauthorized modifications to this instrument. Return the instrument to B&K Precision for service and repair to ensure that safety features are maintained. WARNINGS AND ...
Page 4
Storage When this device is not in use, properly package it and store environment suitable for storage (if present in a good preserving environment, the packaging process can be waived). Freight While moving this product, move it ...
Page 5
... Table of Contents 1. Preface ...................................................................................................... 1 1.1 Products Outline ................................................................................ 1 1.2 Features ............................................................................................. 2 1.3 Specifications .................................................................................... 4 2. Cautions Before Using ............................................................................ 9 2.1 Check and Confirm Accessories before Using .................................. 9 2.2 Operation Instructions ....................................................................... 9 2.3 Ambient Environment ....................................................................... 9 2.4 Storage ............................................................................................. 10 2.5 Power-line voltage ........................................................................... 10 2.6 Fuses ................................................................................................ 10 2.7 Warm-up Time ................................................................................. 11 2.8 Power-off procedure ........................................................................ 11 2.9 Cautions in Operation ...
Page 6
Control Voltage Output with Rotary knob ....................................... 34 4.7 Timer Function ................................................................................ 34 4.8 Series (cascade) / Parallel Mode Setting ......................................... 35 4.8.1 Parallel Connection Setting ........................................................ 35 4.8.2 Series Mode Setting ................................................................... 37 4.8.3 Error Message of Series/Parallel ...
Page 7
... State Bit Definition .......................................................................... 73 6.7 LAN Communication (-GL verions) ............................................... 74 Using Web Server........................................................................................... 74 Main Page (Home) .................................................................................. 74 Using Telnet ............................................................................................ 77 Using Sockets .......................................................................................... 77 7. Assemble Accessories ............................................................................ 78 7.1 Assemble Rack Mount Brackets ..................................................... 78 7.2 Assembly of Output Protective Cover (XLN6024/XLN8018/XLN10014) .................................................. 79 7.3 Assembly of Remote Sense Protective Cover (XLN6024/XLN8018/XLN10014) .................................................. 80 8. Accessories ............................................................................................. 81 9 ...
Page 8
Preface 1.1 Products Outline B&K Precision models XLN3640/XLN6024/XLN8018/XLN10014 are programmable DC power supplies with single outputs that offer the maximum power output up to 1440 watts ( V/ V/ ...
Page 9
Features 1) Output Voltage & Current Voltage output range: (XLN10014) Current output range: (XLN10014) Power output range: 2) Rotary knob, numerical keys and functions keys The rotary knob can be used to rapidly change the output voltage setting and ...
Page 10
UUT by accidentally entering the wrong settings. 6) Series & parallel connection mode The series-parallel connection mode of two or more units (maximum to 4 units) significantly increases the combined output power to a maximum of 5760 W. In parallel ...
Page 11
Specifications XLN3640/XLN6024 Specifications Output Rating Output Voltage Output Current Output Power Output Protection OVP Adjustment Range OVP Accuracy Line Regulation Voltage Current Load Regulation Voltage Current Ripple/Noise (20Hz-20MHz) Normal Mode Voltage ( ≥ 0 max. power) Normal ...
Page 12
... Standard Interface Transient Response Time Efficiency AC Line Rated Input Voltage Tolerance/Variation in Voltage Rated Frequency Maximum Rated Input Power Temperature Ratings(O) Temperature Ratings(S) Dimensions(W*H*D) Weight Standard Accessories Standard Interface Optional Interface <50 ms 0.99 (Full load) 2V ≤ ≤ ≤ ≤ 1000 ms USB ≤ ...
Page 13
XLN8018/XLN10014 Specifications Output Rate Output Voltage Output Current Output Power Output Protection OVP Adjustment Range OVP Accuracy Line Regulation Voltage Current Load Regulation Voltage Current Ripple/Noise (20Hz-20MHz) Normal Mode Voltage ( ≥ 0 max. power) Normal Mode Current ...
Page 14
... AC Line Rated Input Voltage Tolerance/Variation in Voltage Rated Frequency Maximum Rated Input Power Temperature Ratings(O) Temperature Ratings(S) Dimensions(W*H*D) Weight Standard Accessories Standard Interface Option Interface Specifications and information is subject to change without notice <50 ms ≥ 0.99 (Full load ≤ ≤ ≤ ≤ 1000 ms ≤ ...
Page 15
Features of models XLN3640/XLN6024/XLN8018/XLN10014: Graphical, easy to read LCD display Compact, high efficiency and power density output connector for quick connectivity Convenient numerical & function keys Store and recall 10 instrument settings ...
Page 16
... Cautions Before Using 2.1 Check and Confirm Accessories before Using After receiving this product, please verify the items received in accordance with the ones listed below: 1. The appearance of the products is without scratch or other damages. 2. Standard parts as shown in parts list of section 8. 2.2 Operation Instructions In order to avoid damaging the instrument due to improper operation, be sure to read this user manual ...
Page 17
Storage The storage temperature range of this product is within -10ºC - 70ºC and R.H. should be within 80% without moisture condensing. If not operating this product for a long time interval, pack it with original packaging or similar ...
Page 18
Warm-up Time The XLN series is fully operable upon switching the power on. However, to reach the specified equipment accuracy, please allow the supply to warm up for at least 30 minutes. 2.8 Power-off procedure When the supply is ...
Page 19
Front Panel Operation 3.1 XLN3640/XLN6024/XLN8018/XLN10014 Panel 1 3.1.1 Front Panel (1) Power switch: Please consult the “Cautions before use” section before turning on power switch. (2) Display: 192x32 Graphic LCD Module (3) Current setting Press to set up the ...
Page 20
ESC/CLR Press this button to clean up numerical setting or jump to the previous screen. (7) Numerical keys They are used to directly input the voltage or current value or choose the setting option in Menu screen. (8) Down/Right/Store ...
Page 21
Output Control the On/Off of the output power. (12) The rotary knob: Use this knob to adjust voltage or current (press cursor display first). This is adjustable when output is ON. (13) Enter : This key is the confirmation ...
Page 22
SYSTEM SETTING 2 . OUTPUT SETTING 3 . PROTECTION . TIMER CONTROL 8 . CALIBRATION 1. SYSTEM SETTING: Pressing key in the first page of Menu Setting will enter the ...
Page 23
Data bit Parity check Stop bit *When entering the Remote mode, screen will present RMT indicator as shown in the following picture GPIB ADDRESS: EXTERN CONTROL CONFIG: IP ADDRESS: KEY LOCK: *Simultaneously pressing both screen can ...
Page 24
L L BEEP: LCD BACKLIT: RECALL DEFAULT Ext 5V OUTPUT: POWER ON STATE: 2. OUTPUT SETTING: Press in the first page of Menu Setting to enter OUTPUT SETTING menu ...
Page 25
F VOLT LIMIT: CURR LIMIT: VOLT SLEW RATE: CURR SLEW RATE: CONNECTION DROP: EXT FULL VOLT: 3. PROTECTION SETTING (PROTECTION) Press key in the first screen of “Menu Setting” to enter PROTECTION menu. OVP = OFF OCP = OFF OPP ...
Page 26
OVP:turns on/off the overvoltage protection OCP:turns on/off the overcurrent protection OPP:turns on/off the overpower protection Enable/disable the protection of the change CV TO CC: from mode Enable/disable the protection of the change CC TO CV: from CC ...
Page 27
F 6. SPECIAL TEST FUNCTION Press in the second screen of “Menu Setting” to enter SPECIAL TEST FUNCTION menu 6.1 CURRENT COUNTER TEST: Press CURRENT COUNTER TEST screen Refer to “Current Counting” section ...
Page 28
TIMER CONTROL Press in the third page of Menu Setting to enter TIMER CONTROL screen. TIMER: TIME: 8. CALIBRATION Press in the third page of “Menu Setting” to enter CALIBRATION menu. Users must enter the password to ...
Page 29
A. Connect power supply output terminal to DVM (as shown in Figure 1 below). Turn on the supply. Once the unit enters the main page, press MENU and select “8. Calibration” and key in password “13579” to enter the following ...
Page 30
According to voltage value displayed on DVM, fill in the values for their corresponding functions and press ENTER. If any DVM read-back value at each voltage function does not fit with ...
Page 31
Lo MIDL MIDH Hi XLN10014 Function Lo MIDL MIDH Hi E. When pressing ENTER at Hi function, and the calibration data values will be stored in FLASH and unit will return to calibration main screen. OVP CALIBRATION A. Press 2 ...
Page 32
Jump to Hi function when completed Press ENTER to access OVP calibration procedure at High function After completing the above steps, calibration value will be stored in FLASH and unit ...
Page 33
B. First, input parameter (resistance of current shunt, mΩ) of current measurement fixture. According to voltage value shown on DVM, fill in that value that corresponds to the function and press ENTER key. Figure 2 26 ...
Page 34
Please inspect the hardware if the current value is inconsistent with the value in the tolerance error table below after the calibration values of each function is changed to actual current value. XLN3640 ...
Page 35
MIDH Hi XLN10014 Function Setting Lo 0.03625A MIDL MIDH Hi D. The calibration value will be stored in FLASH after pressing ENTER at Hi function. 9. Series Connection Control Setting (CHAIN) Press in Menu setting page to enter CHAIN SETTING ...
Page 36
Rear Panel 16 17 Cooling fans: The supply automatically adjusts fan’s rpm according to the load condition. (16) Cooling fan: The rear cooling fan speed is temperature control. (17) Power output terminal: Please pay attention to the correct polarities ...
Page 37
When Local sense is selected, the wire connection can be setup as follows (shown in the figure above):positive sense (+S) is connected to the positive lead (+) and negative sense (-S) is connected to the negative lead (-), whereas the ...
Page 38
Output: XLN series offers an extra output with a constant output voltage and the maximum output current This extra power supply can be switched on or off under the “System Setting” menu. ...
Page 39
WARNING: This PRODUCT is designed meeting safety code and has passed the related qualification test. In case no output cable is connected, close the protection cover and fasten the screws protect user from electric shock or ...
Page 40
Operation Instructions 4.1 Voltage Setting Press and set the output voltage by pressing the numerical keys directly, and then press 4.2 Current Setting Press and set the output current by pressing the numerical keys directly and then press 4.3 ...
Page 41
Now the cursor will move to the value setting for the OCP on the right hand side. Enter the OCP value by pressing the numerical keys. 4.5 Voltage Output After the voltage, current and protection settings are ...
Page 42
Once it reaches down to zero, the supply will turn off the output automatically. 4.8 Series (cascade) / Parallel Mode Setting The XLN3640/XLN6024/XLN8018/XLN10014 uses the series/parallel mode (4 supplies maximum) to increase the output power capability. ...
Page 43
Master. Therefore, in order to correctly configure the correctly, user must set up the Slaves before To set a XLN3640/XLN6024/XLN8018/XLN10014 to slave mode, press , , and setting option. And then select the parallel mode ...
Page 44
After receiving the control command from the Master, all Slaves will be locked on to the SLAVE screen. At this point all keys except that slaves cannot be operated by front keys except controlled by the Master as shown below: ...
Page 45
After wiring is complete, configure one supply as the Master and the other three as the Slave A, B, and C. After the power supply is configured as Master, it will start searching for all Slaves that are connected to ...
Page 46
Slaves, as shown below. If wiring is correct, this screen will appear: F After receiving the control command from the Master, all Slaves will be locked on the SLAVE screen and all keys except cannot be ...
Page 47
Slaves more than one Master is being set in the series/parallel operation mode, the following message will be displayed. If one of the power supplies is set to different ...
Page 48
External Tuning Setting Models XLN3640/XLN6024/XLN8018/XLN10014 provides the capability to control the output voltages by an external voltage/resistance. The range of the external voltage VDC and the range of the external variable resistance is between ...
Page 49
Timer of Current Flow This function offers testing of the cutoff time of a breaker or a fuse. First, connect the test object to output terminal as shown below. Press , current flow counter screen ...
Page 50
B. Current setting too large The output current is set too big that a breaker is open or a fuse is burnt to open before output current is reaching the setting value. The screen will show ...
Page 51
Please refer to “SCPI command subsystem” section for detail SCPI commands. Below are some examples of commands used to setup a custom program in list mode. Example 1: To output the wave form shown ...
Page 52
PROG:STEP 4 PROG:STEP:CURR 1 PROG:STEP:VOLT 20 PROG:STEP:ONT 0.1 PROG:STEP 5 PROG:STEP:CURR 1 PROG:STEP:VOLT 15 PROG:STEP:ONT 0.1 PROG:STEP 6 PROG:STEP:CURR 1 PROG:STEP:VOLT 10 PROG:STEP:ONT 0.1 PROG:STEP 7 PROG:STEP:CURR 1 PROG:STEP:VOLT 5 PROG:STEP:ONT 0.1 PROG:STEP 8 PROG:STEP:CURR 1 PROG:STEP:VOLT 0 PROG:STEP:ONT 0.1 ...
Page 53
Example 2: To output the wave form shown above, the following example program can be used. PROG 2 PROG:CLE PROG:REP 0 PROG:TOTA 8 PROG:STEP 1 PROG:STEP:CURR 2 PROG:STEP:VOLT 20 PROG:STEP:ONT 0.5 PROG:STEP 2 PROG:STEP:CURR 2 PROG:STEP:VOLT 15 PROG:STEP:ONT 0.5 PROG:STEP ...
Page 54
PROG:STEP:ONT 0.5 PROG:STEP 6 PROG:STEP:CURR 2 PROG:STEP:VOLT 5 PROG:STEP:ONT 0.5 PROG:STEP 7 PROG:STEP:CURR 2 PROG:STEP:VOLT 20 PROG:STEP:ONT 0.5 PROG:STEP 8 PROG:STEP:CURR 2 PROG:STEP:VOLT 0 PROG:STEP:ONT 0.5 PROG:NEXT 0 PROG:SAV PROG 2 PROG:RUN ON Choose step 6 Choose step 7 Choose ...
Page 55
Example needs to execute Program 2 right after Program 1 is executed then program 1 shall be modified to have NEXT 2 command. The following steps can be taken for the modification and execute the programs. PROG ...
Page 56
Multi-unit Connection mode (RS485) XLN3640 / XLN6024 / XLN8018 / XLN10014 can use RS485 to provide multi-units series connection function for units (If more than 10 units, please add a 120Ω resistor terminator in the last ...
Page 57
SYSTEM CONTROL COMMAND: Command ================================================== CADR CCLS CRST CIDN? CREV? CSN? CST? CCLR? ================================================== OUTPUT CONTROL COMMAND: Command ================================================== CPV CPV? CMV? CPC CPC? CMC CDVC? COUT COUT? COV COV? COVP COVP? COC Description followed by address, which can be ...
Page 58
COC? COCP COCP? COP COP? COPP COPP? CMODE? ================================================== SYNCHRONOUS CONTROL COMMAND: Command ================================================== GRST GCLS GCLR GPV GPC GOUT GOV GOVP GOC GOCP GOP GOPP ================================================== EXAMPLES: Q1. How to read back ID for Address 5 on the system? ...
Page 59
CADR 7 CPV 20 Q3. How to set up Output for Address 7 on the system? CADR 3 COUT 1 Q4. How to read back Voltage value for Address 1 on the system? CADR 1 CMV? Q5. How to set ...
Page 60
Protection and Error Messages 5.1 Over-voltage Protection (OVP) When the OVP is activated and voltage measured exceeds the setting point of protected voltage, the system will enter the “Over Voltage Protect” mode that will shut off the output and ...
Page 61
Constant Voltage Protection (CV TO CC) When this function is activated, the power supply will stay in CV mode. If load changes force the system to transition from (constant current) mode, the system will enter the ...
Page 62
Low Voltage Protection (ACD) When the machine has detected abnormally low AC power input, system will enter the “AC Detect Low Protect” mode that will shut off output and display the error message shown in the following figure. Press ...
Page 63
Remote Interface communication protocol The communication protocol includes standard SCPI commands and a few proprietary commands which follow the SCPI convention. 6.1 Prefaces The SCPI interface XLN3640/XLN6024/XLN8018/XLN10014 supply through a computer or a terminal equipped with IEEE-488.2 GPIB or ...
Page 64
The Error/Event List SCPI interface can offer an error/event list that contains errors/events. Users can read the errors/events through the “error?” command in a first-in first-out manner. ...
Page 65
Remote Communication Protocol Command ADDRess ADDRess? BEEP CLR CURRent CURRent? ERRor? IOUT? ISET ISET? LOCK MODEL? OCP OISET OISET? OPP OPSET OPSET? OUT OVP OVSET OVSET? STATUS? VERsion? VOLTage VOLTage? VOUT? VSET VSET? Description set the address of the ...
Page 66
Examples: Q 1:How to set GPIB address? ADDR 10 Q 2:How to read back GPIB address? ADDR? ADDRESS? Q 3:How to set up buzzer? BEEP 1 BEEP off Q 4:How to clear the protecting state? CLR Q 5:How to read ...
Page 67
Q 11:How to read the current outputting value? IOUT? Q 12:How to lock buttons and the rotary knob? LOCK 1 LOCK ON Q 13:How to read the product model number? MODEL? Q 14:How to set up OVP function? OVP 1 ...
Page 68
SCPI Conformity Information The XLN series is entirely compatible with all IEEE-488.2 and SCPI commands (1995). Commands are included in SCPI commands (in Vol. 2, 1995). 6.5.1 Common SCPI commands Command Explanation *CLS Clear status (include error code) *IDN? ...
Page 69
SCPI Command subsystem ABORt FETCh :CURRent? :VOLTage? MEASure :CURRent? :VOLTage? MEMory <NR1 | ? > :VSET <NRf | ? > :ISET <NRf | ? > :SAVE OUTput <Boolean > ? :LIMit :VOLTage <NRf | ? > :CURRent <NRf ...
Page 70
Boolean | ? > :CURRent <NRf | ? > :ONTimet <NRf | ? > :VOLTage <NRf | ? > :TOTA[l] <NR1 ...
Page 71
:MODE <OFF/0,PARALLEL/1,SERIES/2|? > :TYPE <MASTER/0,SLAVEA/1,SLAVEB/2,SLAVEC/3|?> [SOURce] :CURRent <NRf | ? > :PROTection <Boolean | ? > :LEVel <NRf | ? > set or return over-current level :VOLTage <NRf | ? > :PROTection <Boolean | ? > :LEVel <NRf | ? ...
Page 72
TIMER ...
Page 73
Examples: Q 28:How to cancel all actions? ABOR ABORT Q 29:How to fetch current value? FETC:CURR? FETCH:CURRENT? Q 30:How to fetch voltage value? FETC:VOLT? FETCH:VOLTAGE? Q 31:How to measure current? MEAS:CURR? MEASURE:CURRENT? Q 32:How to measure voltage? MEAS:VOLT? MEASURE:VOLTAGE? Q ...
Page 74
MEM:ISET? MEMORY:ISET 25 MEMORY:ISET? Q 36:How to save data to memory set? MEM:SAVE MEMORY:SAVE Q 37:How to set up and cancel output? OUT ON OUTPUT 0 Q 38:How to set up and read back the voltage limit? OUT:LIM:VOLT 30 OUT:LIM:VOLT? ...
Page 75
Q 43:How to read back the protection state? PROT? PROTECTION? Q 44:How to set up and read back the protection state? PROT:CCCV ON PROT:CCCV? PROTECTION:CCCV 0 PROTECTION:CCCV? Q 45:How to set up and read back the CV ...
Page 76
SOURCE:CURRENT:PROTECTION:LEVEL? Q 49:How to set up and read back the overpower protection state? PROT:OPP ON PROT:OPP? PROTECTION:OPP 0 PROTECTION:OPP? Q 50:How to set up and read back the overpower protection point? PROT:OPP:LEV 30 PROT:OPP:LEV? PROTECTION:OPP:LEVEL 40 PROTECTION:OPP:LEVEL? Q 51:How to ...
Page 77
SYSTEM:E5V 0 Q 55:How to read back error code? SYS:ERR? SYSTEM:ERROR? Q 56:How to set up and read back the external adjustment state? SYS:EXT VOLT SYS:EXT? SYSTEM:EXTERNAL RESISTANCE SYSTEM:EXTERNAL? Q 57:How to set up and read back the GPIB address? ...
Page 78
SYS:POW:TYPE? SYS:POWER:TYPE USER SYS:POWER:TYPE? SYSTEM:GPIB:ADDRESS? Q 63:How to set up and read back the voltage under user-defined booting mode? SYS:POW:VOLT 10 SYS:POW:VOLT? SYSTEM:POWER:VOLTAGE 20 SYSTEM:POWER:VOLTAGE? Q 64:How to set up and read back the current under user-defined booting mode? SYS:POW:CURR ...
Page 79
Q 69:How to set up and read back the output voltage? SOUR:VOLT 30 SOUR:VOLT? SOURCE:VOLTAGE 35 SOURCE:VOLTAGE? Q 70:How to set up and read back the output current? SOUR:CURR 40 SOUR:CURR? SOURCE:CURRENT 35 SOURCE:CURRENT? Q 71:How to set up and ...
Page 80
State Bit Definition When “STATE?” command is used, the system will return three (3) bytes in the order as shown below. Byte 2 bit 7 - bit 0 The definition of each bit is described in the following: byte ...
Page 81
LAN Communication (-GL verions) XLN series power supplies provide three LAN control modes, including Web server, Telnet and Sockets. First, enter the first Item “System Setting” on the menu to set the interface selection (Remote Control) to Ethernet. Then, ...
Page 82
Setting Page (Configuration) This page allows you to setup protection settings and reset/setup password for the system. 75 ...
Page 83
Status Page (Status) Display the status of the system. If any error codes are shown, please refer to “Error/Event list” section for details. Web Control This page allows user to set up voltage/current and output. Additionally, the display will allow ...
Page 84
Using Telnet The power supply can be controlled via Telnet over the Ethernet interface. Simply go into command prompt under MS-DOS and enter: Telnet <DeviceIP> 5024 (<Device IP> address of the unit; 5024 is the Telnet port). A ...
Page 85
... Assemble Accessories 7.1 Assemble Rack Mount Brackets The XLN3640/XLN6024/XLN8018/XLN10014 is designed to fit in a space of one rack unit (1U) and can be mounted in a standard 19-inch rack panel or cabinet. Rack mount brackets must be assembled before mounting the unit in a rack. Refer to the following figure to assemble the rack mount brackets. ...
Page 86
Assembly of Output Protective Cover (XLN6024/XLN8018/XLN10014) Safety regulation requests protective cover when the output voltage is higher than 45 VDC. Therefore, there are protective covers for the output connectors for the XLN6024/XLN8018/XLN10014. Refer to the following figure for the ...
Page 87
Assembly of Remote Sense Protective Cover (XLN6024/XLN8018/XLN10014) Safety regulation requests protective cover when the voltage is higher than 45 VDC. Therefore, there are protective covers for the remote sense connectors for the XLN6024/XLN8018/XLN10014. Refer to the following figure for ...
Page 88
... Product Name: XLN3640/XLN6024/XLN8018/XLN10014 Parts List: Item Name & Specification 1. Terminal Block for Rapid Plug Connector 2. XLNRC Output Rapid Connector 3. Rack mount Bracket kit 4. Handle bar kit 5. Operation Manual 6. XLNPC Power Cord 7. Test Report and Certificate of Calibration Remarks Includes two solder plugs 81 ...
Page 89
...
Page 90
... Clearly state on the RMA the performance problem and return any leads, probes, connectors and accessories that you are using with the device. Customers not on an open account must include payment in the form of a money order or credit card. For the most current repair charges please refer to the service and support section on our website. Return all merchandise to B& ...
Page 91
Limited Two-year Warranty B&K Precision Corp. warrants to the original purchaser that its products and the component parts thereof, will be free from defects in workmanship and materials for a period of two years from date of purchase. B&K ...
Page 92
Savi Ranch Parkway © 2009 B&K Precision Corp. Printed in Taiwan Yorba Linda, CA 92887 www.bkprecision.com v1.22 ...