ACA5-20PC-11-AC1-RL-C Murata Power Solutions Inc, ACA5-20PC-11-AC1-RL-C Datasheet - Page 3
ACA5-20PC-11-AC1-RL-C
Manufacturer Part Number
ACA5-20PC-11-AC1-RL-C
Description
AC Ammeter 750A Ext CT AC Pwr
Manufacturer
Murata Power Solutions Inc
Type
AC Ammetersr
Datasheet
1.ACA5-20PC-1-AC1-RL-C.pdf
(5 pages)
Specifications of ACA5-20PC-11-AC1-RL-C
Equipment Type
AC Ammeters
Display Type
3 - 1/2 Digit LED
Primary Voltage Rating
121 V to 220 V
Secondary Current Rating
8 mA
Lead Free Status / RoHS Status
Lead free / RoHS Compliant
Available stocks
Company
Part Number
Manufacturer
Quantity
Price


4.
5.
6.
7.
8.
9.
Step 1.
ACA5-20PC series ammeters are not internally fused. Terminal block
TB1 is to be used only for powering the ammeters’ internal circuitry;
it must not be used to supply power to external loads. The supply
wires feeding these ammeters must be fused with a 0.25A/250V time
delay/time lag fuse, in accordance with applicable regulatory codes.
Wire insulation must be stripped to within ±10% of the stated dimen-
sions, and wires should be inserted into TB1 such that their insulation
is not pinched by the screw terminal.
AC Supply Polarity and Grounding: The two supply inputs, TB1-A
and TB1-B, on all ac-powered ACA5-20PC ammeters are not in
themselves polarity sensitive, that is, they have no internal "AC LO"
or "AC HI" designations. Also, ac-powered ACA5-20PC ammeters do
not include or require a connection to earth/chassis ground.
Connector Torque Ratings: It is important to tighten TB1's, screw-
terminals to their rated torque specifi cation of 3.6 pound-inches
(0.4Nm). Proper tightening will minimize connector losses and ensure
safe, reliable operation.
DC-Powered Models: DC-powered models draw minimal supply cur-
rents (120mA max.) and in most applications can be fused according
to the supply wire’s maximum amperage rating. However, be sure to
check and comply with all applicable codes and regulations to ensure
proper installation and operation.
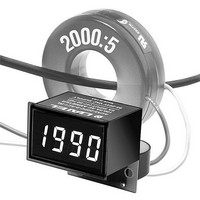
Isolation: The on-board CT (L1) provides a minimum 2000Vdc
isolation between the current-carrying conductor passing through its
primary circuit and the ammeter supply voltage connected to TB1.
This isolation rating only applies to applications in which the load
wiring (i.e., the wire passing through L1’s center hole) does not con-
nect directly or indirectly to TB1-A or TB1-B.
CT Precautions: In normal operation, a 5A current transformer’s
secondary circuit operates at a very low voltage due to its closed-
loop operation and its low burden resistance. However, a CT can still
generate potentially lethal voltages if its output current is suddenly
interrupted. For example, loose CT secondary connections can cause
a condition referred to as “inductive kick". Inductive kick can generate
extremely high voltages across intermitent secondary connections.
Therefore, implementing connections to any 5A current transformer’s
output leads must only be performed with zero load-current, that is,
with no power applied to the load circuit.
CT Connections and Grounding: Some applications require connect-
Step 2.
www.murata-ps.com/dpm
Figure 2. Panel Installation
10. Replacing Analog Panel Meters: ACA5-20PC ammeters can be
PANEL INSTALLATION
All connections to ACA5-20PC Series ammeters must be made after the
ammeter is securely attached to the panel and with all load and supply
voltages de-energized (off).
Care should be exercised when passing conductors through the ammeter’s
built-in CT. The installed wire positions should be such that minimal
forces are applied to the built-in CT, TB1, or to the ammeter itself. In
high-vibration environments, proper strain reliefs must be used for all
load and supply wiring.
To ensure a secure panel-mount installation, MPS recommends using the
DMS-BZL4-C bezel assembly (with sealing gasket) supplied with each
ammeter. See Mechanical Specifi cations for detailed cutout and ammeter
dimensions.
Following the four-step sequence shown in Figure 2 — being careful not
to apply excessive force or twisting motions — insert the ammeter into
the panel opening. When using the DMS-BZL4-C, install its sealing gas-
ket so it is positioned between the ammeter’s front fl ange and panel front
surface (see Mechanical Specifi cations). Be sure to use and securely
tighten all four screws supplied with the bezel assembly.
Step 3.
ing one of the external 5A CT’s output leads to earth/chassis ground.
In the USA, consult the latest revision of the National Electrical Code
(NEC) for more information regarding CT grounding.
After all mechanical assembly is completed, connect the two output
leads of the external 5A CT to each other after they are run through
L1’s center hole. Pressure-style connectors (commonly refered to
as “wire nuts”) are acceptable as long as they are rated for the
number of conductors and voltage invloved.
used as direct replacements for analog panel meters driven by
5A CT’s. All wiring operations must be performed with both the
load and the supply power sources completely de-energized.
5 Amp Input LED-Display AC Ammeters
ACA5-20PC Series
01 Mar 2011 ACA5-20PC_B04 Page 3 of 5
Step 4.
email: sales@murata-ps.com
Related parts for ACA5-20PC-11-AC1-RL-C
Image
Part Number
Description
Manufacturer
Datasheet
Request
R

Part Number:
Description:
AC Ammeter 750A Ext CT DC Pwr
Manufacturer:
Murata Power Solutions Inc
Datasheet:
Part Number:
Description:
AC Ammeter 50A Ext CT DC Pwr
Manufacturer:
Murata Power Solutions Inc
Datasheet:

Part Number:
Description:
Current Meter
Manufacturer:
Murata Power Solutions Inc
Datasheet:
Part Number:
Description:
AC Ammeter 600A Ext CT AC Pwr
Manufacturer:
Murata Power Solutions Inc
Datasheet:
Part Number:
Description:
AC Ammeter 600A Ext CT DC Pwr
Manufacturer:
Murata Power Solutions Inc
Datasheet:
Part Number:
Description:
AC Ammeter 1000A Ext CT AC Pwr
Manufacturer:
Murata Power Solutions Inc
Datasheet:
Part Number:
Description:
AC Ammeter 1000A Ext CT DC Pwr
Manufacturer:
Murata Power Solutions Inc
Datasheet:
Part Number:
Description:
AC Ammeter 1500A Ext CT AC Pwr
Manufacturer:
Murata Power Solutions Inc
Datasheet:
Part Number:
Description:
AC Ammeter 1500A Ext CT DC Pwr
Manufacturer:
Murata Power Solutions Inc
Datasheet:
Part Number:
Description:
AC Ammeter 2000A Ext CT DC Pwr
Manufacturer:
Murata Power Solutions Inc
Datasheet:

Part Number:
Description:
Transformers 5Vin 5Vout 200mA 4000Vdc 1:1.33 turn
Manufacturer:
Murata Power Solutions Inc
Datasheet:

Part Number:
Description:
POWER SUPPLY
Manufacturer:
Murata Power Solutions Inc
Datasheet:

Part Number:
Description:
DPM LED MINI 2VDC 3.5DIG LP RED
Manufacturer:
Murata Power Solutions Inc
Datasheet:

Part Number:
Description:
CONV DC/DC 1W 5VIN 5VOUT SIP SGL
Manufacturer:
Murata Power Solutions Inc
Datasheet:

Part Number:
Description:
CONV DC/DC 1W 5VIN 3.3V SIP SGL
Manufacturer:
Murata Power Solutions Inc
Datasheet: