WS-356 3M, WS-356 Datasheet
WS-356
Specifications of WS-356


Related parts for WS-356


WS-356 Summary of contents
Page 1
... User Instructions for • 3M™ Welding Shield with Auto-Darkening Filter, Variable Shade #10-12 WS-320/37154 • 3M™ Welding Auto-Darkening Filters, Variable Shade #10-12 WS-020/37156 • 3M™ Welding Shield with Standard Glass Filter Plate, Shade #10 WS-110/37155 Important: Keep these User Instructions for reference. ...
Page 2
... User Instructions. Two sensors on the front of the ADF WS Series react independently at the moment the welding arc is struck and cause the filter to darken. The ADF switches back to the light shade (shade 4) as soon as the welding arc has stopped. Two lithium batteries are used as the power source ...
Page 3
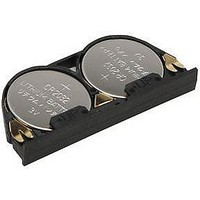
... L-115-10/37010 3M™ Welding Shield Sweat Pad WS-352/37163 3M™ Welding Shield Filter Retainer WS-363/37165 3M™ Inside Protection Plate (for WS-020 ADF only) WS-356/37167 3M™ Welding Filter Battery Holder 04-0320-00/37166 Batteries, type CR-2032 (2-pack) 3 ...
Page 4
... ASSEMBLY AND ADJUSTMENT 3M™ Welding Shield Adjusting head band size (Fig. 1) The ratchet adjustment can be set to the correct head size by pushing the hand-wheel in and turning. The adjustment position is locked when the hand-wheel is released. Adjusting the Stop Angle of the Shield (Fig. 2 & 3) The angle that the welding shield stops when lowered for welding can be adjusted by repositioning the stud in the shield to one of the four holes in the stop angle adjustment tab as shown ...
Page 5
... Install the3M™ Inside Safety Plate L-162-2/37159, ANSI compliant standard glass filter plate, spacer gasket and 3M™ Cover Plate L-152-5/37157 as shown in the figure below. Then install the 3M™ Retainer Bracket WS-352/37163 with the arrow facing up until its four legs are fully engaged in the sockets in the shield and the stack assembly is firmly held in place. ...
Page 6
... Install the filter retainer WS-352/37163 bracket with the arrow facing up until its four legs are fully engaged in the sockets in the shield and the stack assembly is firmly held in place. Removal of Welding Filters (Fig. 8) Hold the shield just above a horizontal surface so the welding filter does not fall and break. From the inside of the welding shield, pull inward on the protruding portion of the retainer bracket legs until their teeth disengage, then push each of the legs through until the retainer bracket is fully disengaged from the shield ...
Page 7
... Shade button. To select another shade, press the Shade button again while the LED is flashing, and then keep pressing the button until the LED shows the desired shade. Use the appropriate shade for the type of welding to be performed as recommended by ANSI Standard Z49.1-1999. (Table 1) Sensitivity Selection Press the sensitivity button once to show the current sensitivity setting on the LED scale ...
Page 8
... Before each use, perform the inspection described in these User Instructions to ensure that all components are installed and functioning as intended. Use of 3M™ welding shield assemblies that do not meet these inspection requirements may result in permanent eye injury and vision loss. • ...
Page 9
CLEANING AND STORAGE Clean the welding shield with mild soap and lukewarm water. Do not use solvents. Clean the welding filter with a clean, lint-free tissue or cloth. Do not immerse ADFs in water or spray directly with liquids. Store ...
Page 10
... WARRANTY WS Series 3M warrants Welding Filters defects resulting from materials or workmanship (proof of purchase required). This warranty is void in case of operator misuse, abuse, or neglect. Read these User Instructions to avoid certain situations, which could void this warranty (for example, cracked filters and filters covered with weld spatter are not covered under the warranty policy) ...