LSXA7L Honeywell, LSXA7L Datasheet - Page 3
LSXA7L
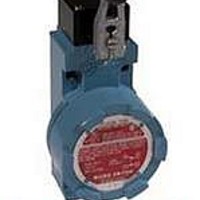
Manufacturer Part Number
LSXA7L
Description
Basic / Snap Action / Limit Switches Hazardous Location/ Single Pole LSX
Manufacturer
Honeywell
Datasheet
1.LSXA3E.pdf
(4 pages)
Specifications of LSXA7L
Contact Form
DPDT - 2 NC / 2 NO
Contact Rating
10 Amps
Actuator
Lever, Side Rotary
Operating Force
0.45 N
Termination Style
Screw
Ingress Protection
NEMA 1, 3, 4, 6, 7, 13
Lead Free Status / Rohs Status
Lead free / RoHS Compliant


To order replacement levers, order the same
part number as that which is metal stamped on
either the lever or lever hub. Use only non-
sparking levers to retain the explosion proof
qualities.
ADAPTER MOUNTING PLATE
Following is a list of replacement parts for the
heavy duty LS switches. Should your specific
switch catalog listing not appear in this list, con-
tact the nearest local MICRO SWITCH Autho-
rized Distributor or a MICRO SWITCH Branch
Office.
For ease of making switch adjustments which
may be necessary on various switch listings, it is
r e c o m m e n d e d t h a t y o u o r d e r t h e L e v e r a n d
Switch Adjusting Tool Set (Catalog Listing -
LSZ4005). This set consists of (1) special 3/32-
inch open end wrench, and (1) 9/64-inch hex-
Catalog Listing LSXZ4022
agon key wrench.
REPLACEMENT LEVERS
REPLACEMENT PARTS
*Only the portion of Catalog listing is shown which
determines the replacement part. Listings shown with -7A,
or -8A are complete Iistings.
Catalog Listing* on
Switch Nameplate
2. From the bottom of the head, grasp the end of
3. Referring to Fig. 11, select the correct pin
4. Insert the pin plunger in the position provid-
5. Replace the operating head on the switch
1. Loosen the head screws and remove head
TOP ROTARY
Follow these steps to change the operating
direction of the LSXB type switch:
LSXN3K
LSXN4L
LSXP3K
LSXP4L
LSXR3K
LSXR4L
LSXJ3K-7A
LSXK3K-8A
LSXK4L-8A
LSXL4M
LSXM4N
actuation.
LSXC4L
LSXD3K
LSXD4L
LSXE3K
LSXE4L
LSXF3K
LSXF4L
LSXH3K
LSXH4L
LSXJ4L-7A
from the switch housing.
the pin plunger (Fig. 10) and remove the pin. It
may be necessary to rotate the actuating shaft
to expose the end of the pin plunger.
plunger position for the desired direction of
ing the desired direction of actuation.
housing and securely tighten the head screws.
LSXB3K
LSXB4L
LSXC3K
LSXA3K
LSXA4L
NON-PLUG-IN
Operating
Head Only
LSZ1N
LSZ1P
LSZ1P
LSZ1R
LSZ1R
LSXZ1KHA
LSZ1L
LSZ1M
LSZ1N
LSZ1H
LSZ1H
LSZ1JGA
LSZ1JGA
LSXZ1KHA
LSXZ1C
LSXZ1D
LSXZ1D
LSXZ1E
LSXZ1E
LSXZ1F
LSXZ1F
LSZ1B
LSZ1B
LSXZ1C
LSZ1A
LSZ1A
(Basic Switch Only)
Contact Block
LSXZ3L
LSXZ3K
LSXZ3L
LSXZ3K
LSXZ3L
LSXZ3L
LSXZ3K
LSXZ3L
LSXZ3K
LSXZ3L
LSXZ3M
LSXZ3M
LSXZ3K
LSXZ3L
LSXZ3K
LSXZ3L
LSXZ3K
LSXZ3L
LSXZ3K
LSXZ3L
LSXZ3K
LSXZ3K
LSXZ3L
LSXZ3K
LSXZ3L
LSXZ3K
PK 81181
PAGE 3
Related parts for LSXA7L
Image
Part Number
Description
Manufacturer
Datasheet
Request
R

Part Number:
Description:
BASIC UNIT, PLASTIC, 1N0/1NC, IP66
Manufacturer:
MOELLER
Datasheet:

Part Number:
Description:
BASIC UNIT, PLASTIC, 1N0/1NC, IP66
Manufacturer:
MOELLER
Datasheet:

Part Number:
Description:
Basic / Snap Action / Limit Switches LIMIT SWITCH-OT
Manufacturer:
Honeywell
Part Number:
Description:
Basic / Snap Action / Limit Switches LIMIT SWITCH-OT
Manufacturer:
Honeywell
Part Number:
Description:
Basic / Snap Action / Limit Switches LIMIT SWITCH-OT
Manufacturer:
Honeywell
Part Number:
Description:
Basic / Snap Action / Limit Switches LIMIT SWITCH-OT
Manufacturer:
Honeywell
Part Number:
Description:
Basic / Snap Action / Limit Switches LIMIT SWITCH-OT
Manufacturer:
Honeywell
Part Number:
Description:
Basic / Snap Action / Limit Switches LIMIT SWITCH-OT
Manufacturer:
Honeywell
Part Number:
Description:
Basic / Snap Action / Limit Switches LIMIT SWITCH-OT
Manufacturer:
Honeywell
Part Number:
Description:
Basic / Snap Action / Limit Switches LIMIT SWITCH
Manufacturer:
Honeywell
Part Number:
Description:
Basic / Snap Action / Limit Switches LIMIT SWITCH-OT
Manufacturer:
Honeywell
Part Number:
Description:
Basic / Snap Action / Limit Switches LIMIT SWITCH-OT
Manufacturer:
Honeywell
Part Number:
Description:
Basic / Snap Action / Limit Switches LIMIT SWITCH-OT
Manufacturer:
Honeywell
Part Number:
Description:
Basic / Snap Action / Limit Switches LIMIT SWITCH
Manufacturer:
Honeywell
Part Number:
Description:
Basic / Snap Action / Limit Switches LIMIT SWITCH
Manufacturer:
Honeywell