E2C-JC4A Omron, E2C-JC4A Datasheet - Page 16
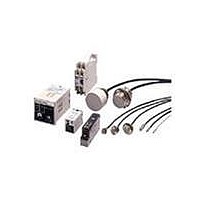
E2C-JC4A
Manufacturer Part Number
E2C-JC4A
Description
DC AMP NPN FOR E2C PROX
Manufacturer
Omron
Series
E2Cr
Specifications of E2C-JC4A
Amplifier Type
Standard
Voltage - Supply
10 V ~ 30 V
Output Type
NPN
Current - Supply
45mA
Mounting Type
Bracket Mount
Lead Free Status / RoHS Status
Lead free / RoHS Compliant
Lead Free Status / RoHS Status
Lead free / RoHS Compliant
Other names
E2CJC4A


● Mounting
Mounting the Amplifier Unit
E2C-JC4A
Lengthwise Mounting
(1)Secure the Mounting Bracket with the enclosed M3 screws.
(2)Loosen the M2.6 cover screw and remove the cover.
(3)Slide the protrusion on the Amplifier Unit into the hole on the
(4)Using the M3 mounting screw inside the Amplifier Unit, secure the
(5)Secure the cover to the case.
Mounting to the Side
(1)Loosen the M2.6 cover screw and remove the cover. Loosen the
(2)Attached the enclosed M3 screw to the cover and secure the cover
(3)Secure the Amplifier Unit with M3 screws from the side. You must
After completing adjustments, attach the
enclosed caution label over the adjustment
holes to prevent adjustment mistakes.
Mounting Bracket.
Amplifier Unit to the mounting base.
M2.6 cover screw and remove the cover, and remove the M3
screw.
to the case.
provide these screws.
Mounting
base
M3 Mounting
Mounting
Bracket
M3 Mounting screw
1
screw
M2.6 cover screw
M2.6 cover screw
4
5
M3
M3
M3 screw
(enclose)
2
2
3
Mounting base
1
M3 screw (enclose)
M3 screws
3
E2C-A@4A
Using P2CF-11, P2CF-08
When aligning the Amplifier Unit vertically with the Socket, consider
the space required for the hooks and allow a leeway of about 20 mm
above and below the Amplifier Unit.
Mounting Embedded in a Panel
(1)When using the Y92F-30 Embedded Mounting Adapter, insert the
(2)When using the Y92F-70 or Y92F-71 Embedded Mounting
Amplifier Unit into a square hold in the panel, attach the Adapter
from the back and press in to reduce the gap with the panel. Then
secure the Adapter with the screws.
Adapter, just press the Amplifier into a square hole in the panel. If
the panel coating is too thick and the hooks do not lock in place,
spread the hooks from the back by pushing in the directions of the
arrows.
Panel
Insert the Amplifier Unit and
then spread the hooks.
Panel
Insert the Sensor and then
spread the hooks.
P2CF-11
P2CF-08
Hook
20
Hook
Y92F-30
Duct or
other object
Panel
E2C/E2C-H
16
Related parts for E2C-JC4A
Image
Part Number
Description
Manufacturer
Datasheet
Request
R

Part Number:
Description:
DC AMP For M8 E2C-H HiTemp PRX
Manufacturer:
Omron
Datasheet:
Part Number:
Description:
DC AMP, M18 E2C-H HiTemp PROX
Manufacturer:
Omron
Datasheet:

Part Number:
Description:
SEP.AMP.PROX. M18, 10mm DIST
Manufacturer:
Omron
Datasheet:

Part Number:
Description:
G6S-2GLow Signal Relay
Manufacturer:
Omron Corporation
Datasheet:
Part Number:
Description:
Compact, Low-cost, SSR Switching 5 to 20 A
Manufacturer:
Omron Corporation
Datasheet:
Part Number:
Description:
Manufacturer:
Omron Corporation
Datasheet:
Part Number:
Description:
Manufacturer:
Omron Corporation
Datasheet: