G3PA-220B-VD DC5-24 Omron, G3PA-220B-VD DC5-24 Datasheet - Page 6
G3PA-220B-VD DC5-24
Manufacturer Part Number
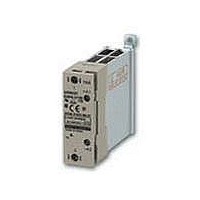
G3PA-220B-VD DC5-24
Description
SOLID STATE RELAY
Manufacturer
Omron
Series
G3PAr
Specifications of G3PA-220B-VD DC5-24
Circuit
SPST-NO (1 Form A)
Output Type
AC, Zero Cross
Load Current
20A
Voltage - Input
4 ~ 30VDC
Voltage - Load
19 ~ 264 V
Mounting Type
DIN Rail
Termination Style
Screw Terminal
Package / Case
SSR with Integrated Heatsink
Control Voltage Range
5 V to 24 V
Load Voltage Rating
200 V
Load Current Rating
20 A
Mounting Style
DIN Rail
Lead Free Status / RoHS Status
Lead free / RoHS Compliant
On-state Resistance
-
Lead Free Status / Rohs Status
Lead free / RoHS Compliant
Other names
G3PA-220B-VDDC5-24
G3PA220BVDDC524
G3PA220BVDDC524


■ Replacement Procedure
G32A-A10(L)-VD/G32A-A20(L)-VD/G32-A420-VD(-2)
To remove or replace the Power Device Cartridge, use the special tool provided with it for extraction.
Extraction
Follow the procedures below to dismount the Power Device
Cartridge from the G3PA.
1. Switch off the power.
2. Remove the terminal cover.
3. Hook the indented part of the cartridge with the tool and pull up
Mounting
Follow the procedures below to mount the Power Device Cartridge
on the G3PA.
1. Apply silicone grease (provided with the G32A-A) to the entire
G32A-A40(L)-VD/G32A-A60(L)-VD/G32A-A430-VD(-2)/G32A-A450-VD-2
The G32A Power Device Cartridge is mounted and secured with screws to the G3PA Unit.
Extraction
Follow the procedures below to dismount the G32A-A Power Device
Cartridge from the G3PA.
1. Switch off the power.
2. Remove the terminal cover.
3. Loosen the two centered screws on the sides to dismount the
4. Loosen the screws on both the corners.
5. Hold the indented part of both the corners to dismount the
on the cartridge to remove it.
surface of the heat sink.
cartridge. The screws are connected to terminals 1 and 2.
cartridge.
Loosen
Hook here with
Remover.
Loosen
Remover
Loosen
Loosen
2. Make sure that there is no dust or pieces of wire on the heat sink
3. Insert the cartridge into the opening of the G3PA so that the
4. Attach the terminal cover.
5. Switch on the power and check the G3PA to be sure it works
Mounting
1. Apply silicone grease to the entire surface of the heat sink.
2. Make sure that there is no dust or pieces of wire on the heat sink
of the G32A-A or the G3PA.
letters on the cartridge and those on the G3PA are in the same
direction and side A and side B are even.
properly.
of the G32A-A or the G3PA.
Side A
Apply silicone grease here.
Apply silicone grease here.
Side B
G3PA
6
Related parts for G3PA-220B-VD DC5-24
Image
Part Number
Description
Manufacturer
Datasheet
Request
R

Part Number:
Description:
SOLID STATE RELAY
Manufacturer:
Omron
Datasheet:

Part Number:
Description:
G6S-2GLow Signal Relay
Manufacturer:
Omron Corporation
Datasheet:
Part Number:
Description:
Compact, Low-cost, SSR Switching 5 to 20 A
Manufacturer:
Omron Corporation
Datasheet:
Part Number:
Description:
Manufacturer:
Omron Corporation
Datasheet:
Part Number:
Description:
Manufacturer:
Omron Corporation
Datasheet:
Part Number:
Description:
Manufacturer:
Omron Corporation
Datasheet:
Part Number:
Description:
Manufacturer:
Omron Corporation
Datasheet:
Part Number:
Description:
Manufacturer:
Omron Corporation
Datasheet:
Part Number:
Description:
Manufacturer:
Omron Corporation
Datasheet: