LD400600 Red Lion Controls, LD400600 Datasheet
LD400600
Specifications of LD400600


LD400600 Summary of contents
Page 1
... Hz and input pulse widths to 10 msec min.) Input A Trigger levels: V Input B Trigger levels: V Overflow Indication: Display “ LD200400, LD200600, LD400400, & LD400600: Count Rate: 25 KHz max. @ 50% duty cycle (no scaling) LD2006P0 & LD4006P0: Maximum Count Rates: 50% duty cycle, count mode dependent. With setpoints disabled: 25 KHz, all modes except Quadrature x4 (23 KHz). ...
Page 2
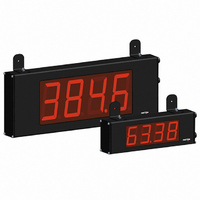
... Criterion B LD2006P0 10 V/m EN 61000-4-4 Criterion power 1 kV signal EN 61000-4-5 Criterion L- L&N-E power EN 61000-4-6 Criterion A 3 V/rms EN 61000-4-11 Criterion A 0.5 cycle EN 55011 Class B EN 55011 Class A PART NUMBER LD200400 LD200600 LD400400 LD400600 LD2006P0 LD4006P0 LDPLUG00 MOUNTING HOLE (.281") TERMINAL #3 (TBA) MUST BE CONNECTED TO ...
Page 3
S ETTING THE SETTING THE 8 DIP SWITCHES To access the switches, remove the right side plate of the meter. A bank of eight switches is located inside the unit. Warning: Exposed line voltage exists on the circuit boards. ...
Page 4
WIRING OVERVIEW Electrical connections are made via pluggable terminal blocks located inside the meter. All conductors should conform to the meter's voltage and current ratings. All cabling should conform to appropriate standards of good installation, local codes and regulations. It ...
Page 5
INPUT WIRING The Large Display has two signal inputs, A and B. These inputs are wired to terminal block TBB located inside the unit on the right side. Terminal 1: Input A Terminal 3: Input B Terminal 2: Input ...
Page 6
RS232 Communications LD METER (DTE) TXD RXD 1 RXD TXD 2 COMM. 3 Terminal Block Connection Figure RS232 is intended to allow two devices to communicate over distances feet. Data Terminal Equipment (DTE) transmits data on the ...
Page 7
MODULE MENU (PAR KEY) Each module has a separate module menu (which is shown at the start of each module discussion). The key is pressed to advance to a particular parameter PAR to be changed, without changing the programming of ...
Page 8
... The User Input Assignment is only active when Counter B is enabled and the user input selection perfroms a Reset, Inhibit or Store function on one or both of the counters. *For value entry instructions, refer to selection/value entry in the Programming The Meter section. ...
Page 9
MODULE PAR Rate Rate Decimal Enable Point Scaling Style RATE ENABLE This parameter enables the rate display. For maximum input frequency, Rate Enable should be set to when not ...
Page 10
INPUT FREQUENCY CALCULATION The meter determines the input frequency by summing the number of falling edges received during a sample period of time. The sample period begins on the first falling edge. At this falling edge, the meter starts accumulating ...
Page 11
FACTORY SERVICE OPERATIONS Select to perform either of the Factory Service Operations shown below. VIEW MODEL AND VERSION DISPLAY Entering Code 50 will display the model and version (x.x) ...
Page 12
SETPOINT ASSIGNMENT Select the display the Setpoint assigned. SETPOINT OUTPUT ACTION This parameter selects the action of the Setpoint output as described in ...
Page 13
MODULE 5-SEr PAR bAUd dAtA PAritY Baud Rate Data Bit Parity Bit Module 5 is the programming module for the Serial Communications Parameters. These parameters are used to match the serial settings of the meter with ...
Page 14
This is the factory default setting new meter should arrive ready for copying. The meter sending the program settings (master) should be set to the desired baud rate for the application (if different than ...
Page 15
Abbreviated Transmission Byte Description 12 byte data field, 10 bytes for number, one byte for sign, 1-12 one byte for decimal point 13 <CR> (carriage return) 14 <LF> (line feed) 15 <SP>* (Space) 16 <CR>* (carriage return) 17 <LF>* (line ...
Page 16
...