101-1101 Rabbit Semiconductor, 101-1101 Datasheet - Page 11
101-1101
Manufacturer Part Number
101-1101
Description
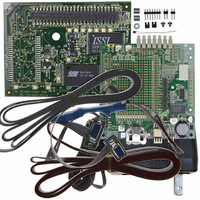
KIT DEV RABBITCORE RCM4110
Manufacturer
Rabbit Semiconductor
Series
RabbitCore 4000r
Type
MPU Moduler
Datasheet
1.20-101-1093.pdf
(112 pages)
Specifications of 101-1101
Contents
RabbitCore Module, Dev. Board, AC Adapter, Cable and Dynamic C® CD-Rom
Processor To Be Evaluated
RCM4110
For Use With/related Products
RCM4110
Lead Free Status / RoHS Status
Lead free by exemption / RoHS compliant by exemption
Other names
316-1076


2.1 Install Dynamic C
To develop and debug programs for the RCM4100 series (and for all other Rabbit hard-
ware), you must install and use Dynamic C.
If you have not yet installed Dynamic C version 10.01 (or a later version), do so now by
inserting the Dynamic C CD from the RCM4100 Development Kit in your PC’s CD-ROM
drive. If autorun is enabled, the CD installation will begin automatically.
If autorun is disabled or the installation does not start, use the Windows
or Windows Disk Explorer to launch
The installation program will guide you through the installation process. Most steps of the
process are self-explanatory.
Dynamic C uses a COM (serial) port to communicate with the target development system.
The installation allows you to choose the COM port that will be used. The default selec-
tion is COM1. You may select any available port for Dynamic C’s use. If you are not cer-
tain which port is available, select COM1. This selection can be changed later within
Dynamic C.
Once your installation is complete, you will have up to three new icons on your PC desk-
top. One icon is for Dynamic C, one opens the documentation menu, and the third is for
the Rabbit Field Utility, a tool used to download precompiled software to a target system.
If you have purchased any of the optional Dynamic C modules, install them after installing
Dynamic C. The modules may be installed in any order. You must install the modules in
the same directory where Dynamic C was installed.
User’s Manual
This chapter describes the RCM4100 series in more detail, and
explains how to set up and use the accompanying Prototyping Board.
NOTE: This chapter (and this manual) assume that you have the RCM4100 Development
NOTE: The installation utility does not check the selected COM port in any way. Speci-
Kit. If you purchased an RCM4100 module by itself, you will have to adapt the infor-
mation in this chapter and elsewhere to your test and development setup.
fying a port in use by another device (mouse, modem, etc.) may lead to a message such
as "could not open serial port" when Dynamic C is started.
setup.exe
2. G
from the root folder of the CD-ROM.
ETTING
S
Start | Run
TARTED
menu
7
Related parts for 101-1101
Image
Part Number
Description
Manufacturer
Datasheet
Request
R

Part Number:
Description:
KIT DEV FOR BL2500 COYOTE
Manufacturer:
Rabbit Semiconductor
Datasheet:

Part Number:
Description:
KIT APPLICATION SIMPLE SENSOR
Manufacturer:
Rabbit Semiconductor
Datasheet:

Part Number:
Description:
KIT DEV RABBITCORE RCM3750
Manufacturer:
Rabbit Semiconductor
Datasheet:

Part Number:
Description:
KIT DEV RABBIT 2000 INT'L
Manufacturer:
Rabbit Semiconductor
Datasheet:
Part Number:
Description:
KIT DEV RABBIT RCM2000 INT'L
Manufacturer:
Rabbit Semiconductor
Datasheet:

Part Number:
Description:
KIT DEVELOPMENT RCM3700 INT'L
Manufacturer:
Rabbit Semiconductor
Datasheet:

Part Number:
Description:
BL4S200 TOOL KIT
Manufacturer:
Rabbit Semiconductor
Datasheet:


Part Number:
Description:
KIT DEVELOPMENT FOR JACKRABBIT
Manufacturer:
Rabbit Semiconductor
Part Number:
Description:
MODULE RABBITCORE RCM3720
Manufacturer:
Rabbit Semiconductor
Datasheet:
Part Number:
Description:
MODULE RABBITCORE RCM3220
Manufacturer:
Rabbit Semiconductor
Datasheet:
Part Number:
Description:
MODULE RABBITCORE RCM3210
Manufacturer:
Rabbit Semiconductor
Datasheet:
Part Number:
Description:
COMPUTER SGL-BOARD OP6600 W/SRAM
Manufacturer:
Rabbit Semiconductor
Datasheet:
Part Number:
Description:
COMPUTER SGL-BD BL2000 SRAM/FLSH
Manufacturer:
Rabbit Semiconductor