E3F2-R2Z1 Omron, E3F2-R2Z1 Datasheet - Page 15
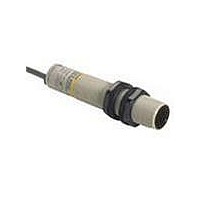
E3F2-R2Z1
Manufacturer Part Number
E3F2-R2Z1
Description
Industrial Photoelectric Sensors LIGHT-ON NP RETROREF
Manufacturer
Omron
Type
Photoelectric Sensorr
Series
E3F2r
Specifications of E3F2-R2Z1
Features
DC switching types with connectors
Height
90 mm
Length
24 mm
Maximum Operating Temperature
+ 55 C
Minimum Operating Temperature
- 25 C
Width
24 mm
Sensing Distance
2 mm to 100 mm
Output Configuration
Light ON
Output Current
200mA
Sensor Output
SCR LO
Switch Terminals
Wire Leaded
Supply Voltage Min
24VAC
Sensor Housing
Cylindrical
Sensor Input
Optical
Output Type
SCR LO
Supply Voltage Max
240VAC
Sensing Method
Retroreflective
Sensing Object
Mirror
Sensing Light
Infrared
Mounting Type
M18 Threaded Body, Nut
Current - Supply
5mA
Voltage - Supply
24 V ~ 240 V
Package / Case
Axial, Pre-Wired
Sensing Mode
Retroreflective
Sensing Range Max
2m
Rohs Compliant
Yes
Lead Free Status / RoHS Status
Lead free / RoHS Compliant
Lead Free Status / RoHS Status
Lead free / RoHS Compliant, Lead free / RoHS Compliant


Safety precautions
This product is not designed or rated for directly or
indirectly ensuring safety of persons. Do not use it for
such a purpose.
Do not use the product with voltage in excess of the
rated voltage. Excess voltage may result in malfunc-
tion or fire.
Never use the product with an AC power supply.
Otherwise, explostion may result.
When cleaning the product, do not apply a high-pres-
sure spray of water to one part of the product. Other-
wise, parts may become damaged and the degree of
protection may be degraded.
High-temperature environments may result in burn
injury.
The following precautions must be observed to ensure safe
operation of the Sensor.
Operating Environment
Do not use the Sensor in an environment where explosive or
flammable gas is present.
Connecting Connectors
Be sure to hold the connector cover when inserting or removing
the connector. Be sure to tighten the connector lock by hand;
do not use pliers or other tools. If the tightening is insufficient, the
degree of protection will not be maintained and the Sensor may
become loose due to vibration. The appropriate tightening torque
is 0.39 to 0.49 N·m for M12 connectors.
Load
Do not use a load that exceeds the rated load.
Rotation Torque for Sensitivity Adjustment
Adjust with a torque of 0.05 N·m or less.
Environements with Cleaners and Disinfectants
(e.g., Food Processing Lines)
Do not use the Sensor in environments subject to cleaners and
disifectants. They may reduce the degree of protection.
Modifications
Do not attempt to disassemble, repair, or modify the Sensor.
Outdoor Use
Do not use the Sensor in locations subject to direct sunlight.
Cleaning
Do not use thinner, alcohol, or other organic solvents. Otherwise,
the optical properties and degree of protection may be degraded.
Surface Temperature
Burn injury may occur. The Sensor surface temperature rises de-
pending on application conditions, such as the surrounding tem-
perature and the power supply voltage. Use caution when
operating or washing the Sensor.
E3F2
ALL DIMENSIONS SHOWN ARE IN MILLIMETERS.
To convert millimeters into inches, multiply by 0.03937. To convert grams into ounces, multiply by 0.03527.
Precautions for Safe Use
! Warning
! Caution
Do not use the Sensor in any atmosphere or environment that
exceeds the ratings.
Do not install the Sensor in the following locations.
(1) Locations subject to direct sunlight
(2) Locations subject to condensation due to high humidity
(3) Locations subject to corrosive gas
(4) Locations where the Sensor may receive direct vibration or
Connecting and Mounting
(1) The maximum power supply voltage is 30 VDC. Before turning
(2) Laying Sensor wiring in the same conduit or duct as high-volt-
(3) Use an extension cable with a minimum thickness of 0.3 mm
(4) Do not pull on the cable with excessive force.
(5) Pounding the Photoelectric Sensor with a hammer or other
(6)Mount the Sensor using a bracket (sold separately).
(7) Be sure to turn OFF the power supply before inserting or re-
Cleaning
Never use thinner or other solvents. Otherwise, the Sensor sur-
face may be dissolved.
Power Supply
If a commercial switching regulator is used, ground the FG (frame
ground) terminal.
Power Supply Reset Time
The Sensor will be able to detect objects 100 ms after the power
supply is tuned ON. Start using the Sensor 100 ms or more after
turning ON the power supply. If the load and the Sensor are con-
nected to separate power supplies, be sure to turn ON the Sensor
first.
Turning OFF the Power Supply
Output pulses may be generated even when the power supply is
OFF. Therefore, it is recommended to first turn OFF the power
supply for the load or the load line.
Load Short-circuit Protection
This Sensor is equipped with load short-circuit protection, but be
sure to not short circuit the load. Be sure to not use an output cur-
rent flow that exceeds the rated current. If a load short circuit oc-
curs, the output will turn OFF, so check the wiring before turning
ON the power supply again. The short-circuit protection circuit will
be reset.
Water Resistance
Do not use the Sensor in water, rainfall, or outdoors.
shock
the power ON, make sure that the power supply voltage does
not exceed the maximum voltage.
age wires or power lines may result in malfunction or damage
due to induction. As a general rule, wire the Sensor in a sepa-
rate conduit or use shielded cable.
and less than 100 m long.
tool during mounting will impair water resistance.
Do not exceed a torque of 2.0 Nm when tightening mounting
nuts for plastic models or 20.0 Nm when tightening mounting
nuts for metal models
moving the connector.
Precautions for Correct Use
15
2
Related parts for E3F2-R2Z1
Image
Part Number
Description
Manufacturer
Datasheet
Request
R

Part Number:
Description:
Photoelectric Sensors - Industrial E3F2-R2RC41 5M W/O R EFLECTOR
Manufacturer:
Omron
Part Number:
Description:
Photoelectric Sensors - Industrial E3F2-R2RB41 5m W/O R EFLECTOR
Manufacturer:
Omron
Part Number:
Description:
RECVER 7M WIRE-LEADS PNP T-BEAM
Manufacturer:
Omron
Datasheet:
Part Number:
Description:
RECVER 7M WIRE LEADS NPN T-BEAM
Manufacturer:
Omron
Datasheet:
Part Number:
Description:
RECVER 7M CONN NPN THROUGH BEAM
Manufacturer:
Omron
Datasheet:
Part Number:
Description:
EMITTER 7M WIRE LEADS T-BEAM
Manufacturer:
Omron
Datasheet:
Part Number:
Description:
SENSOR PHOTO M18 NPN THRU DC
Manufacturer:
Omron
Datasheet:

Part Number:
Description:
SENS 7M WIRE LEADS NPN T-BEAM
Manufacturer:
Omron
Datasheet:
Part Number:
Description:
SENS 7M M12-CONN NPN-OUT T-BEAM
Manufacturer:
Omron
Datasheet:

Part Number:
Description:
SENSOR PHOTO M18 LT-ON THRU AC
Manufacturer:
Omron
Datasheet:

Part Number:
Description:
G6S-2GLow Signal Relay
Manufacturer:
Omron Corporation
Datasheet:
Part Number:
Description:
Compact, Low-cost, SSR Switching 5 to 20 A
Manufacturer:
Omron Corporation
Datasheet:
Part Number:
Description:
Manufacturer:
Omron Corporation
Datasheet: