H7CN-BLN-AC100-240 Omron, H7CN-BLN-AC100-240 Datasheet - Page 10
H7CN-BLN-AC100-240
Manufacturer Part Number
H7CN-BLN-AC100-240
Description
Controllers Rev count 100-240VAC 30cps SPST-NO outpu
Manufacturer
Omron
Type
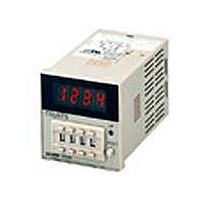
1/16 DIN Digital Counterr
Datasheet
1.H7CN-YLNM-AC100240.pdf
(10 pages)
Specifications of H7CN-BLN-AC100-240
Analog / Digital
Digital
Voltage Rating
100 V to 240 V
Mounting
DIN Rail
Counting Method
Reversible
Display Type
4-Digit LED
Size
72.5 mm L x 48 mm W x 44.8 mm H
Features
Easy to read, contact and solid state inputs for count and reset
Output Type
Sustained until reset
Lead Free Status / RoHS Status
Lead free / RoHS Compliant


H7CN
OMRON ELECTRONICS LLC
One East Commerce Drive
Schaumburg, IL 60173
1-800-55-OMRON
Cat. No. GC TMCN1
Mounting
Using Y92F-30 Adapter
Insert the counter through the panel
cutout. Push the Y92F-30 adapter from
the rear of the counter as far forward
toward the panel as possible. Push the
P3G -
counter. Then wire the socket. Tighten the
two retaining screws. To release the
adapter, lift the tab at the rear of the
adapter.
Several counters may be panel mounted
close together using a Y92F-30 adapter
as shown here. When mounting two or
more counters in a vertical line, arrange
the adapters so that their molded tabs are
positioned on the right and left sides.
When mounting two or more counters in a
horizontal line, arrange the adapters so
that their molded tabs are positioned on
the top and bottom sides.
P2CF-
Mounting
The P2CF-
secure the counter to the socket. Be sure
to allow at least 20 mm (0.79 in) clear-
ance above and below the socket to gain
access and to release the hooks for
servicing and maintenance. Insert counter
into the socket. Latch hooks. Then clip
rear of the socket to the track. Push the
bottom onto the track until the latch hooks
securely.
PANEL MOUNTING
NOTE: DIMENSIONS ARE SHOWN IN MILLIMETERS. To convert millimeters to inches divide by 25.4.
socket onto the rear of the
Socket
socket has two hooks that
3/02
Molded
tab
OMRON ON-LINE
Global - http://www.omron.com
USA - http://www.omron.com/oei
Canada - http://www.omron.com/oci
Specifications subject to change without notice.
10
Molded
tab
Removal
Pull the latch on the socket with a flat-
blade screwdriver and remove the counter
and socket as one unit.
Panel cutout for side-by-side
mounting of two counters
OMRON CANADA, INC.
885 Milner Avenue
Scarborough, Ontario M1B 5V8
416-286-6465
Printed in the U.S.A.
H7CN