HEDS-5500#G06 Avago Technologies US Inc., HEDS-5500#G06 Datasheet - Page 9
HEDS-5500#G06
Manufacturer Part Number
HEDS-5500#G06
Description
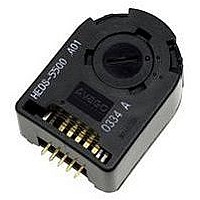
Optical Encoder
Manufacturer
Avago Technologies US Inc.
Series
HEDM-550xr
Datasheet
1.HEDS-8907-001.pdf
(12 pages)
Specifications of HEDS-5500#G06
No. Of Channels
2
Rotational Speed Max
30000rpm
Supply Voltage Range
4.5VDC To 5.5VDC
Encoder Resolution
360CPR
Supply Voltage
5V
Output Type
Square Wave Digital Pulse
Pulses Per Revolution
360 CPR
Number Of Channels
2
Mounting Style
Screw
Termination Style
Solder Pin
Output
Quadrature with Index
Operating Temperature Range
- 40 C to + 100 C
Product
Kits
Encoder Output
Square Wave Digital Pulse
Rohs Compliant
Yes
Sensor Supply Voltage
4.5VDC To 5.5VDC
Encoder Type
Optical
Leaded Process Compatible
Yes
Lead Free Status / RoHS Status
Lead free / RoHS Compliant
Available stocks
Company
Part Number
Manufacturer
Quantity
Price


Encoder Mounting and Assembly
1a. For HEDS-5500 and 5600: Mount encoder base plate
1b. For HEDS-5540, 5640 and HEDM-5500, 5600, 5540 :
1c. It is recommended that adhesive* is applied to the
2.
3a. Push the hex wrench into the body of the encoder to
3b. While continuing to apply a downward force, rotate
3c. Remove the hex wrench by pulling it straight out of
4.
The encoder is ready for use!
9
Slip alignment tool onto motor shaft. With alignment
tool in place, mount encoder baseplate onto motor
as shown above. Tighten screws. Remove alignment
tool.
screw-baseplate interface to prevent screw loosening
due to effect of high temperature on plastic
onto motor. Tighten screws. Go on to step 2.
Snap encoder body onto base plate locking all 4
snaps.
ensure that it is properly seated into the code wheel
hub set screws. Then apply a downward force on the
end of the hex wrench. This sets the code wheel gap
by levering the code wheel hub to its upper position.
the hex wrench in the clockwise direction until the
hub set screw is tight against the motor shaft (The
recommended torque to tighten the setscrew is 15-
18 ozf.inch). The hub set screw attaches the code
wheel to the motor’s shaft.
the encoder body.
Use the center screwdriver slot, or either of the two
side slots, to rotate the encoder cap dot clockwise
from the one dot position to the two dot position. Do
not rotate the encoder cap counterclockwise beyond
the one dot position.
Related parts for HEDS-5500#G06
Image
Part Number
Description
Manufacturer
Datasheet
Request
R

Part Number:
Description:
ENCODER OPTICAL GAP 3CH 500CPR
Manufacturer:
Avago Technologies US Inc.
Datasheet:

Part Number:
Description:
Encoders 2 Channel 256CPR
Manufacturer:
Avago Technologies US Inc.
Datasheet:
Part Number:
Description:
Encoders 2 Channel 150CPR
Manufacturer:
Avago Technologies US Inc.
Datasheet:
Part Number:
Description:
Encoders 2 Channel 120CPR
Manufacturer:
Avago Technologies US Inc.
Datasheet:
Part Number:
Description:
SML ENC MOD 2CH BENT LDS 100 CPR
Manufacturer:
Avago Technologies US Inc.
Datasheet:
Part Number:
Description:
Encoders 2 Channel 400CPR
Manufacturer:
Avago Technologies US Inc.
Datasheet:

Part Number:
Description:
Encoders 2 Channel 180CPR
Manufacturer:
Avago Technologies US Inc.
Datasheet:
Part Number:
Description:
Encoders 2 Channel 400CPR
Manufacturer:
Avago Technologies US Inc.
Datasheet:
Part Number:
Description:
Encoders 2 Channel 150CPR
Manufacturer:
Avago Technologies US Inc.
Datasheet:
Part Number:
Description:
Encoders 2 Channel 150CPR
Manufacturer:
Avago Technologies US Inc.
Datasheet:
Part Number:
Description:
Encoders 2 Channel 150CPR
Manufacturer:
Avago Technologies US Inc.
Datasheet:
Part Number:
Description:
Encoders 2 Channel 150CPR
Manufacturer:
Avago Technologies US Inc.
Datasheet:
Part Number:
Description:
Encoders 2 Channel 360CPR
Manufacturer:
Avago Technologies US Inc.
Datasheet:
Part Number:
Description:
Encoders 2 Channel 150CPR
Manufacturer:
Avago Technologies US Inc.
Datasheet:
Part Number:
Description:
Encoders 2 Channel 400CPR
Manufacturer:
Avago Technologies US Inc.
Datasheet: