E2CCR8A Omron, E2CCR8A Datasheet - Page 16
E2CCR8A
Manufacturer Part Number
E2CCR8A
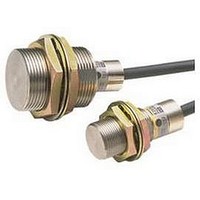
Description
Inductive Proximity Sensor
Manufacturer
Omron
Series
E2Cr
Datasheet
1.E2C-GE4A.pdf
(23 pages)
Specifications of E2CCR8A
Sensor Input
Inductive
Sensing Range
1.8mm
Switch Terminals
Cable
Sensing Face Diameter
3.5mm
Sensor Output
NPN, NO/NC
Peak Reflow Compatible (260 C)
No
Sensor Housing
Rectangular
Lead Free Status / RoHS Status
Contains lead / RoHS non-compliant


● Mounting
Mounting the Amplifier Unit
E2C-JC4A, E2C-JC4@H
Lengthwise Mounting
(1)Secure the Mounting Bracket with the enclosed M3 screws.
(2)Slide the protrusion on the Amplifier Unit into the holes on the
(3)Secure the Amplifier Unit with mounting screws.
(4)Secure the cover to the case.
Mounting to the Side
(1)Remove the cover screw and mounting screw.
(2)Attached the enclosed M3 screw to the cover and secure the cover
(3)Secure the Amplifier Unit with M3 screws from the side.
After completing adjustments, attach the
enclosed caution label over the adjustment
holes to prevent adjustment mistakes.
Mounting Bracket.
to the case.
Mounting
base
Mounting screw
Mounting
1
Mounting
Bracket
Cover screw
screw
M3
3
M3 screw
4
M3 screw
2
M3
1
Mounting base
M3 screws
3
2
E2C-WH4A
Mounting Method
(1)Mount to DIN Track as shown in the following diagram.
(2)Hook part (A) at the top of the Amplifier Unit on the DIN Track first
Removing the Amplifier Unit
(3)Pull down on the track stopper (C) with a flat-blade screwdriver and
and then press in on the Amplifier Unit in the direction indicated by
(B).
then remove the Amplifier Unit from the DIN Track. When using
DIN standard 35 track, keep other devices on the track separated
from the Amplifier Unit by at least 30 mm to facilitate mounting and
removal.
Track stopper
(white)
(C)
DIN Standard 35 Track
(PFP-100N or PFP-100N2)
30 mm min.
(B)
E2C/E2C-H
30 mm min.
(A)
16
Related parts for E2CCR8A
Image
Part Number
Description
Manufacturer
Datasheet
Request
R

Part Number:
Description:
G6S-2GLow Signal Relay
Manufacturer:
Omron Corporation
Datasheet:
Part Number:
Description:
Compact, Low-cost, SSR Switching 5 to 20 A
Manufacturer:
Omron Corporation
Datasheet:
Part Number:
Description:
Manufacturer:
Omron Corporation
Datasheet:
Part Number:
Description:
Manufacturer:
Omron Corporation
Datasheet:
Part Number:
Description:
Manufacturer:
Omron Corporation
Datasheet:
Part Number:
Description:
Manufacturer:
Omron Corporation
Datasheet:
Part Number:
Description:
Manufacturer:
Omron Corporation
Datasheet:
Part Number:
Description:
Manufacturer:
Omron Corporation
Datasheet: