EPAX0600 Red Lion Controls, EPAX0600 Datasheet
EPAX0600
Specifications of EPAX0600


Related parts for EPAX0600

EPAX0600 Summary of contents
Page 1
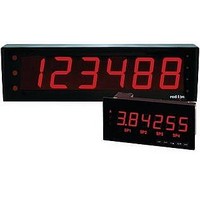
... Additional specifications, wiring, programming, and information for the individual MPAX models are contained in the corresponding standard PAX literature. This PAX literature is shipped with the ordered MPAX model. 1. DISPLAY: 4" (101 mm) Red LED 6-Digit (EPAX0600): (-99999 to 999999) 2. POWER REQUIREMENTS: AC MPAX Modules 250 VAC, 50/60 Hz EPAX Display 250 VAC, 50/60 Hz INPUT: Accepts digital input modules, see “ ...
Page 2
... EPAX0600 Real-Time Clock/Timer MPAXCK00 EPAX0600 Timer MPAXTM00 EPAX0600 OPTIONAL PLUG-IN CARDS AND ACCESSORIES WARNING: Disconnect all power to the unit before installing Plug-in cards. Adding Option Cards The PAX and MPAX series meters can be fitted with up to three optional plug- in cards. The details for each plug-in card can be reviewed in the specification section of the PAX Bulletin ...
Page 3
ASSEMBLING THE DISPLAY CAUTION: The MPAX main circuit board and the option cards contain static sensitive components. Before handling the module or the cards, discharge static charges from your body by touching a grounded bare metal object. Handle the ...
Page 4
INSTALLING THE DISPLAY EPAX DISPLAY INSTALLATION The EPAX display is intended to be mounted into a panel or enclosure. The display is provided with a gasket to provide a water-tight seal. The recommended minimum panel thickness for NEMA 4/IP65 ...
Page 5
WIRING AND PROGRAMMING THE DISPLAY Once assembled, the EPAX and MPAX have all the same functions and capabilities of our PAX Series Intelligent Panel Meters. Therefore, you will find the appropriate PAX information packed with the MPAX Module. Simply ...
Page 6
NEMA 4/IP65 LARGE DISPLAY ENCLOSURE & SHROUD FOR EPAX Picture includes the EPAX, Nema Enclosure, and Shroud DIMENSIONS In inches (mm Housing Only Overall Including Screwheads Figure 1 TYPICAL INSTALLATIONS FOR NEMA 4/IP65 ENCLOSURE Removing the rear panel ...
Page 7
ASSEMBLY AND INSTALLATION PROCEDURE 1. Install the two mounting channels on the enclosure housing using the four #8-32 screws provided and then insert the strut nuts (provided). Invert enclosure if base mounting the wiring routed ...
Page 8
... EPAX NEMA 4/IP65 Enclosure and Shroud TROUBLESHOOTING For technical assistance, contact technical support. LIMITED WARRANTY Red Lion Controls BV Printerweg 3821 AD Amersfoort Tel +31 (0) 334 723 225 Fax +31 (0) 334 893 793 PART NUMBERS EPAX0600 MPAXI000 MPAXC000 MPAXR000 MPAXCK00 MPAXTM00 PAXCDS10 PAXCDS20 PAXCDS30 PAXCDS40 ...