CY8CKIT-029 Cypress Semiconductor Corp, CY8CKIT-029 Datasheet - Page 9
CY8CKIT-029
Manufacturer Part Number
CY8CKIT-029
Description
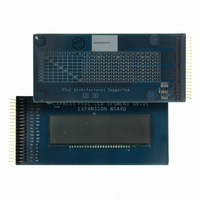
KIT DEV PSOC3 LCD SEGMENT EXPAN
Manufacturer
Cypress Semiconductor Corp
Series
PSOC™ 3r
Specifications of CY8CKIT-029
Main Purpose
Displays, LCD Display
Embedded
Yes, MCU, 32-Bit
Primary Attributes
128 addressable segments
Secondary Attributes
CD contains sample projects
Description/function
Evaluation Kit
Interface Type
USB
Backlighting
No Backlighting
Data Bus Width
8 bit, 16 bit, 32 bit
Maximum Operating Temperature
+ 50 C
Minimum Operating Temperature
0 C
Number Of Segments
7, 14
Operating Voltage
2.5 V to 5.5 V
Pixel Format
8 x 16
Product
Display Modules
Software
Software Included
Touch Panel
No Touch Panel
For Use With/related Products
PSoC 3
Lead Free Status / RoHS Status
Lead free / RoHS Compliant
Utilized Ic / Part
-
Lead Free Status / Rohs Status
Lead free / RoHS Compliant
Other names
428-2993


3.1
3.2
CY8CKIT-029 PSoC LCD Segment Drive Expansion Board Kit Guide, Doc. # 001-55415 Rev. *B
3.
Kit Operation
Introduction
The CY8CKIT-029 PSoC LCD Segment Drive EBK example projects are designed to provide
various examples of displays using a display with many segments (8 common lines by 16 segment
lines giving 128 addressable segments).
■
This project demonstrates the battery charge indicator along with the 14-segment display of the LCD
glass by implementing a battery meter.
■
This project implements a stopwatch using the RTC component in PSoC Creator. The hours,
minutes, and seconds (HH:MM:SS) are displayed on the 14-segment LCD display.
Refer to
Programming PSoC 3 Device
The example projects are provided in the documentation section of the kit CD. This section provides
details on programming the PSoC 3 device.
To program the ‘Battery Meter’ project to the PSoC 3 silicon, follow these steps:
1. Place the PSoC 3 processor module on the CY8CKIT-001 DVK.
2. Power the DVK using either battery connections or a wall power unit.
3. Connect the Miniprog3 JTAG cable to the JTAG connector, both on MiniProg3 and the PSoC 3
The connections for steps 1 to 3 are shown in
Example Project 1: LCD_Seg_Example1_Battery_Meter
Example Project 2: LCD_Seg_Example2_StopWatch
processor module. Connect the MiniProg3 to a host PC USB high speed port using a USB cable.
Example Projects on page 21
for more information.
Figure
3-1.
9
[+] Feedback
Related parts for CY8CKIT-029
Image
Part Number
Description
Manufacturer
Datasheet
Request
R

Part Number:
Description:
KIT DEV FOR PSOC3/5
Manufacturer:
Cypress Semiconductor Corp
Datasheet:

Part Number:
Description:
PSoC1/3/5 Development Kit
Manufacturer:
Cypress Semiconductor Corp
Datasheet:

Part Number:
Description:
KIT DEV PSOC PROC MODULE CY8C38
Manufacturer:
Cypress Semiconductor Corp

Part Number:
Description:
KIT DEV PSOC PROC MODULE CY8C29
Manufacturer:
Cypress Semiconductor Corp

Part Number:
Description:
KIT DEV PSOC ANALOG VOLTMETER
Manufacturer:
Cypress Semiconductor Corp
Datasheet:

Part Number:
Description:
KIT DEV PSOC5 FIRST TOUCH
Manufacturer:
Cypress Semiconductor Corp
Datasheet:

Part Number:
Description:
KIT DEV PSOC3 FIRSTTOUCH STARTER
Manufacturer:
Cypress Semiconductor Corp
Datasheet:
Part Number:
Description:
KIT DEV PROC MODULE PSOC5
Manufacturer:
Cypress Semiconductor Corp
Datasheet:

Part Number:
Description:
KIT PSOC CY8C28 FAMILY PROCESSOR
Manufacturer:
Cypress Semiconductor Corp
Datasheet:

Part Number:
Description:
KIT PSOC MINIPROG3 PROGRAM DEBUG
Manufacturer:
Cypress Semiconductor Corp
Datasheet:

Part Number:
Description:
KIT EVAL POWERLINE HIGH VOLT
Manufacturer:
Cypress Semiconductor Corp
Datasheet:

Part Number:
Description:
KIT PSOC FIRST TOUCH
Manufacturer:
Cypress Semiconductor Corp
Datasheet:

Part Number:
Description:
EVAL KIT WORLDTOUR2
Manufacturer:
Cypress Semiconductor Corp
Datasheet:

Part Number:
Description:
KIT UNIVERSAL CAPSENSE CTRLR
Manufacturer:
Cypress Semiconductor Corp
Datasheet:
