101-1272 Rabbit Semiconductor, 101-1272 Datasheet - Page 17
101-1272
Manufacturer Part Number
101-1272
Description
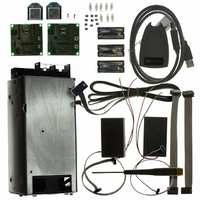
KIT MESH NETWORK ADD-ON RCM4510W
Manufacturer
Rabbit Semiconductor
Type
Microprocessorr
Datasheet
1.20-101-1207.pdf
(118 pages)
Specifications of 101-1272
Product
Modules
Data Bus Width
12 bit
Processor Type
Rabbit 4000
Sram
512 KB
Number Of I/os
20
Description/function
Computer Module
Interface Type
Ethernet
For Use With/related Products
RCM4510W
Lead Free Status / RoHS Status
Not applicable / Not applicable
Other names
316-1158


2.2.2 Step 2 — Attach Module to Prototyping Board
Turn the RCM4510W module so that the mounting holes line up with the corresponding
holes on the Prototyping Board with the programming header at the top right. Insert the
metal standoffs as shown in Figure 4, secure them from the bottom using the 4-40 screws
and washers, then insert the module’s header J1 on the bottom side into socket RCM1 on
the Prototyping Board.
Press the module’s pins gently into the Prototyping Board socket—press down in the area
above the header pins. For additional integrity, you may secure the RCM4510W to the
standoffs from the top using the remaining three 4-40 screws and washers.
User’s Manual
NOTE: If you are using the preview version of
NOTE: It is important that you line up the pins on header J1 of the module exactly with
the RCM4510W, do not connect the program-
ming cable to header J3 (shown below the
programming header at right). Header J3 is
used only by the factory.
socket RCM1 on the Prototyping Board. The header pins may become bent or damaged
if the pin alignment is offset, and the module will not work. Permanent electrical
damage to the module may also result if a misaligned module is powered up.
Figure 4. Install the Module on the Prototyping Board
11
Related parts for 101-1272
Image
Part Number
Description
Manufacturer
Datasheet
Request
R

Part Number:
Description:
COMPUTER SNGLBD BL2120 FRCTNLOCK
Manufacturer:
Rabbit Semiconductor
Datasheet:

Part Number:
Description:
KIT APPLCTN RABBITCORE RCM4010
Manufacturer:
Rabbit Semiconductor
Datasheet:

Part Number:
Description:
KIT DEV FOR BL2500 COYOTE
Manufacturer:
Rabbit Semiconductor
Datasheet:

Part Number:
Description:
KIT APPLICATION SIMPLE SENSOR
Manufacturer:
Rabbit Semiconductor
Datasheet:

Part Number:
Description:
KIT DEV RCM5400W US/INTERNATIONL
Manufacturer:
Rabbit Semiconductor
Datasheet:

Part Number:
Description:
DEV KIT DELUXE MINICORE RCM5600W
Manufacturer:
Rabbit Semiconductor
Datasheet:


Part Number:
Description:
KIT FOR BL4S100 STARTER PACKAGE
Manufacturer:
Rabbit Semiconductor
Datasheet:

Part Number:
Description:
DEV KIT STANDARD MINI RCM5600W
Manufacturer:
Rabbit Semiconductor
Datasheet:

Part Number:
Description:
MODULE RABBITCORE RCM3720
Manufacturer:
Rabbit Semiconductor
Datasheet:
Part Number:
Description:
MODULE RABBITCORE RCM3220
Manufacturer:
Rabbit Semiconductor
Datasheet:
Part Number:
Description:
MODULE RABBITCORE RCM3210
Manufacturer:
Rabbit Semiconductor
Datasheet:
Part Number:
Description:
COMPUTER SGL-BOARD OP6600 W/SRAM
Manufacturer:
Rabbit Semiconductor
Datasheet:
Part Number:
Description:
COMPUTER SGL-BD BL2000 SRAM/FLSH
Manufacturer:
Rabbit Semiconductor