101-1272 Rabbit Semiconductor, 101-1272 Datasheet - Page 70
101-1272
Manufacturer Part Number
101-1272
Description
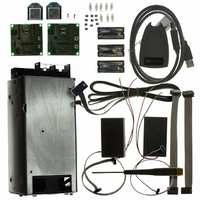
KIT MESH NETWORK ADD-ON RCM4510W
Manufacturer
Rabbit Semiconductor
Type
Microprocessorr
Datasheet
1.20-101-1207.pdf
(118 pages)
Specifications of 101-1272
Product
Modules
Data Bus Width
12 bit
Processor Type
Rabbit 4000
Sram
512 KB
Number Of I/os
20
Description/function
Computer Module
Interface Type
Ethernet
For Use With/related Products
RCM4510W
Lead Free Status / RoHS Status
Not applicable / Not applicable
Other names
316-1158


•
•
64
SLEEPMODE2.C
in the “sleep” mode where most power is removed from the RCM4510W module.
Power is restored once a message is received or after a specified time interval. This
sample program demonstrates waking after a specified time interval.
Sleeping only works on end devices, so the
ENDDEV
sor off and on, a serial terminal emulator is required once the program has been compiled.
Once the XBee RF module on the RCM4510W completes its initialization (it joins the
network), you will be prompted to enter three values that control the XBee RF module's
sleep mode — enter the values followed by the
entered these values via the serial terminal emulator, press any key to initiate the sleep
mode. There will be a delay of a few seconds before the RCM4510W module powers
off. When the RCM4510W module powers back up, it will begin running this program
again from the beginning.
XBEE_GPIO_SERVER.C
and clusters. It is meant to be run with the Windows GUI client (installed in Dynamic C’s
Utilities
sample program (
RabbitCore module or on a single-board computer with a separate XBee RF module.
Compile and run this sample program with the RCM4510W RabbitCore module installed
on the Prototyping Board. Run the Windows GUI client (
Dynamic C
ent to connect to the Digi USB XBee coordinator and scan for devices. Make sure the
RCM4510W and the Digi USB XBee coordinator are configured with the same PAN
ID or extended PAN ID.
If you run the
RF module, set the PAN IDs to match between the client and the server sample programs.
Now select the GPIO server and use the GUI interface on the PC, or the command-line
client on another XBee-equipped board to view the server's inputs and change its outputs.
For example, you can toggle the LEDs on the Prototyping Board on/off.
1. Compile and run the sample program on the RCM4510W module.
2. Once the sample program is running, choose “Close Connection” from the in Dynamic C
3. Connect the
4. Open the serial port in your serial terminal emulator such as TeraTerm or Hyperterminal to connect to
5. Plug the AC adapter back in to apply power to the Prototyping Board once again.
menu, and unplug the AC adapter supply power to the Prototyping Board.
RCM4510 programming header.
the serial port at 57600 baud.
NOTE: This sample program does not demonstrate the saving state. State information
may be saved in battery-backed RAM before the RCM4510W module is placed in the
sleep mode.
in this sample program. Because the XBee RF module turns the Rabbit proces-
Utilities\XBee GPIO GUI
directory) and a Digi USB XBee coordinator or with the GPIO client
XBEE_GPIO_CLIENT.C
DIAG
—This sample program shows how to place the RCM4510W module
SAMPLES/XBEE/XBEE_GPIO_CLIENT.C
connector instead of the
—This sample program shows how to set up and use endpoints
sample program on another board with an XBee
PROG
XBEE_ROLE
folder) on your PC. Configure the GUI cli-
Enter
connector on the programming cable to the
key each time. Once you have
XBEE_GPIO_GUI.exe
macro is set to
) running on an RCM4510W
RabbitCore RCM4500W
NODE_TYPE_
Run
in the
Related parts for 101-1272
Image
Part Number
Description
Manufacturer
Datasheet
Request
R

Part Number:
Description:
COMPUTER SNGLBD BL2120 FRCTNLOCK
Manufacturer:
Rabbit Semiconductor
Datasheet:

Part Number:
Description:
KIT APPLCTN RABBITCORE RCM4010
Manufacturer:
Rabbit Semiconductor
Datasheet:

Part Number:
Description:
KIT DEV FOR BL2500 COYOTE
Manufacturer:
Rabbit Semiconductor
Datasheet:

Part Number:
Description:
KIT APPLICATION SIMPLE SENSOR
Manufacturer:
Rabbit Semiconductor
Datasheet:

Part Number:
Description:
KIT DEV RCM5400W US/INTERNATIONL
Manufacturer:
Rabbit Semiconductor
Datasheet:

Part Number:
Description:
DEV KIT DELUXE MINICORE RCM5600W
Manufacturer:
Rabbit Semiconductor
Datasheet:


Part Number:
Description:
KIT FOR BL4S100 STARTER PACKAGE
Manufacturer:
Rabbit Semiconductor
Datasheet:

Part Number:
Description:
DEV KIT STANDARD MINI RCM5600W
Manufacturer:
Rabbit Semiconductor
Datasheet:

Part Number:
Description:
MODULE RABBITCORE RCM3720
Manufacturer:
Rabbit Semiconductor
Datasheet:
Part Number:
Description:
MODULE RABBITCORE RCM3220
Manufacturer:
Rabbit Semiconductor
Datasheet:
Part Number:
Description:
MODULE RABBITCORE RCM3210
Manufacturer:
Rabbit Semiconductor
Datasheet:
Part Number:
Description:
COMPUTER SGL-BOARD OP6600 W/SRAM
Manufacturer:
Rabbit Semiconductor
Datasheet:
Part Number:
Description:
COMPUTER SGL-BD BL2000 SRAM/FLSH
Manufacturer:
Rabbit Semiconductor