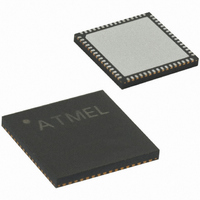
ATMEGA128RZAV-8MU Atmel, ATMEGA128RZAV-8MU Datasheet - Page 365

ATMEGA128RZAV-8MU
Manufacturer Part Number
ATMEGA128RZAV-8MU
Description
MCU ATMEGA1281/AT86RF230 64-QFN
Manufacturer
Atmel
Series
ATMEGAr
Datasheets
1.ATMEGA640V-8CU.pdf
(38 pages)
2.ATMEGA640V-8CU.pdf
(444 pages)
3.AT86RF230-ZU.pdf
(98 pages)
Specifications of ATMEGA128RZAV-8MU
Frequency
2.4GHz
Data Rate - Maximum
2Mbps
Modulation Or Protocol
802.15.4 Zigbee
Applications
General Purpose
Power - Output
3dBm
Sensitivity
-101dBm
Voltage - Supply
1.8 V ~ 3.6 V
Data Interface
PCB, Surface Mount
Memory Size
128kB Flash, 4kB EEPROM, 8kB RAM
Antenna Connector
PCB, Surface Mount
Package / Case
64-QFN
For Use With
ATAVRISP2 - PROGRAMMER AVR IN SYSTEMATJTAGICE2 - AVR ON-CHIP D-BUG SYSTEMATSTK501 - ADAPTER KIT FOR 64PIN AVR MCUATSTK500 - PROGRAMMER AVR STARTER KIT
Lead Free Status / RoHS Status
Lead free / RoHS Compliant
Operating Temperature
-
Current - Transmitting
-
Current - Receiving
-
Lead Free Status / Rohs Status
Lead free / RoHS Compliant
- Current page: 365 of 444
- Download datasheet (10Mb)
29.9.18
29.9.19
29.9.20
2549M–AVR–09/10
Programming the EEPROM
Reading the EEPROM
Programming the Fuses
A more efficient data transfer can be achieved using the PROG_PAGEREAD instruction:
1. Enter JTAG instruction PROG_COMMANDS.
2. Enable Flash read using programming instruction 3a.
3. Load the page address using programming instructions 3b, 3c and 3d. PCWORD (refer
4. Enter JTAG instruction PROG_PAGEREAD.
5. Read the entire page (or Flash) by shifting out all instruction words in the page (or Flash),
6. Enter JTAG instruction PROG_COMMANDS.
7. Repeat steps 3 to 6 until all data have been read.
Before programming the EEPROM a Chip Erase must be performed, see “Performing Chip
Erase” on page 364.
1. Enter JTAG instruction PROG_COMMANDS.
2. Enable EEPROM write using programming instruction 4a.
3. Load address High byte using programming instruction 4b.
4. Load address Low byte using programming instruction 4c.
5. Load data using programming instructions 4d and 4e.
6. Repeat steps 4 and 5 for all data bytes in the page.
7. Write the data using programming instruction 4f.
8. Poll for EEPROM write complete using programming instruction 4g, or wait for t
9. Repeat steps 3 to 8 until all data have been programmed.
Note that the PROG_PAGELOAD instruction can not be used when programming the EEPROM.
1. Enter JTAG instruction PROG_COMMANDS.
2. Enable EEPROM read using programming instruction 5a.
3. Load address using programming instructions 5b and 5c.
4. Read data using programming instruction 5d.
5. Repeat steps 3 and 4 until all data have been read.
Note that the PROG_PAGEREAD instruction can not be used when reading the EEPROM.
1. Enter JTAG instruction PROG_COMMANDS.
2. Enable Fuse write using programming instruction 6a.
3. Load data high byte using programming instructions 6b. A bit value of “0” will program the
4. Write Fuse High byte using programming instruction 6c.
to
starting with the LSB of the first instruction in the page (Flash) and ending with the MSB
of the last instruction in the page (Flash). The Capture-DR state both captures the data
from the Flash, and also auto-increments the program counter after each word is read.
Note that Capture-DR comes before the shift-DR state. Hence, the first byte which is
shifted out contains valid data.
(refer to
corresponding fuse, a “1” will unprogram the fuse.
Table 29-7 on page
Table 29-14 on page
338) is used to address within one page and must be written as 0.
ATmega640/1280/1281/2560/2561
348).
WLRH
365
Related parts for ATMEGA128RZAV-8MU
Image
Part Number
Description
Manufacturer
Datasheet
Request
R

Part Number:
Description:
Manufacturer:
ATMEL Corporation
Datasheet:

Part Number:
Description:
Microcontroller with 128K bytes In-system programmable flash, 8 MHz, power supply =2.7 - 5.5V
Manufacturer:
ATMEL Corporation
Datasheet:

Part Number:
Description:
IC AVR MCU 128K 16MHZ 5V 64TQFP
Manufacturer:
Atmel
Datasheet:

Part Number:
Description:
IC AVR MCU 128K 16MHZ 5V 64-QFN
Manufacturer:
Atmel
Datasheet:

Part Number:
Description:
IC AVR MCU 128K 16MHZ COM 64-QFN
Manufacturer:
Atmel
Datasheet:

Part Number:
Description:
IC AVR MCU 128K 16MHZ 64-TQFP
Manufacturer:
Atmel
Datasheet:

Part Number:
Description:
IC AVR MCU 128K 16MHZ 64-TQFP
Manufacturer:
Atmel
Datasheet:

Part Number:
Description:
IC AVR MCU 128K 16MHZ IND 64-QFN
Manufacturer:
Atmel
Datasheet:

Part Number:
Description:
MCU AVR 128KB FLASH 16MHZ 64TQFP
Manufacturer:
Atmel
Datasheet:

Part Number:
Description:
MCU AVR 128KB FLASH 16MHZ 64QFN
Manufacturer:
Atmel
Datasheet:

Part Number:
Description:
MCU AVR 128KB FLASH 16MHZ 64TQFP
Manufacturer:
Atmel
Datasheet:


