TWR-SER2 Freescale Semiconductor, TWR-SER2 Datasheet - Page 7
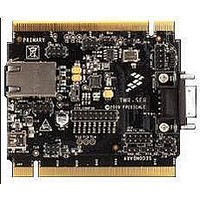
TWR-SER2
Manufacturer Part Number
TWR-SER2
Description
MCU, MPU & DSP Development Tools SERIAL2 TOWER MODULE
Manufacturer
Freescale Semiconductor
Specifications of TWR-SER2
Processor To Be Evaluated
MCF5441X
Data Bus Width
8 bit, 16 bit, 32 bit
Interface Type
CAN, RS-232, USB
Lead Free Status / RoHS Status
Lead free / RoHS Compliant


Serial Settings
Refer to these settings to configure the
multiple serial connections.
• Serial-to-USB—The TWR-SER2
• RS232 DB9—The TWR-SER2 will be
• RS485 DB9—The TWR-SER2 will be
Quick Start Guide for TWR-SER2
will be connected to a host PC using
J5 (mini B). Use driver included on
DVD to install the virtual COM port on
the host PC.
connected to a host PC using the
onboard DB9 connector.
connected to a host PC using the
onboard DB9 connector.
J7 pins 1-2, 3-4 should be shunted
J1 pins 2-3 should be shunted
J2 pins 2-3 should be shunted
J13 pins 1-2 should be shunted
J1 pins 1-2 should be shunted
J2 pins 1-2 should be shunted
J13 pins 2-3 should be shunted
Loopback settings can be
configured using J11
• RS232 Headers—The TWR-SER2
CAN Settings
Refer to these settings to enable the
connection to the CAN Transceiver.
The TWR-SER2 will be connected to
a CAN device using J3. Refer to the
TWR-SER2 User Manual for header
pinout details.
• J4 pins 3-4, 5-6 should be connected
• J4 pins 1-2 can be connected to
will be connected a host PC using
the required adapter cable(s)
connected to J19 and/or J20.
enable control of “Silent Mode”
J22 pins 1-2, 3-4 should be
J22 pins 5-6, 7-8 should be
J23 pins 1-2, 3-4 should be
J23 pins 5-6, 7-8 should be
shunted to UART2 (J19)
shunted if using RTS/CTS flow
control on UART2 (J19)
shunted to UART3 (J20)
shunted if using RTS/CTS flow
control on UART3 (J20)
TOWER SYSTEM
Related parts for TWR-SER2
Image
Part Number
Description
Manufacturer
Datasheet
Request
R

Part Number:
Description:
TOWER SYSTEM BOARD MPC5125
Manufacturer:
Freescale Semiconductor
Datasheet:

Part Number:
Description:
TOWER SYSTEM KIT MPC5125
Manufacturer:
Freescale Semiconductor
Datasheet:

Part Number:
Description:
TOWER SYSTEM BOARD K40X256
Manufacturer:
Freescale Semiconductor
Datasheet:

Part Number:
Description:
TOWER SYSTEM KIT MC56F8257
Manufacturer:
Freescale Semiconductor
Datasheet:

Part Number:
Description:
TOWER SYSTEM KIT K40X256
Manufacturer:
Freescale Semiconductor
Datasheet:

Part Number:
Description:
MCU, MPU & DSP Development Tools IAR KickStart Kit for Kinetis K60
Manufacturer:
Freescale Semiconductor
Datasheet:

Part Number:
Description:
TOWER SYSTEM S08LL64
Manufacturer:
Freescale Semiconductor
Datasheet:

Part Number:
Description:
KIT TOWER SYSTEM S08LH64
Manufacturer:
Freescale Semiconductor
Datasheet:

Part Number:
Description:
MCU, MPU & DSP Development Tools TOWER CD MCF51AG128 KIT
Manufacturer:
Freescale Semiconductor
Part Number:
Description:
TOWER SYSTEM S08LL64
Manufacturer:
Freescale Semiconductor
Datasheet:

Part Number:
Description:
KIT TOWER BOARD/SERIAL/ELEVATOR
Manufacturer:
Freescale Semiconductor
Datasheet:

Part Number:
Description:
KIT TOWER BOARD MCF5225X
Manufacturer:
Freescale Semiconductor
Datasheet:

Part Number:
Description:
TOWER SYSTEM S08LH64
Manufacturer:
Freescale Semiconductor
Datasheet:

Part Number:
Description:
KIT TOWER BRD/SER/ELEV MCF5225X
Manufacturer:
Freescale Semiconductor
Datasheet:

Part Number:
Description:
KIT TOWER BOARD
Manufacturer:
Freescale Semiconductor
Datasheet: